

If at any point your screen does not look like the picture, stop and email support@lexbrief.au – we would rather help than have you guess.
What you will do in this guide. The whole thing takes about fifteen minutes. By the end you will have:
- Signed in.
- Filled in your own details (so they appear on your invoices).
- Created your first matter (a "matter" is one brief or file).
- Set the hourly rate you charge on it.
- Recorded some time you worked.
- Turned that time into an invoice and sent it.
- Marked the invoice as paid when the money arrives.
Before you start
Have these ready:
- Your LexBrief link and password. We emailed you a welcome message with your own personal link, and a button in the same email to set your password. Keep that email handy – the link is how you reach LexBrief. Lost it? See If you have lost your link below.
- About fifteen minutes. You can stop at any point and come back – nothing is lost.
A note on wording used throughout: the dark strip of links down the left-hand side of the screen is called the menu. When we say "click Matters in the left-hand menu", we mean click the word Matters in that dark strip.
Step 1 – Sign in
Open your web browser and go to the link we emailed you. Type your email and password and click Sign in.
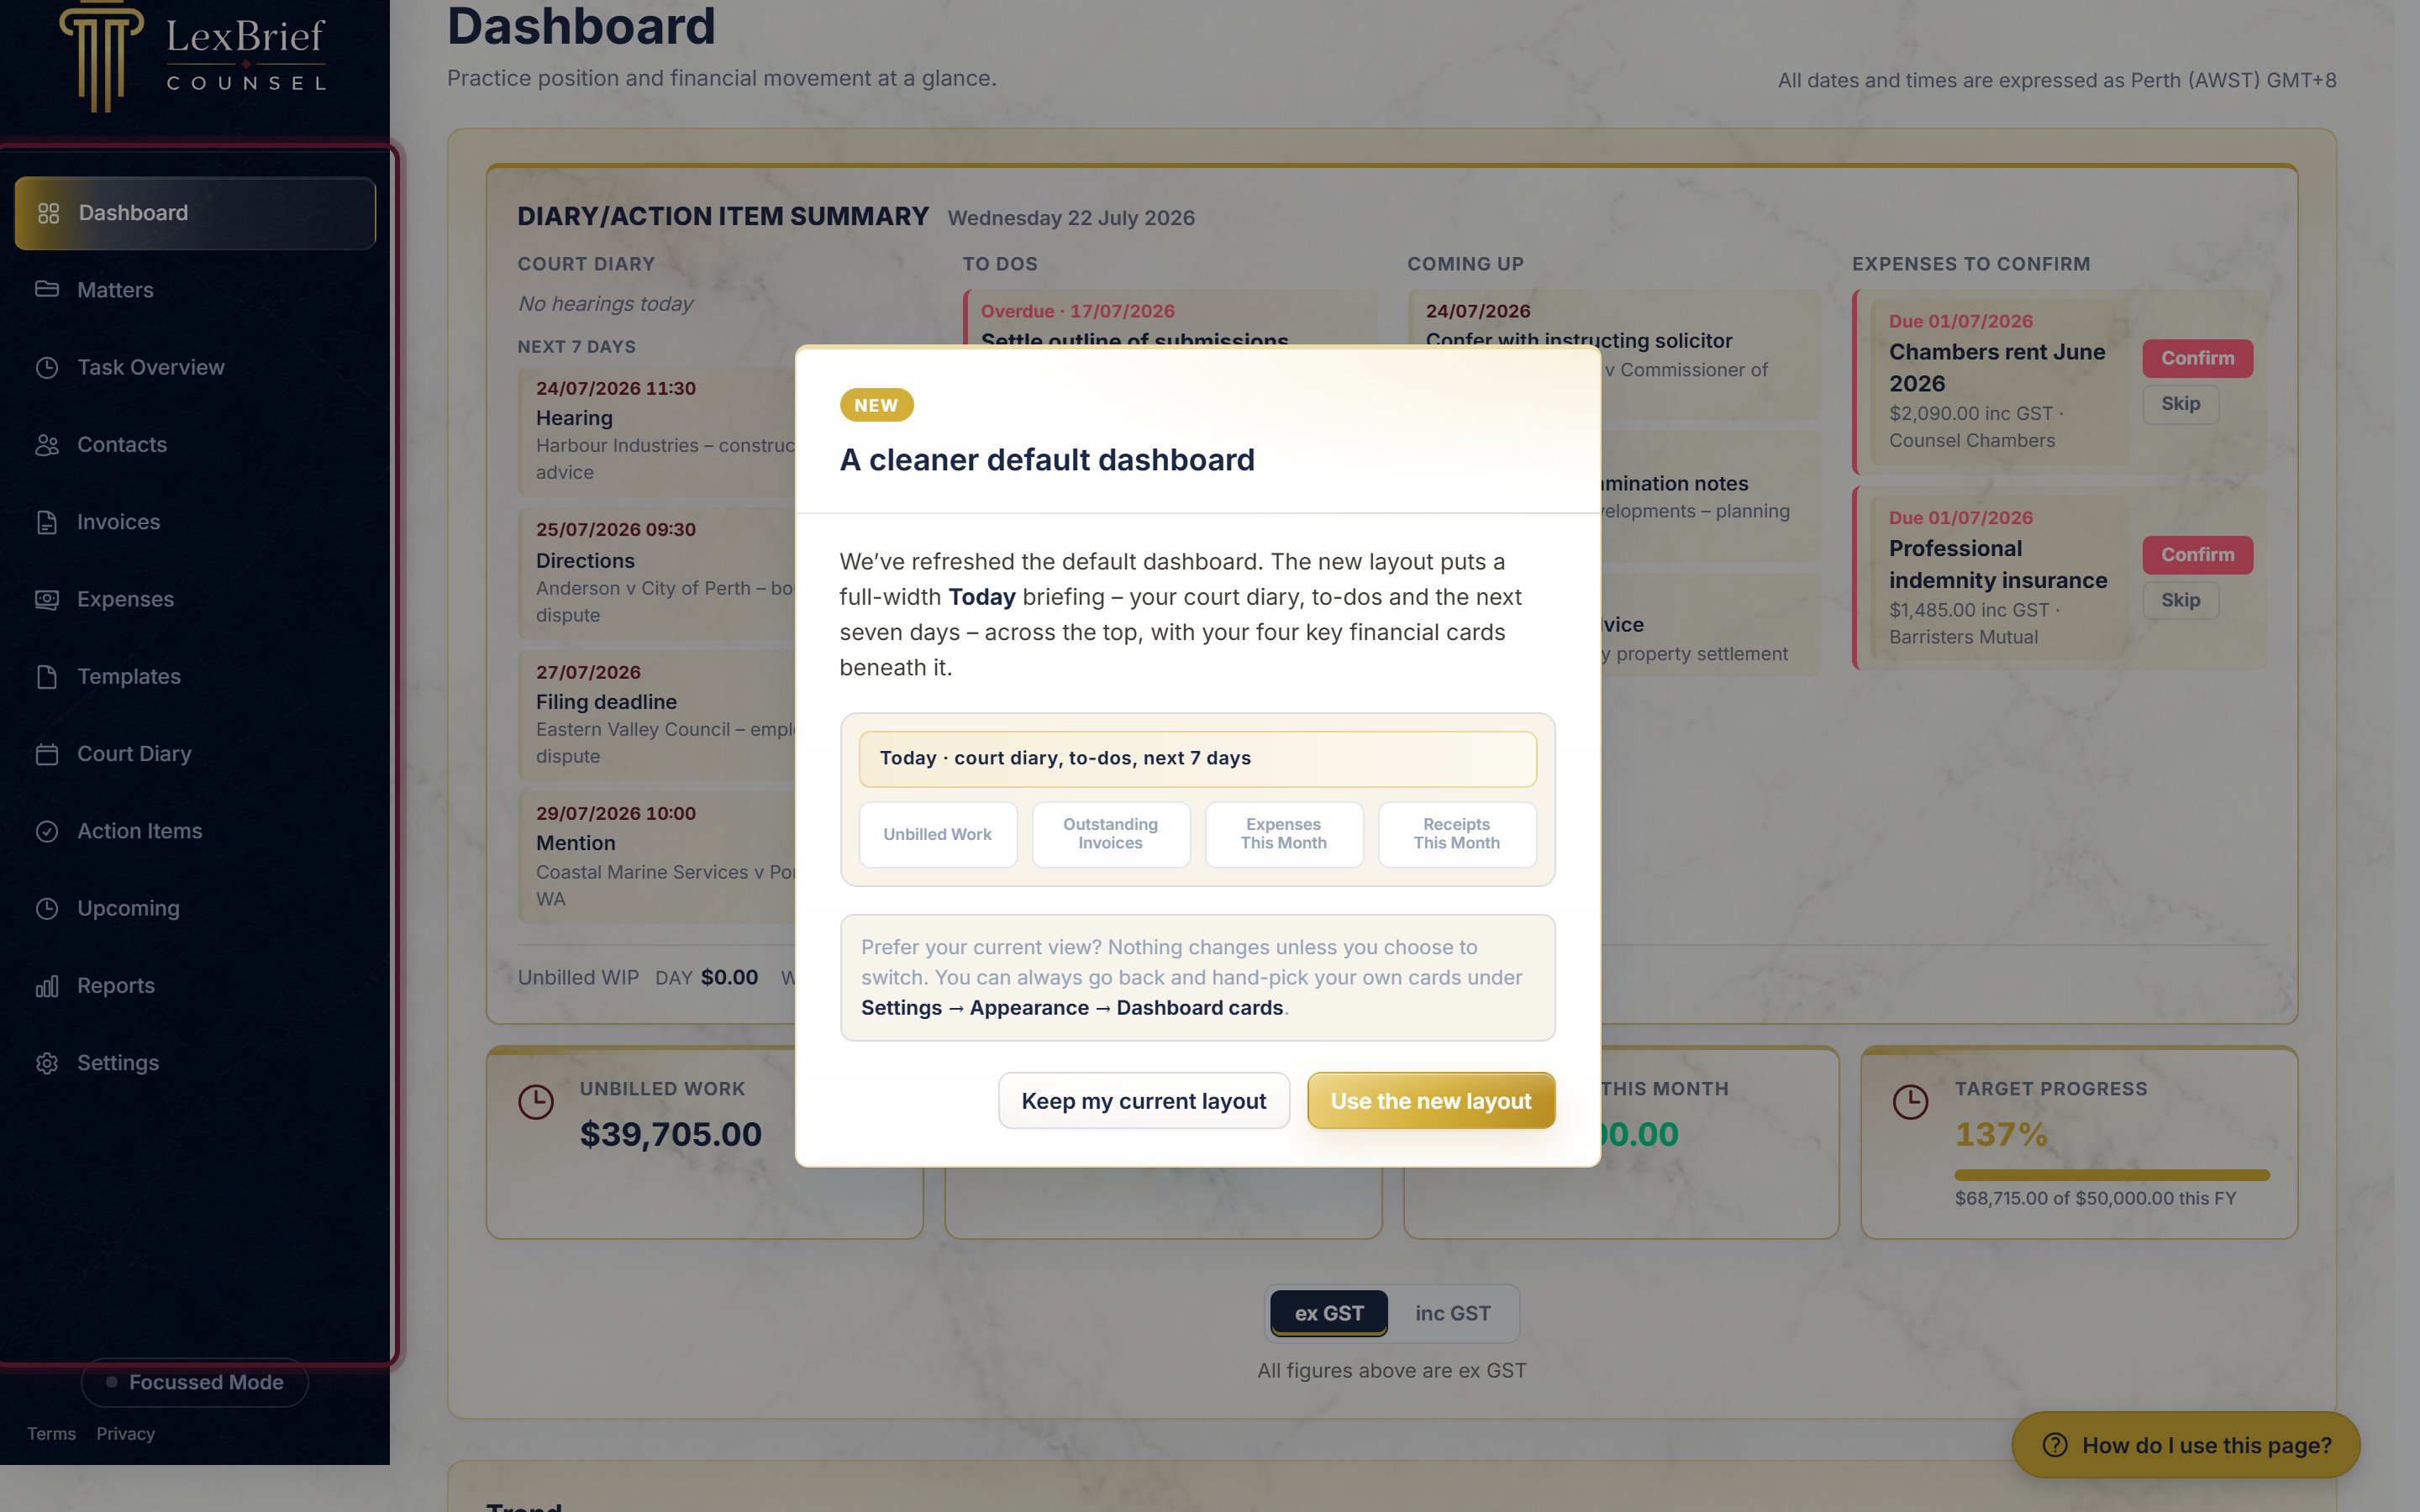
What you should see. Your home screen (called the Dashboard). It shows a few summary cards and a chart. The dark strip of links down the left is your menu – that is how you move around LexBrief.
If you have lost your link
Your own workspace address is the quickest way in, and we recommend you save it. If you cannot find the welcome email, there is a sign-in portal that will remind you.
Ask the portal to email you your address
- Go to counsel.lexbrief.au in your browser.
- Type your email address into the box labelled Email address. Use the address your trial is registered under.
- Click Continue.
What you should see. A short message on the page: "If your email address is registered with LexBrief Counsel, we've emailed you the address of your workspace. Please check your inbox." The portal does not take you through to LexBrief itself.
If your address is registered, an email arrives shortly afterwards from LexBrief Counsel, with the subject Your LexBrief Counsel workspace. It contains your workspace address. Open that address and sign in with your email and password as usual.
Why the page says the same thing either way. You see that identical message whether or not the address is registered. That is deliberate. If the page went straight through only for a registered address, anyone could type addresses into it and work out who holds a LexBrief account. Sending the answer by email instead keeps that private.
Save yourself the trip: bookmark your workspace
Once you have your workspace address, bookmark it in your browser. Going straight to it is faster, and skips the portal altogether. Better still, follow Add LexBrief to your taskbar below – with the LexBrief icon sitting on your taskbar you open your workspace with one click, and you will almost never need the portal again.
Add LexBrief to your taskbar (recommended)
LexBrief runs in your web browser, but you can add it to your Windows taskbar (or the dock on a Mac) so it opens with a single click and fills the whole screen like an ordinary program – no address bar, and no other tabs in the way. It takes about a minute, and you only do it once. You do not have to do this to use LexBrief, but most people find it much nicer day to day.
If you use Microsoft Edge
Edge is the blue-and-green swirl icon. With LexBrief open and signed in:
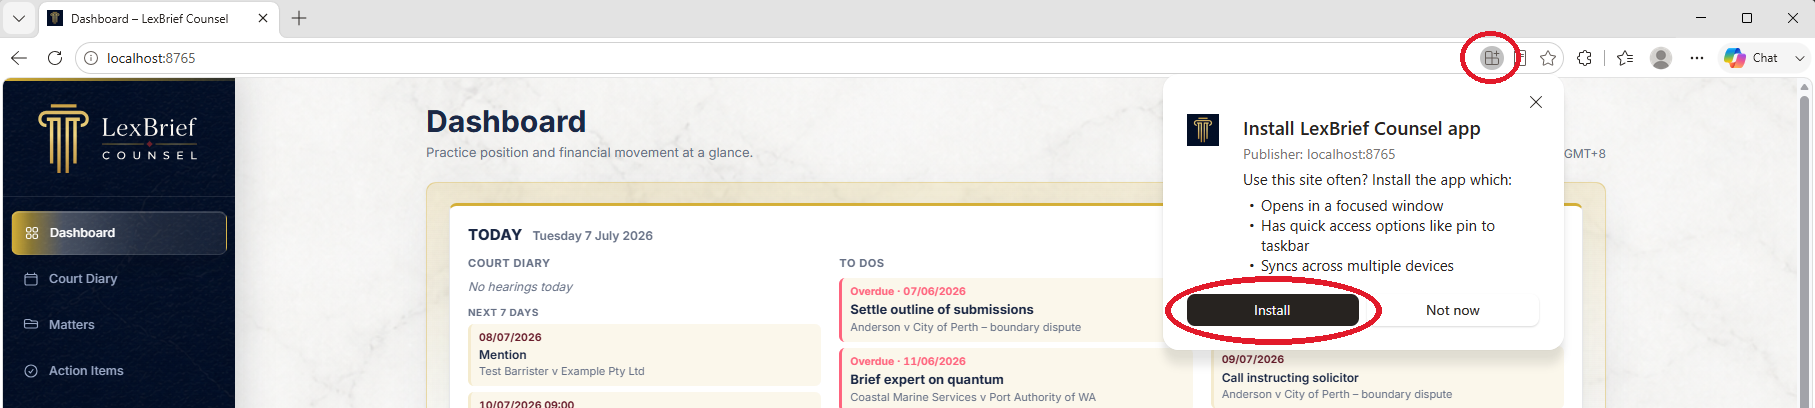
- Look at the right-hand end of the address bar (the long box at the top where the web address sits) for a small install icon. Click it. Edge shows an Install LexBrief Counsel app box – click the black Install button in it.
- Edge confirms App installed and asks what to allow. Make sure Pin to taskbar is ticked (turn on Pin to Start too if you like), then click Allow.
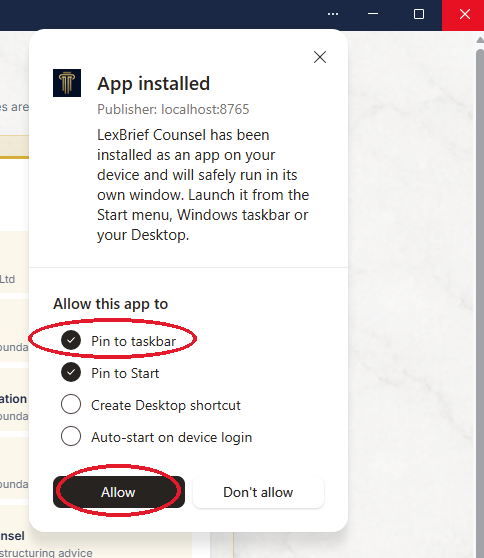
That is it – the LexBrief icon is now on your taskbar.
If you use Google Chrome
Chrome is the red, yellow, green and blue circle icon. With LexBrief open and signed in:
- Look at the right-hand end of the address bar for a small Install button (a little screen with a downward arrow, with the word "Install"). Click it.

- A small Install app box appears. Click Install.
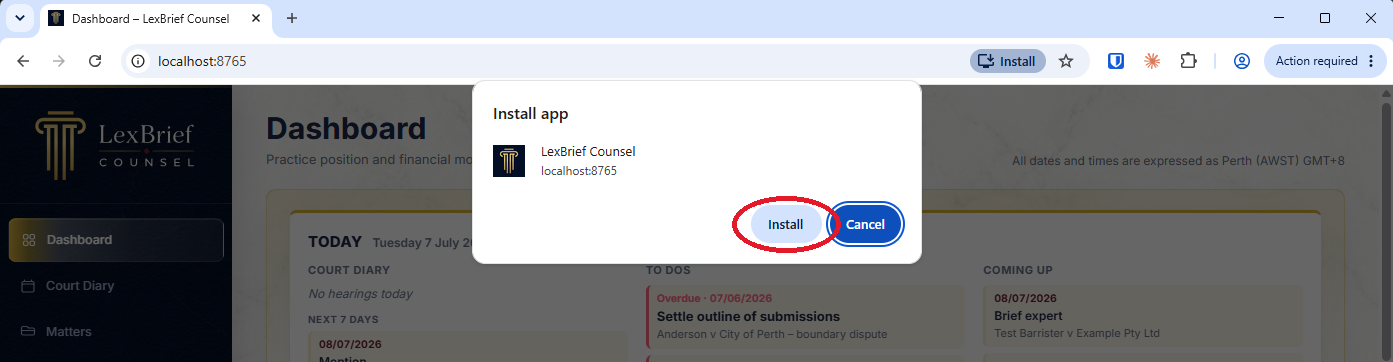
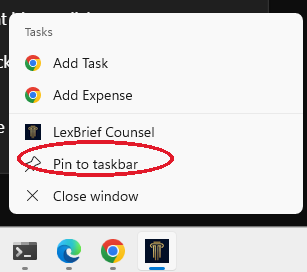
- Chrome opens LexBrief in its own window. Unlike Edge, Chrome does not pin it for you – so right-click the LexBrief icon that has appeared on your taskbar and choose Pin to taskbar so it stays there for good.
From now on
What you should see: a LexBrief icon now sits on your taskbar. Click it any time to open LexBrief in its own clean window. If it ever asks you to sign in again, enter your email and password as usual.
With that done, let's set up your profile.
Step 2 – Set up your profile
Your profile is your own name, address and ABN. LexBrief prints these at the top of every invoice and costs agreement, so it is worth doing first.
2.1 Open Settings
Click Settings at the bottom of the left-hand menu.
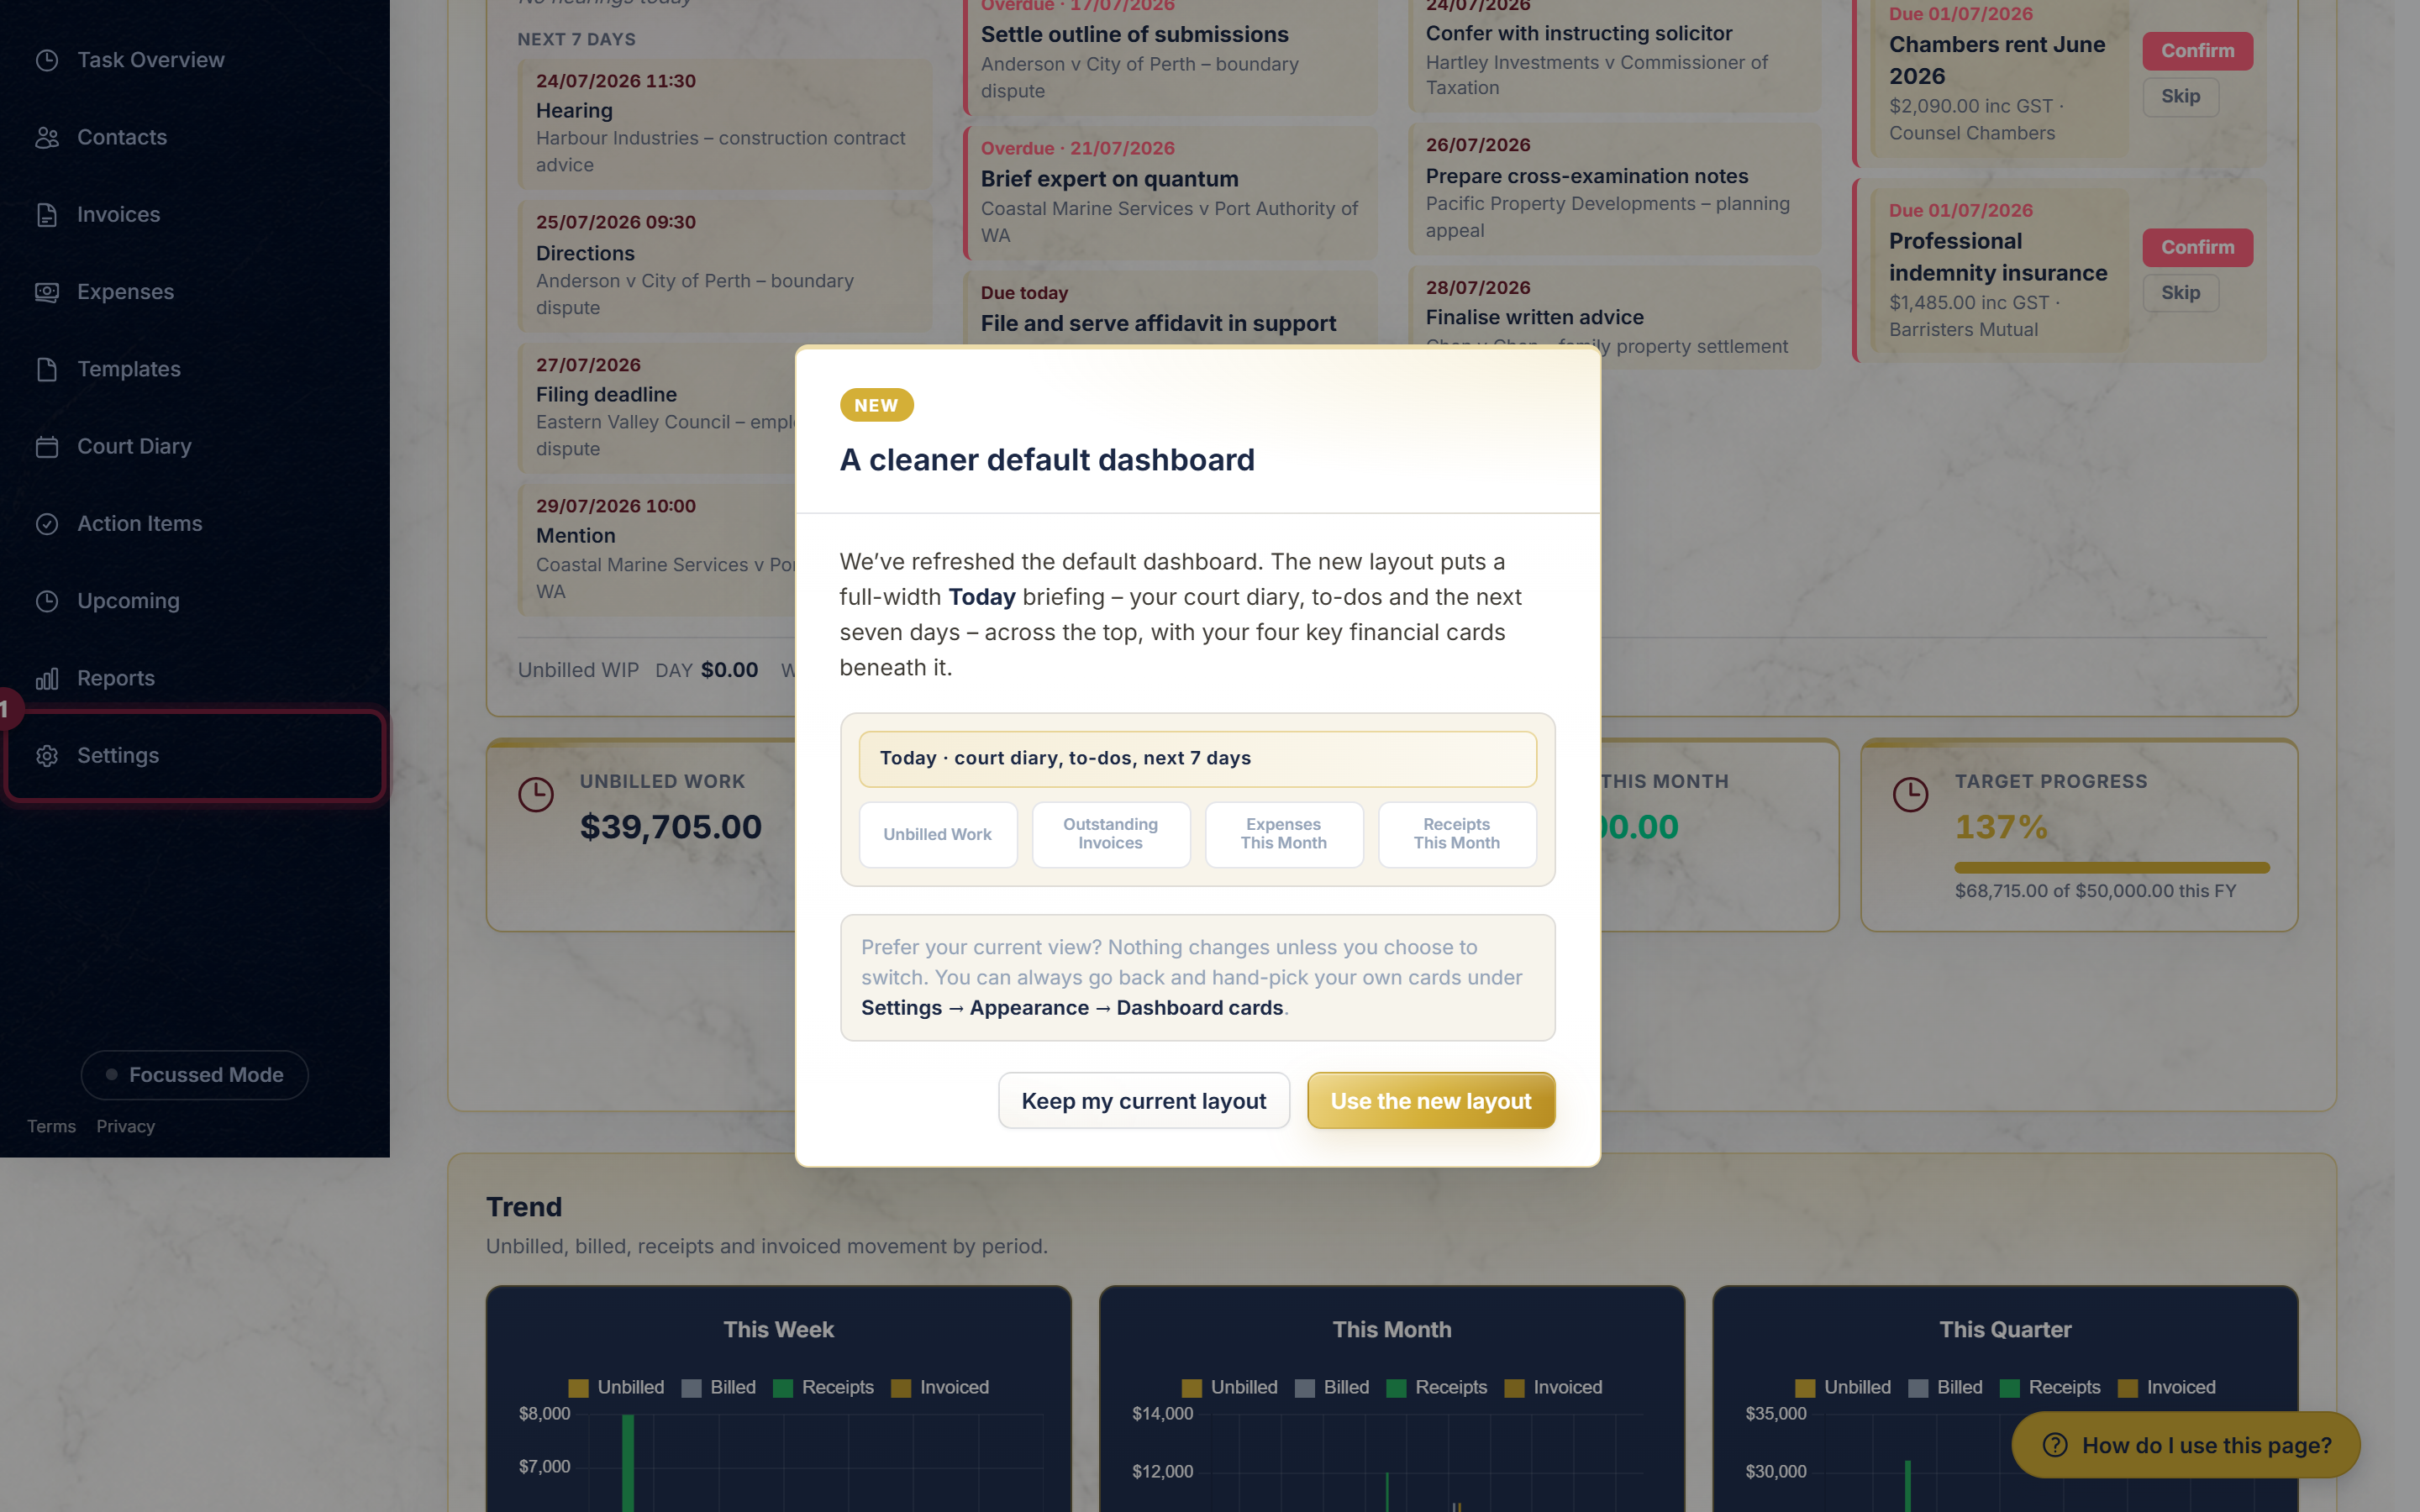
What you should see. The Settings page opens on the Profile section, with boxes for your title, name and so on.
2.2 Fill in your name and details
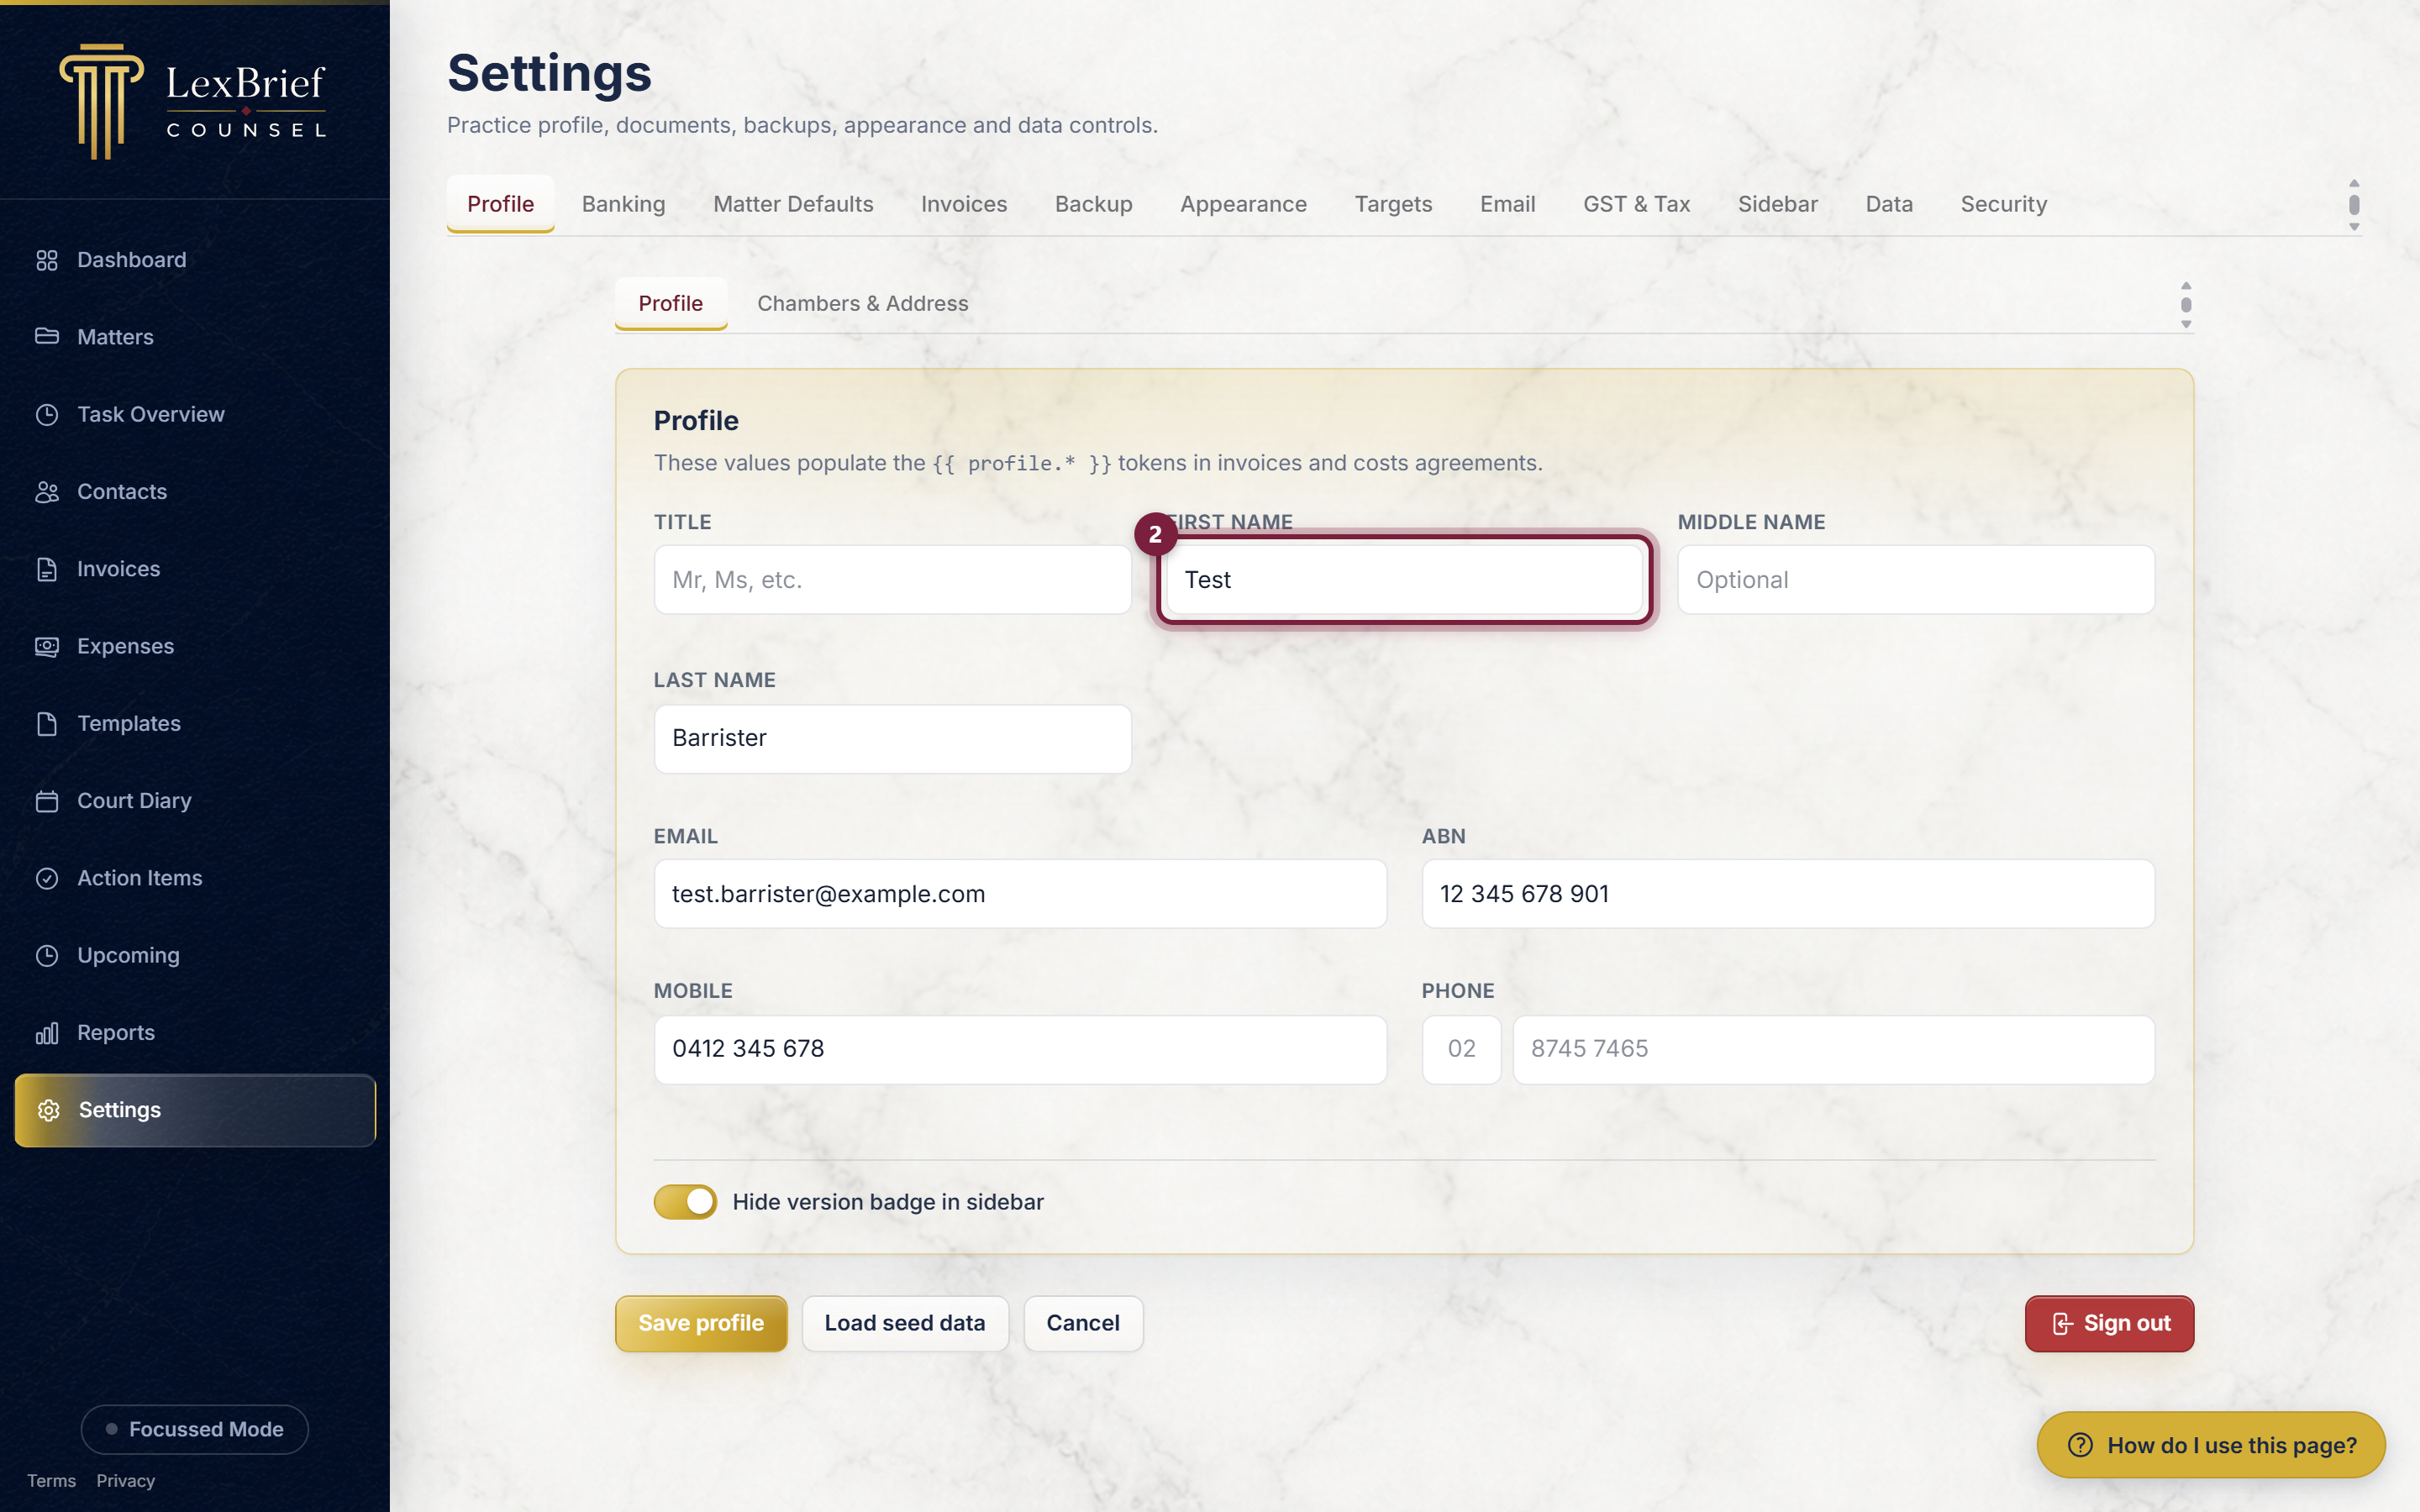
Type your details into the boxes. At a minimum, fill in your First name and Last name. If you have them handy, also add your Email, ABN, and your chambers address further down – but you can always come back and add those later.
2.3 Save
Scroll to the bottom and click the Save profile button.
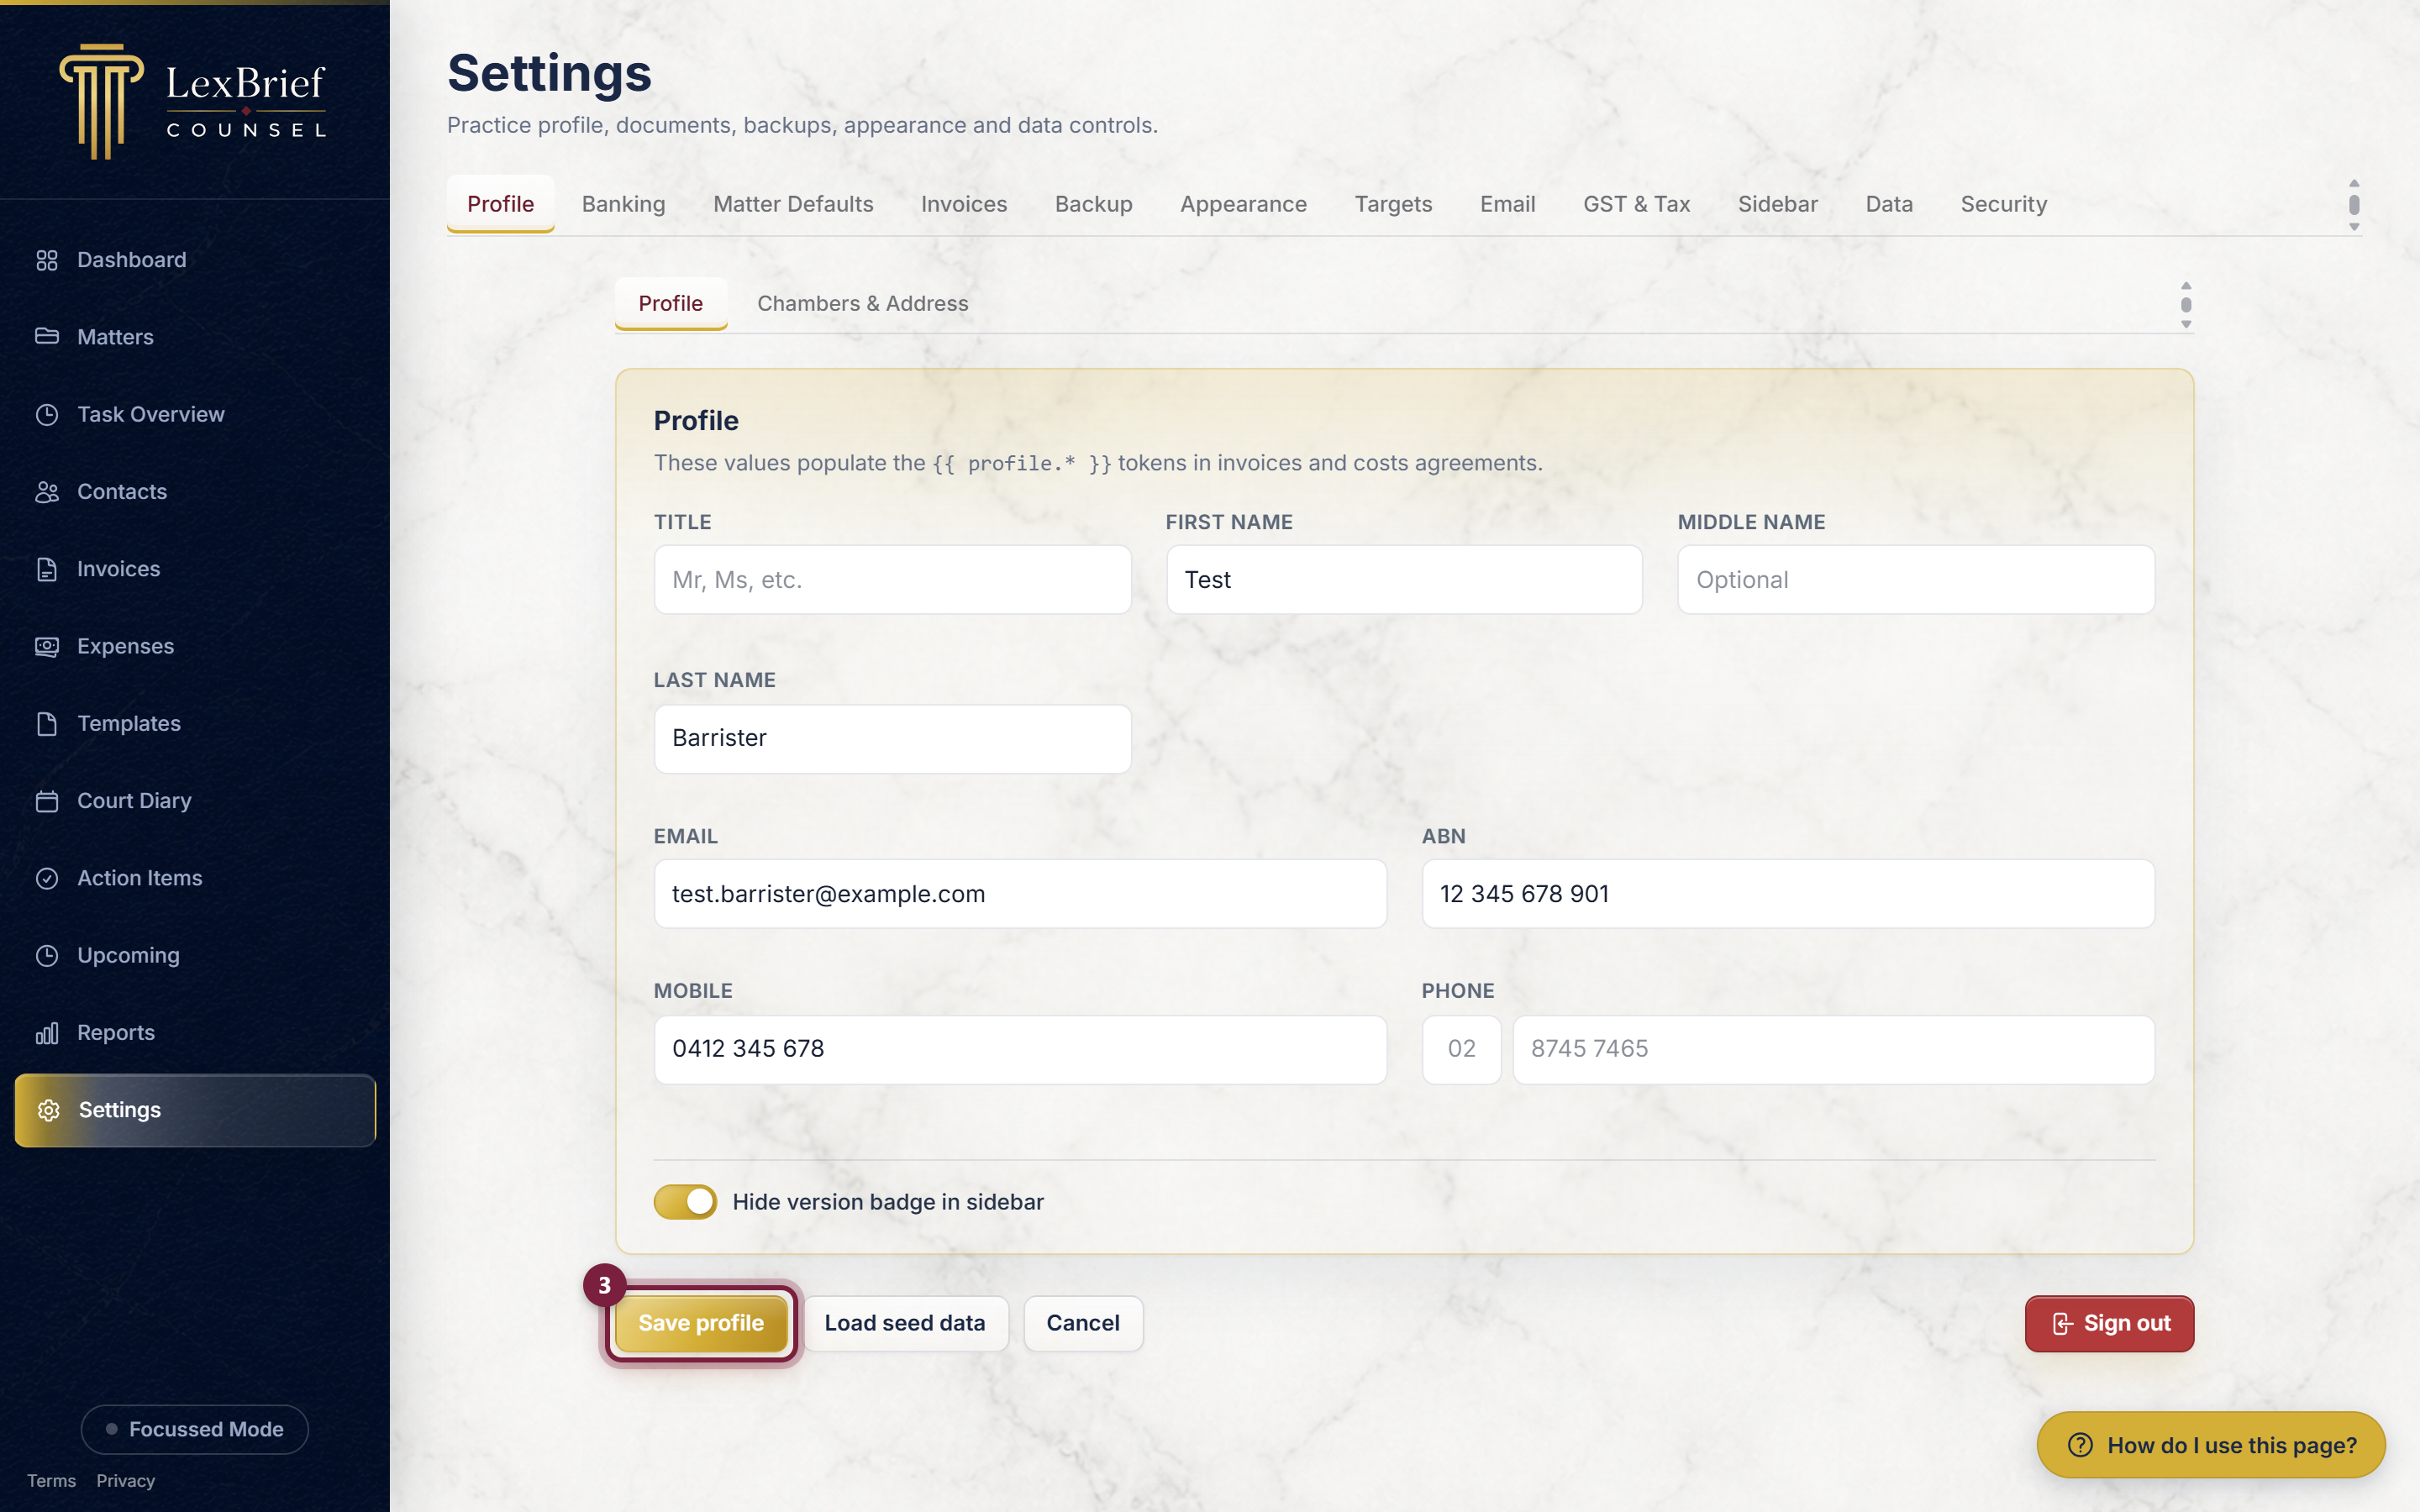
What you should see. The page reloads and your details are kept. That is your profile done.
Step 3 – Create your first matter
A matter is a single brief or file – one dispute, one client engagement. Everything else (your time, your invoices) hangs off a matter, so this is the thing you create first for any new piece of work.
3.1 Open Matters
Click Matters in the left-hand menu.
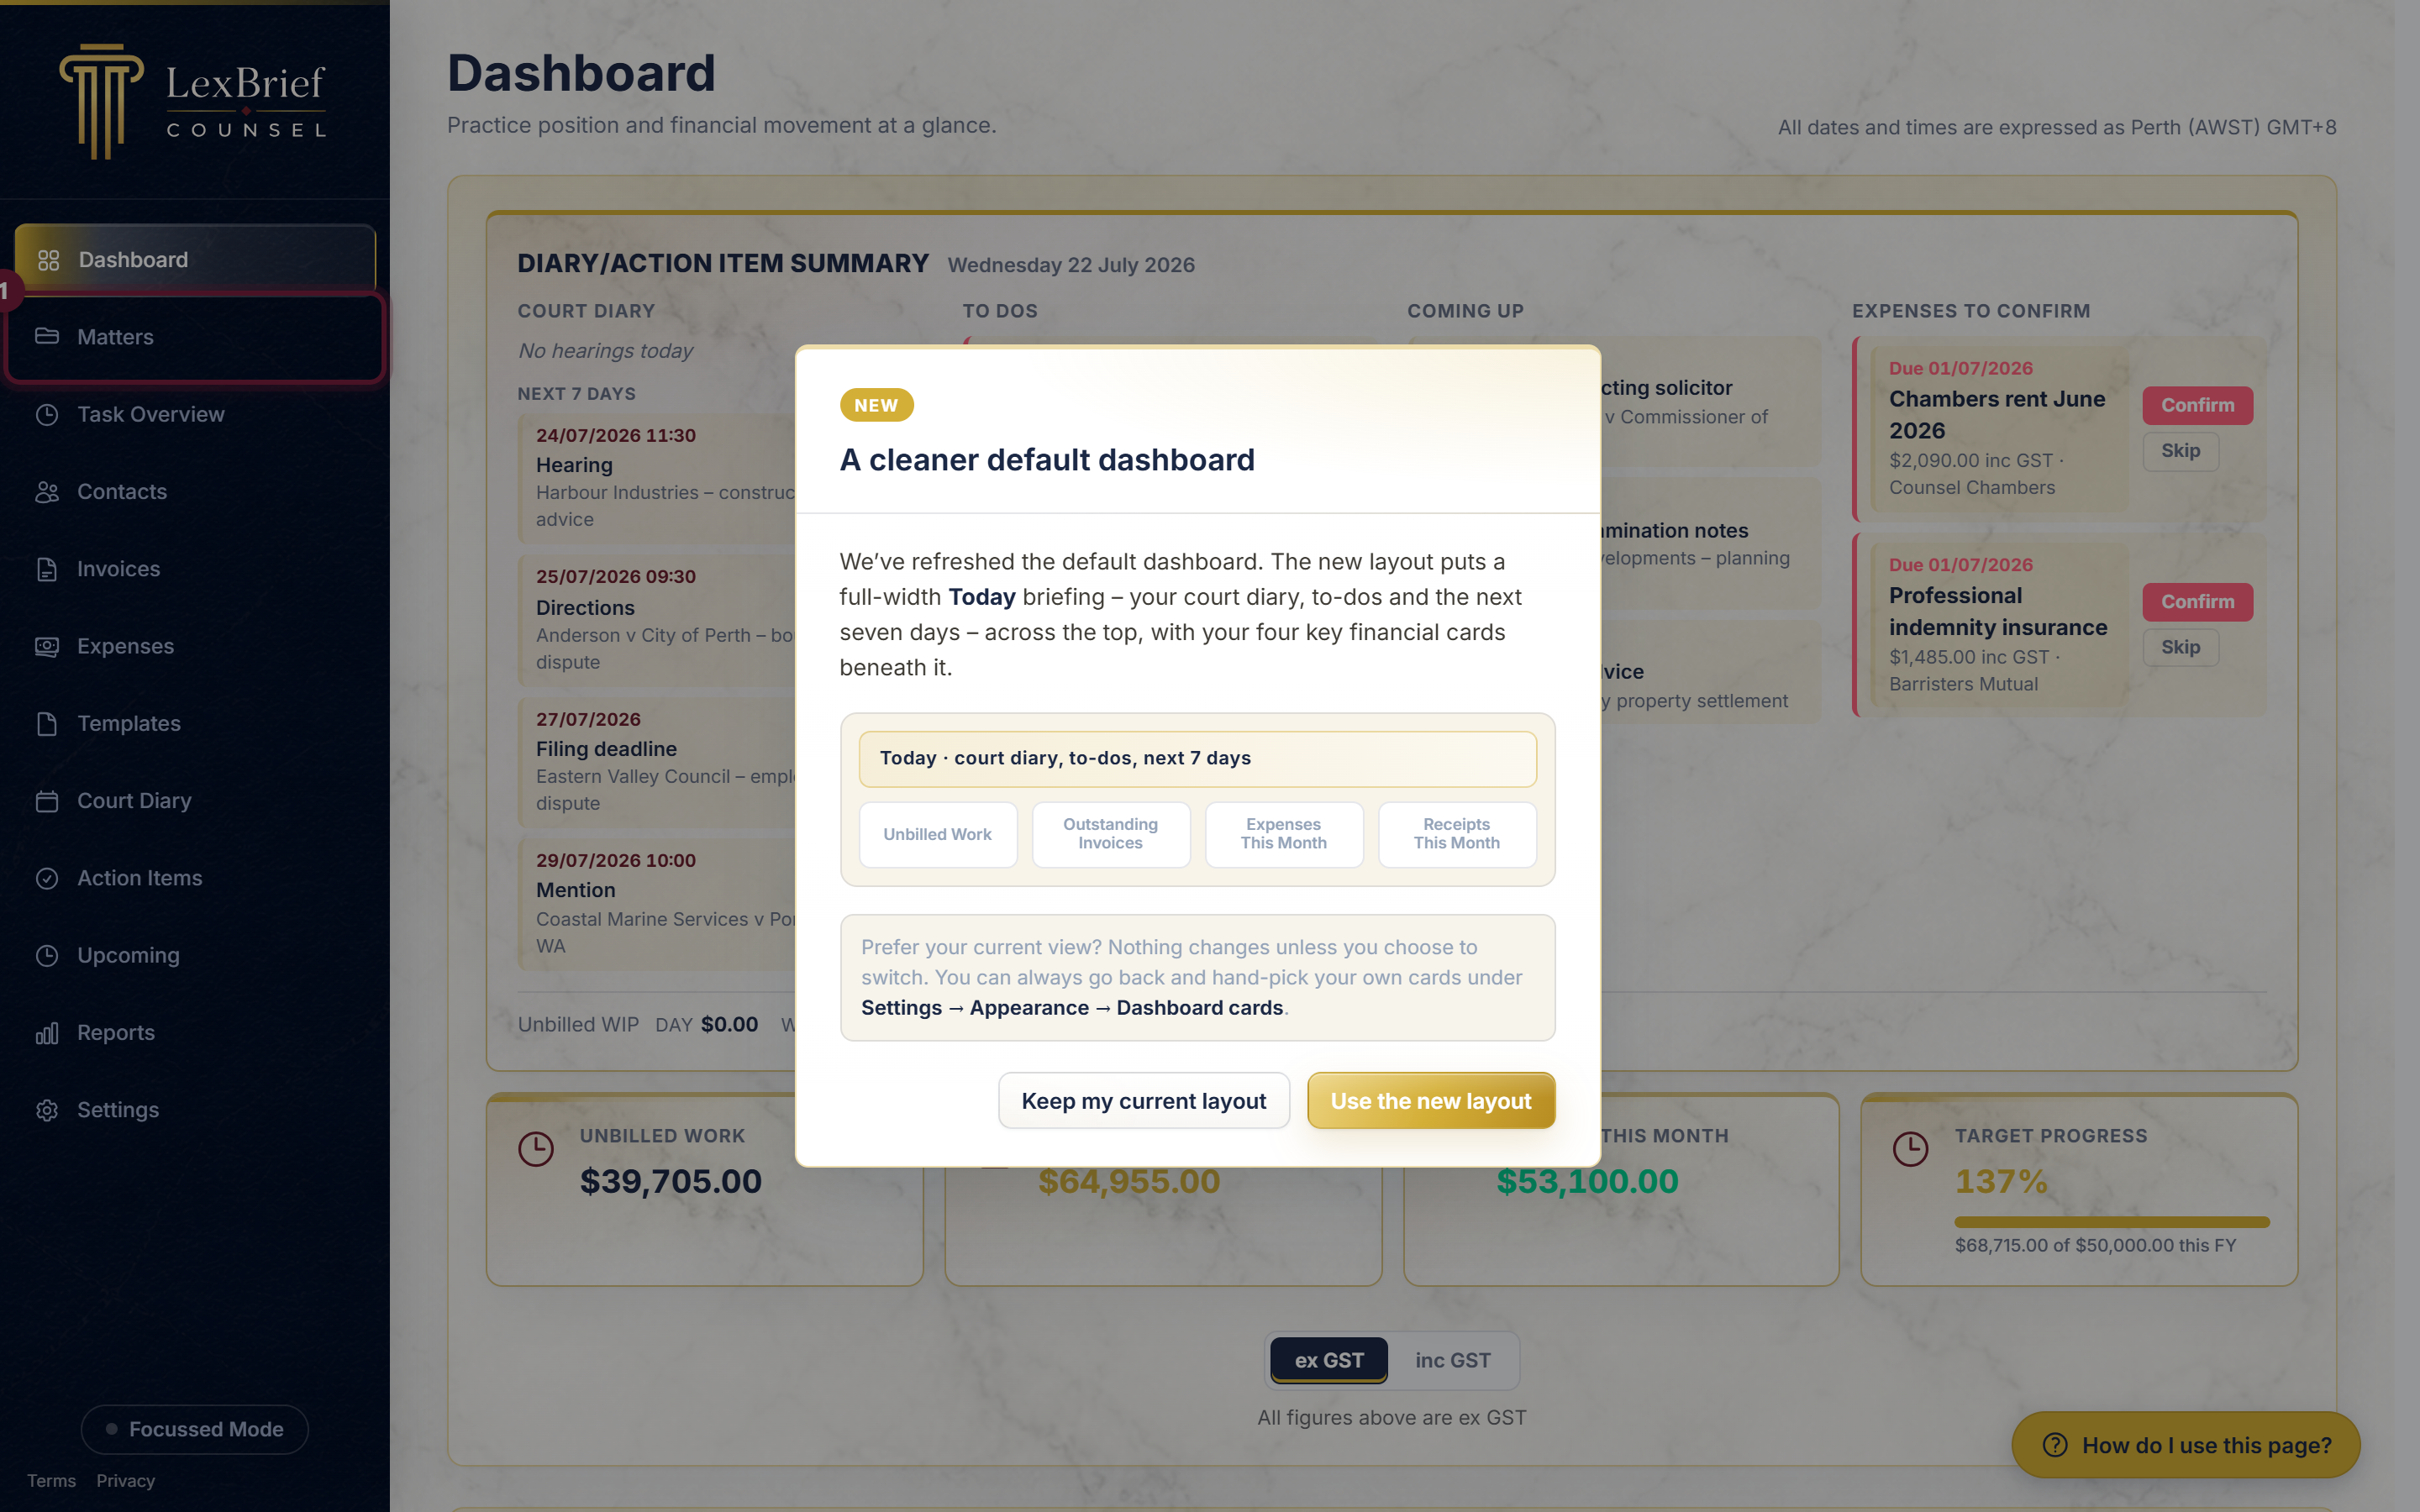
3.2 Click "New matter"
Click the gold New matter button in the top-right corner.
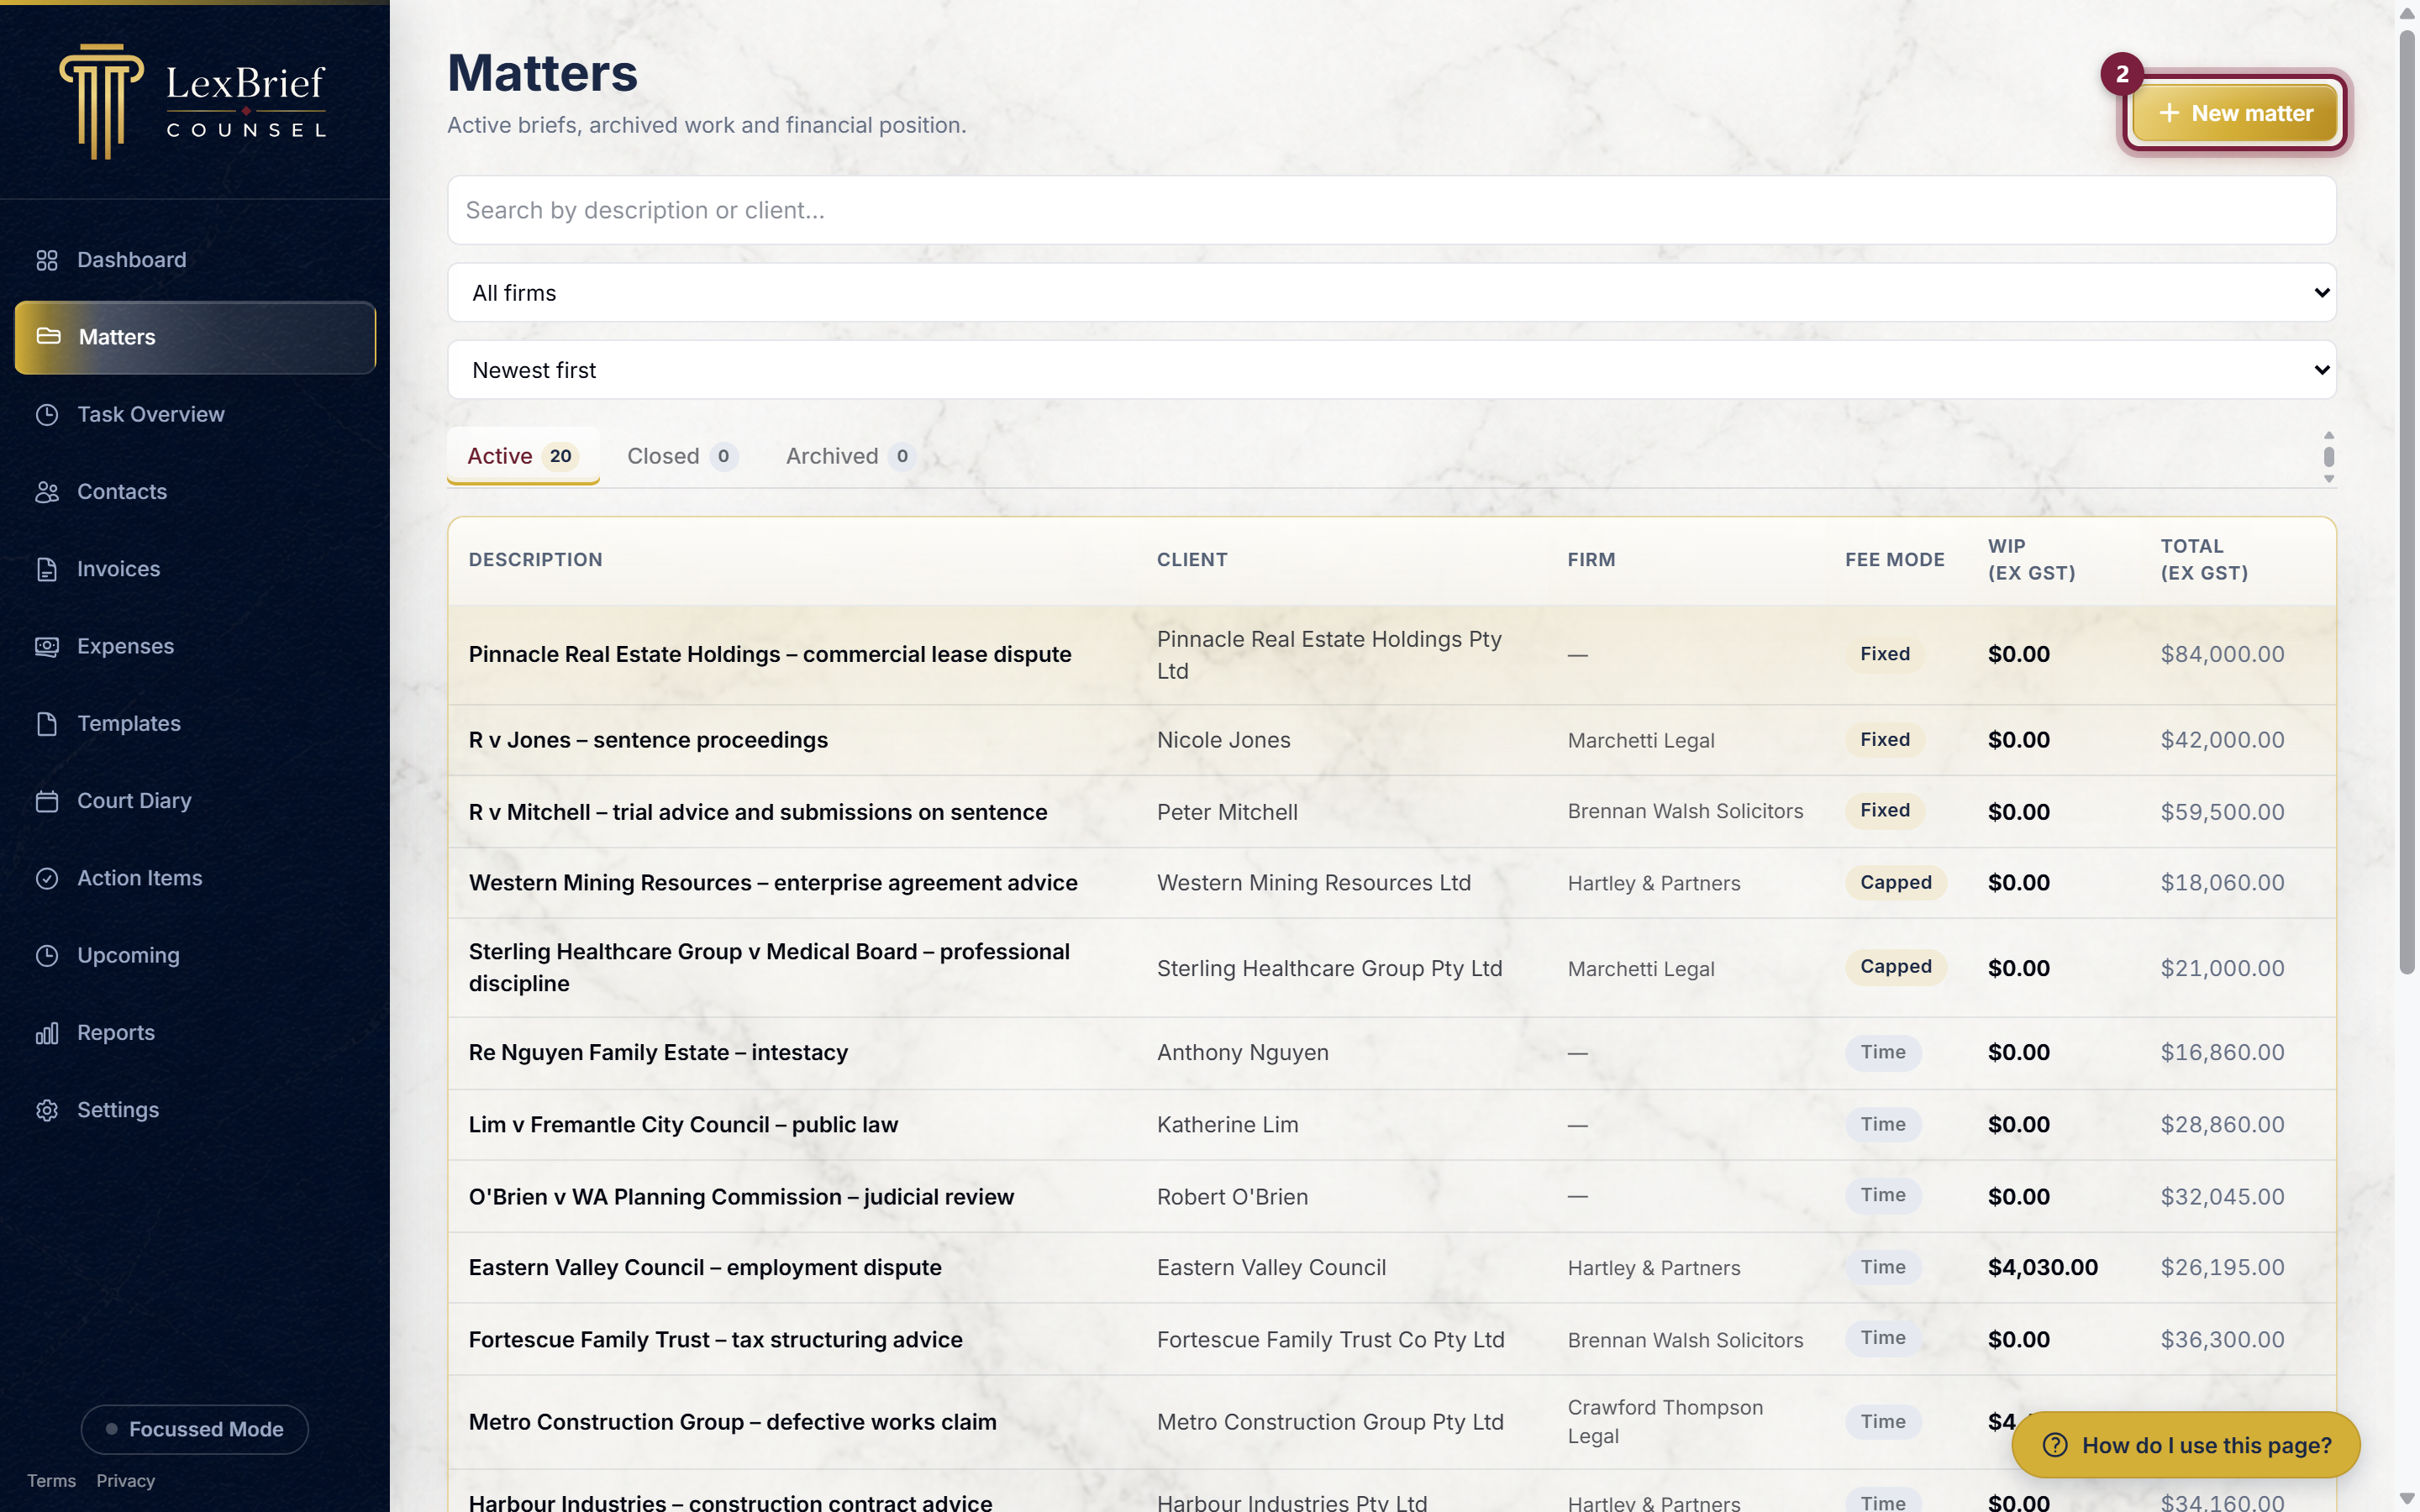
3.3 Choose how you were briefed
A small box pops up asking how you were briefed. Most of the time this is Firm brief (a solicitor at a firm instructed you). If a client came to you directly, choose Direct brief. This only changes which party boxes the next form shows – it is not a big decision, and you can edit the matter afterwards. For now, click Firm brief.
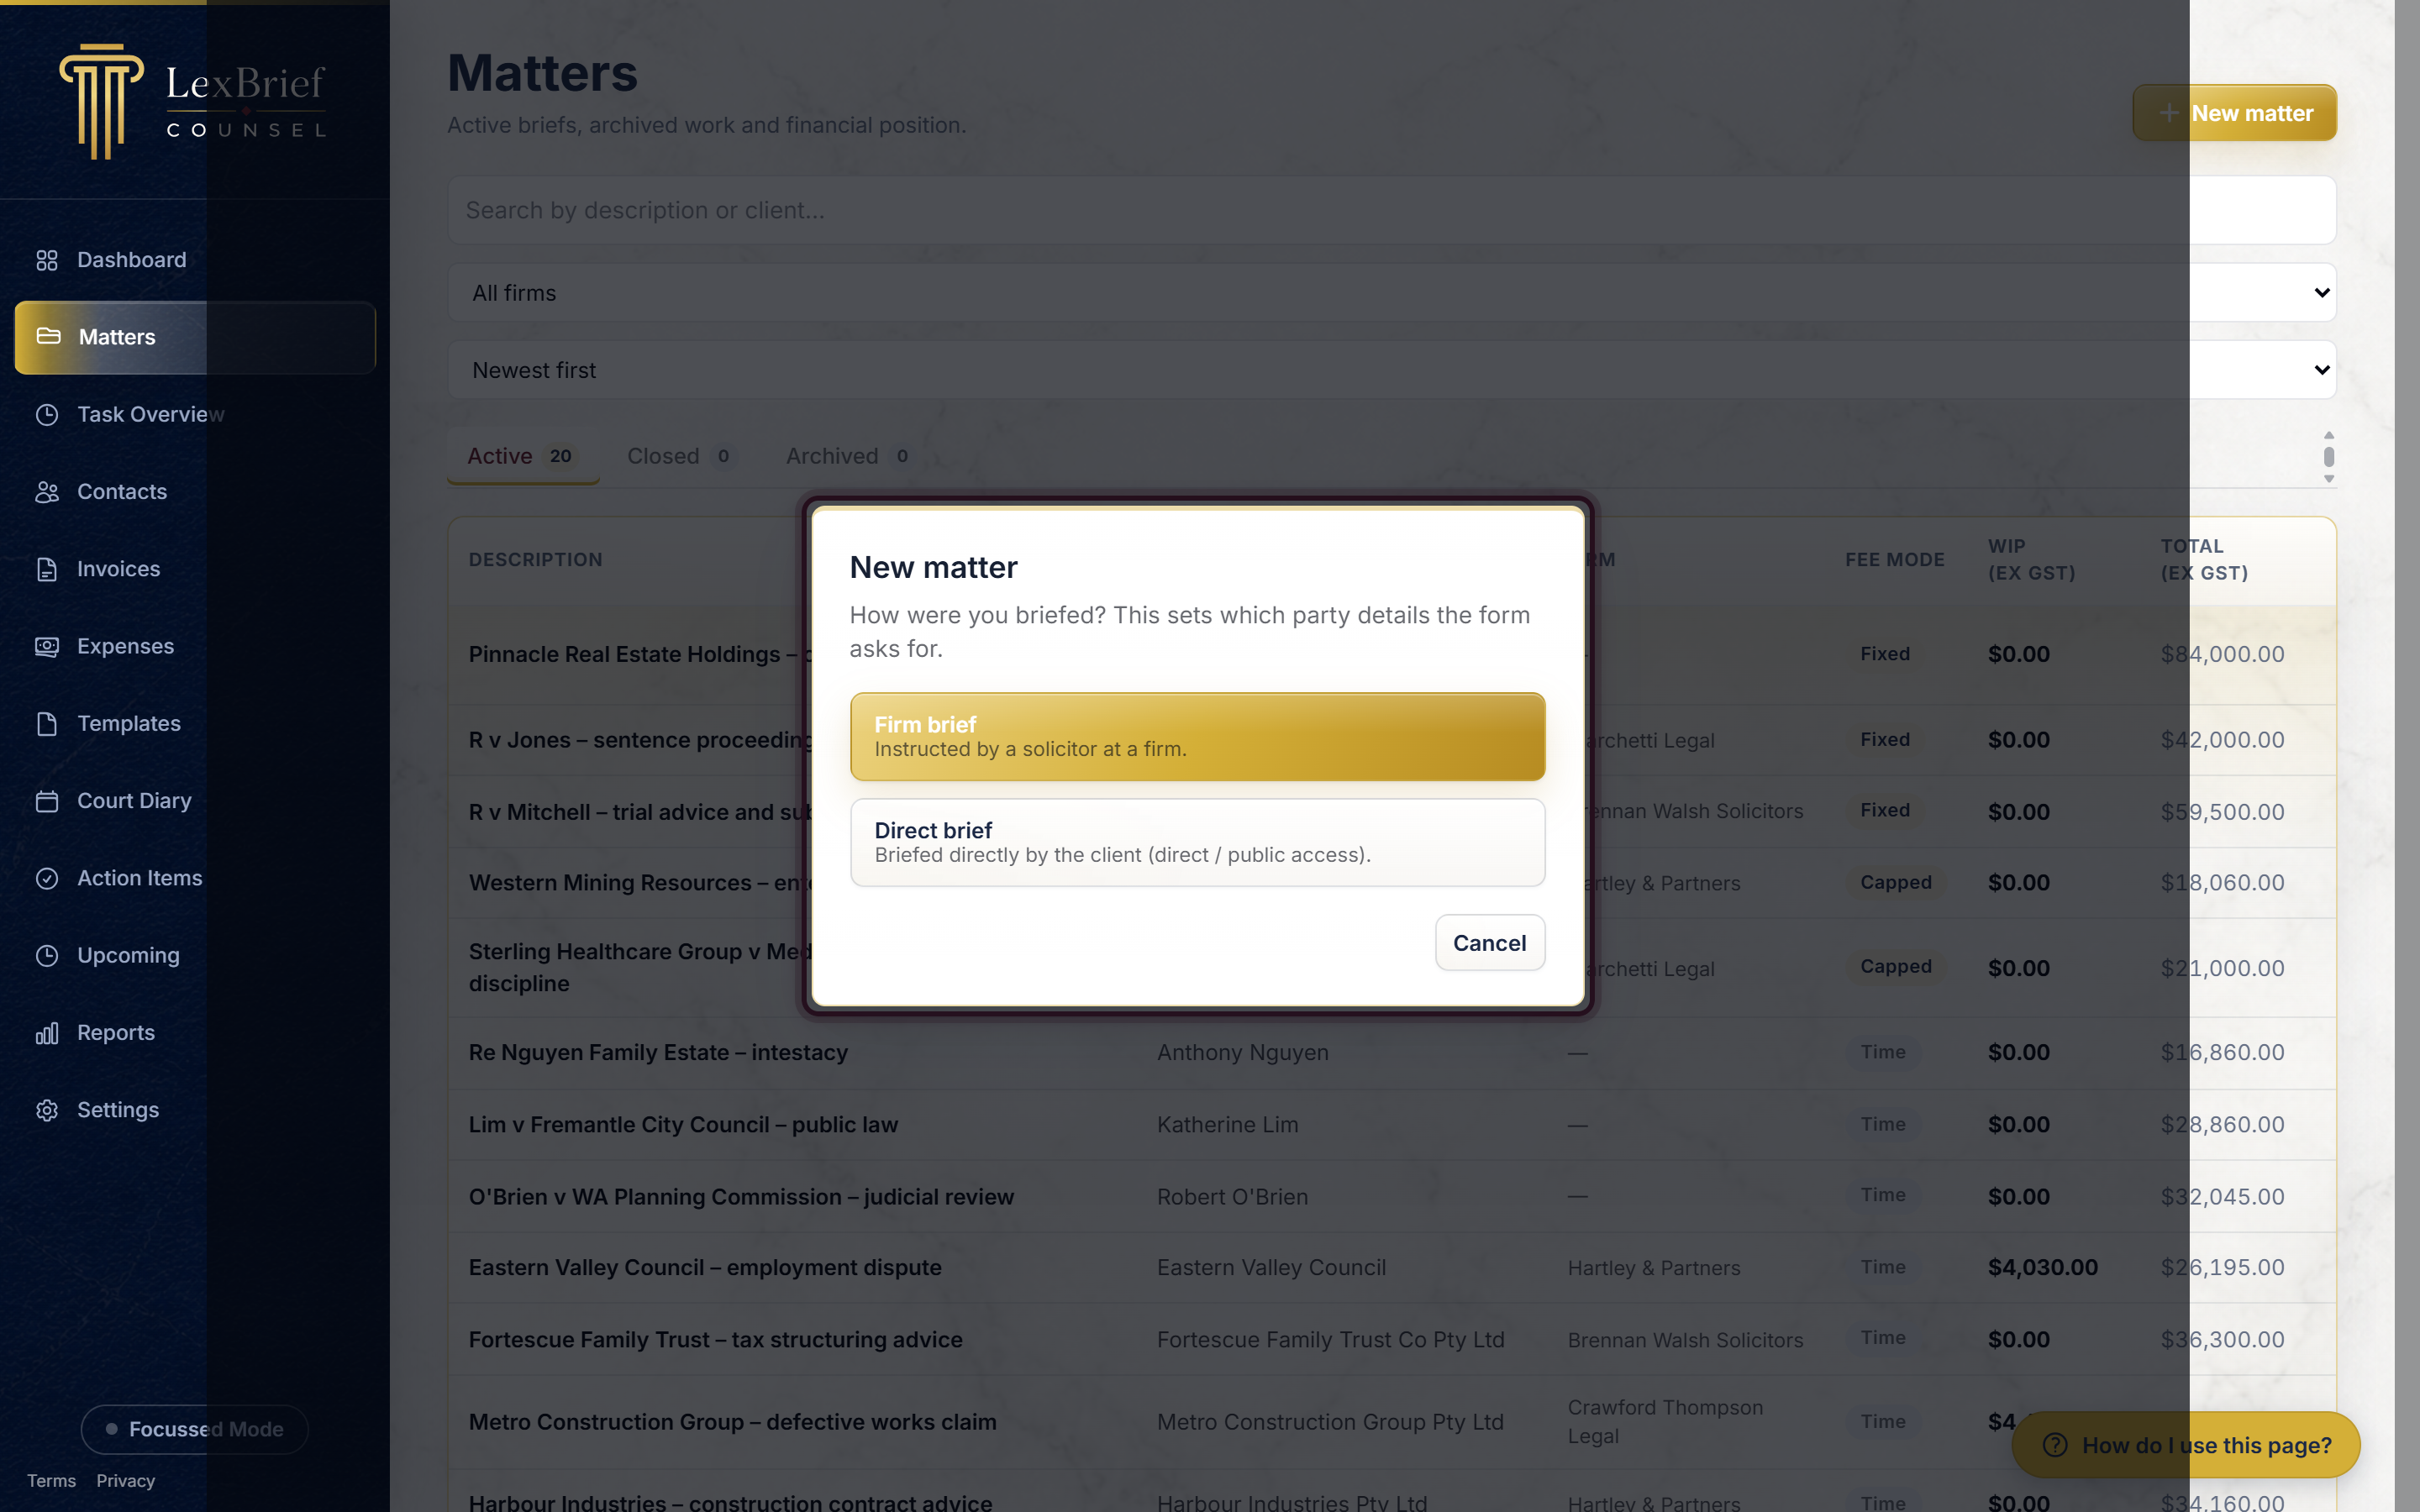
3.4 Give the matter a description
The form opens. The only box you must fill in is Description – this is the name of the matter, for example Smith v Jones – contract dispute. Type it in.
You can fill in the client, instructing firm, court and so on now if you like, but none of it is required to get going. Feel free to skip straight to the fee.
3.5 Check the fee arrangement
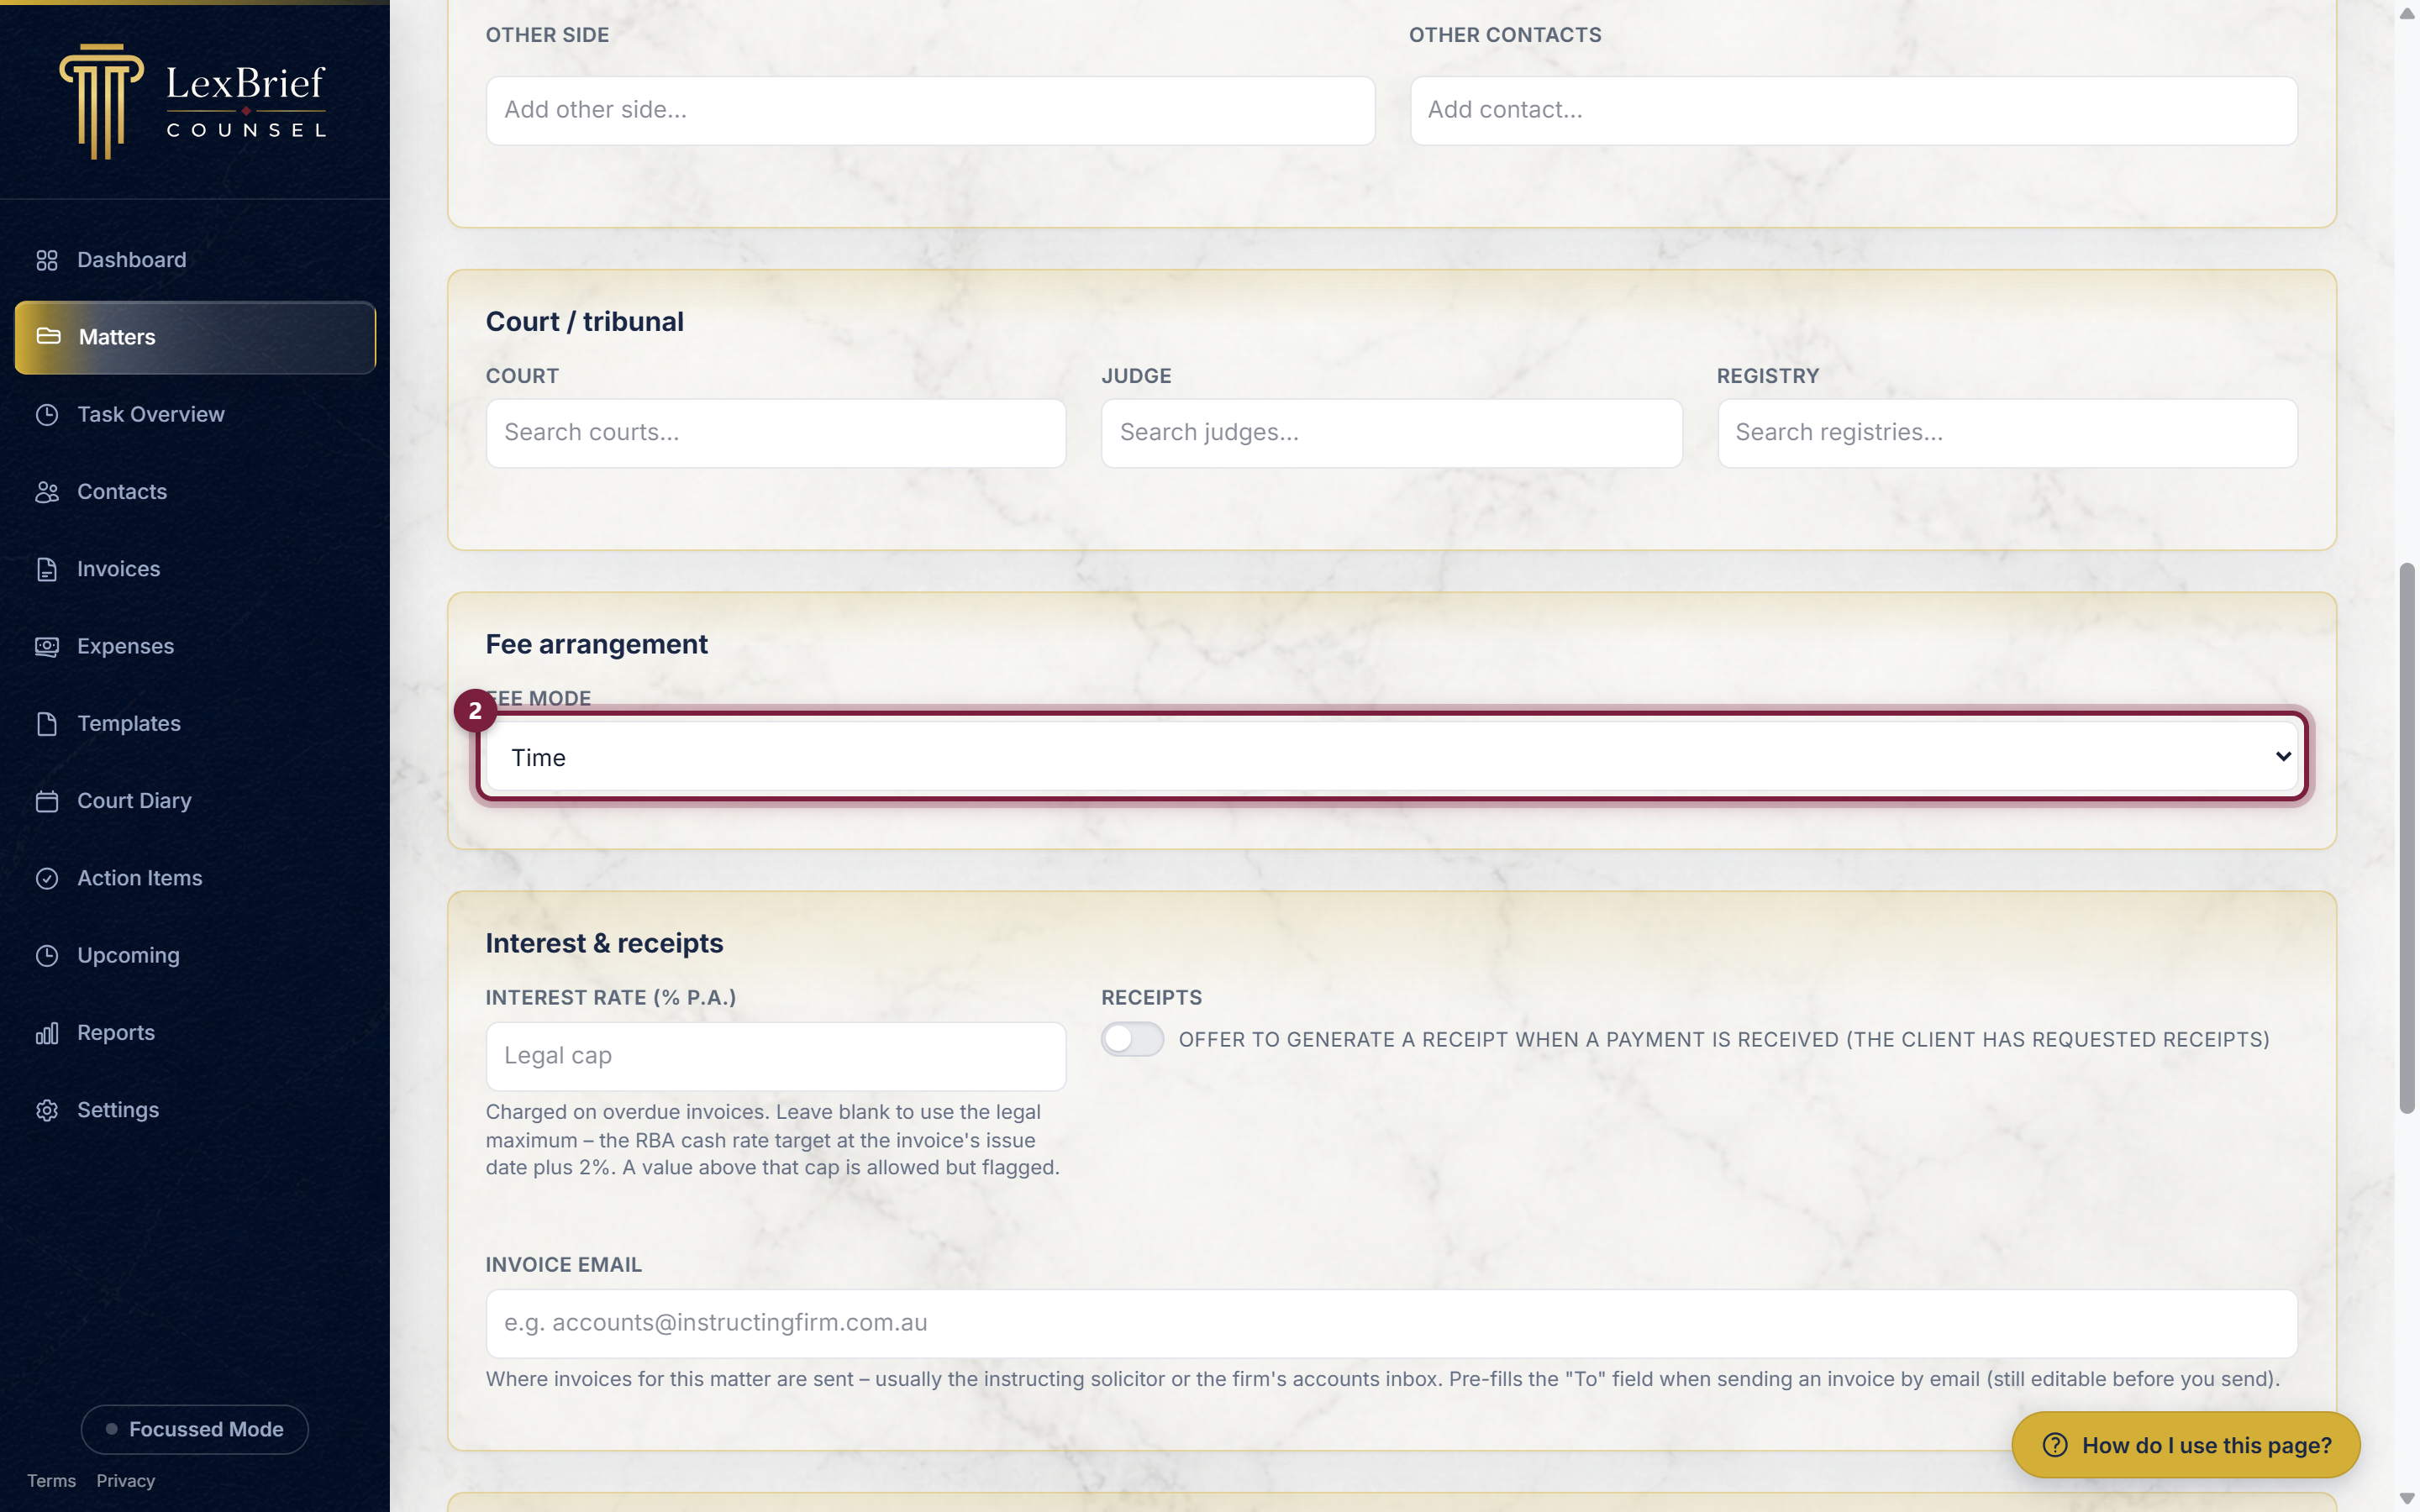
Scroll down to Fee arrangement. The Fee mode box decides how you charge on this matter:
- Time – you charge for the time you spend (an hourly or per-unit rate). This is the usual choice, and it is selected by default.
- Fixed – one flat fee for the whole matter.
- Capped – you charge for your time, but not above an agreed ceiling.
For this walkthrough leave it on Time.
3.6 Save the matter
Scroll to the bottom and click Save.
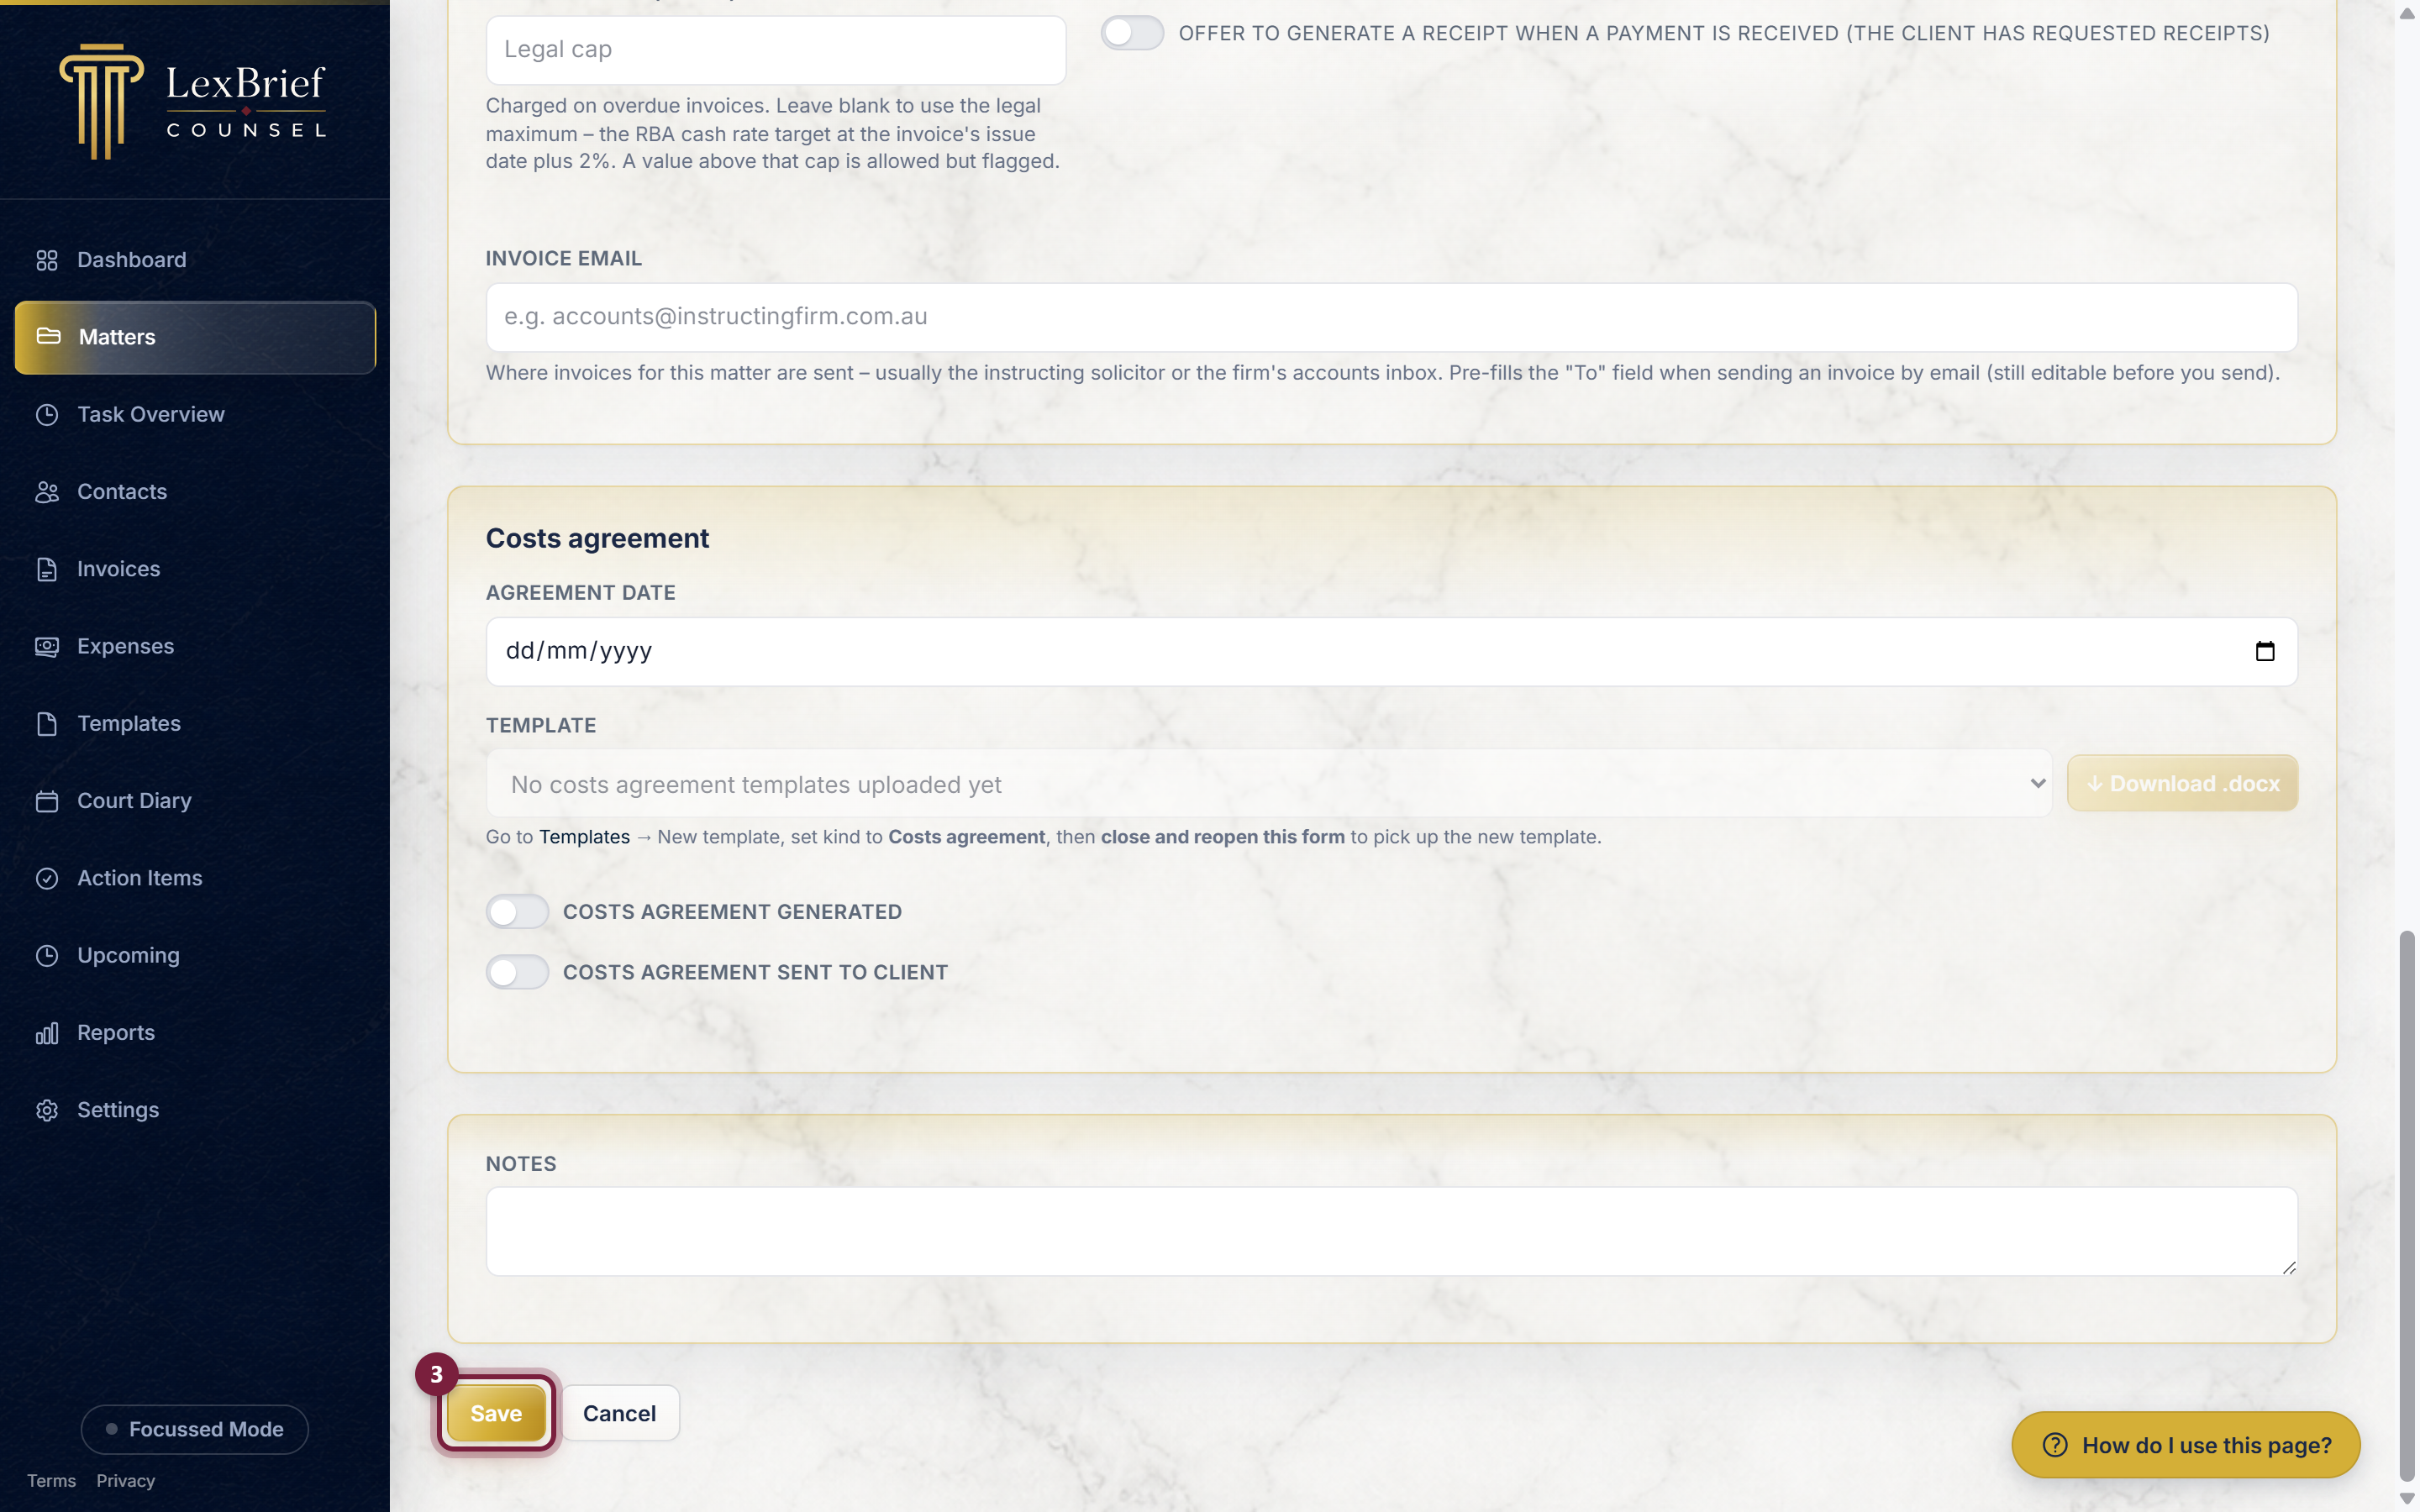
What you should see. The matter's own page opens, with a row of tabs across the middle (Detail, Rates, Tasks, Invoices, and so on).
Step 4 – Add a rate
Before you can record time on a Time matter, LexBrief needs to know what you charge. You do this once per matter by adding a rate.
4.1 Open the Rates tab
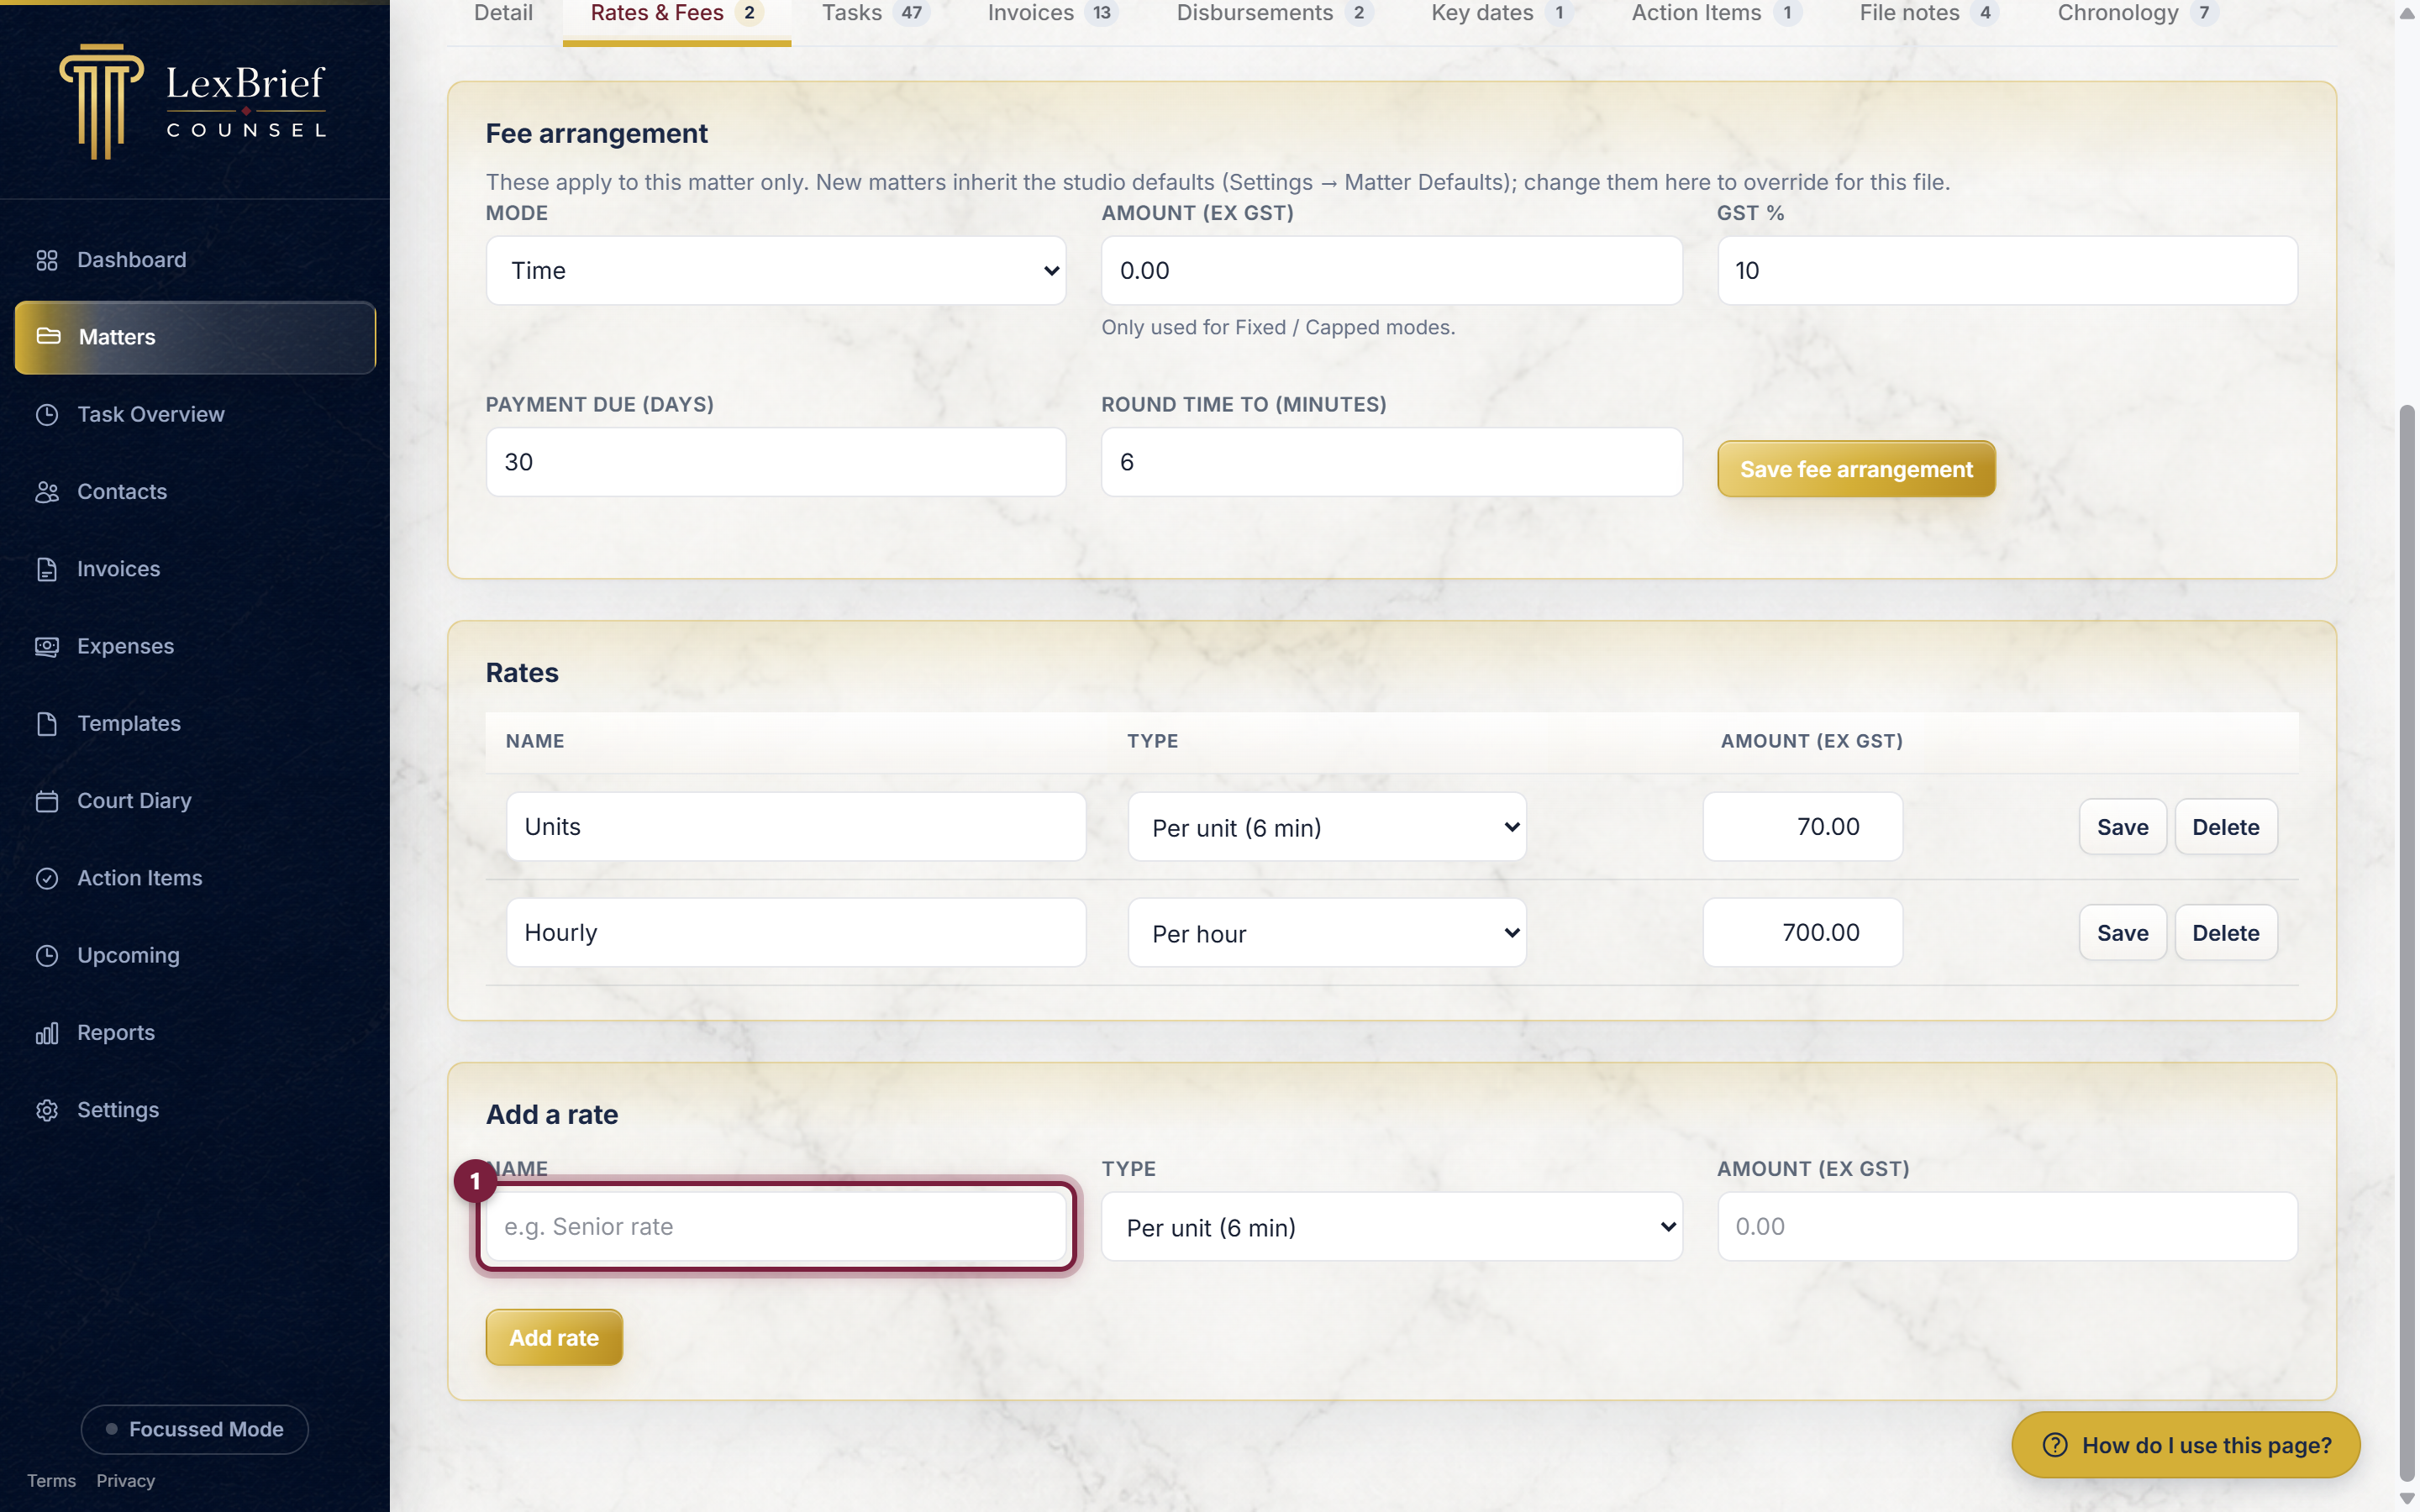
On the matter's page, click the Rates tab. Near the bottom you will find an Add a rate row with empty boxes.
4.2 Fill in the rate
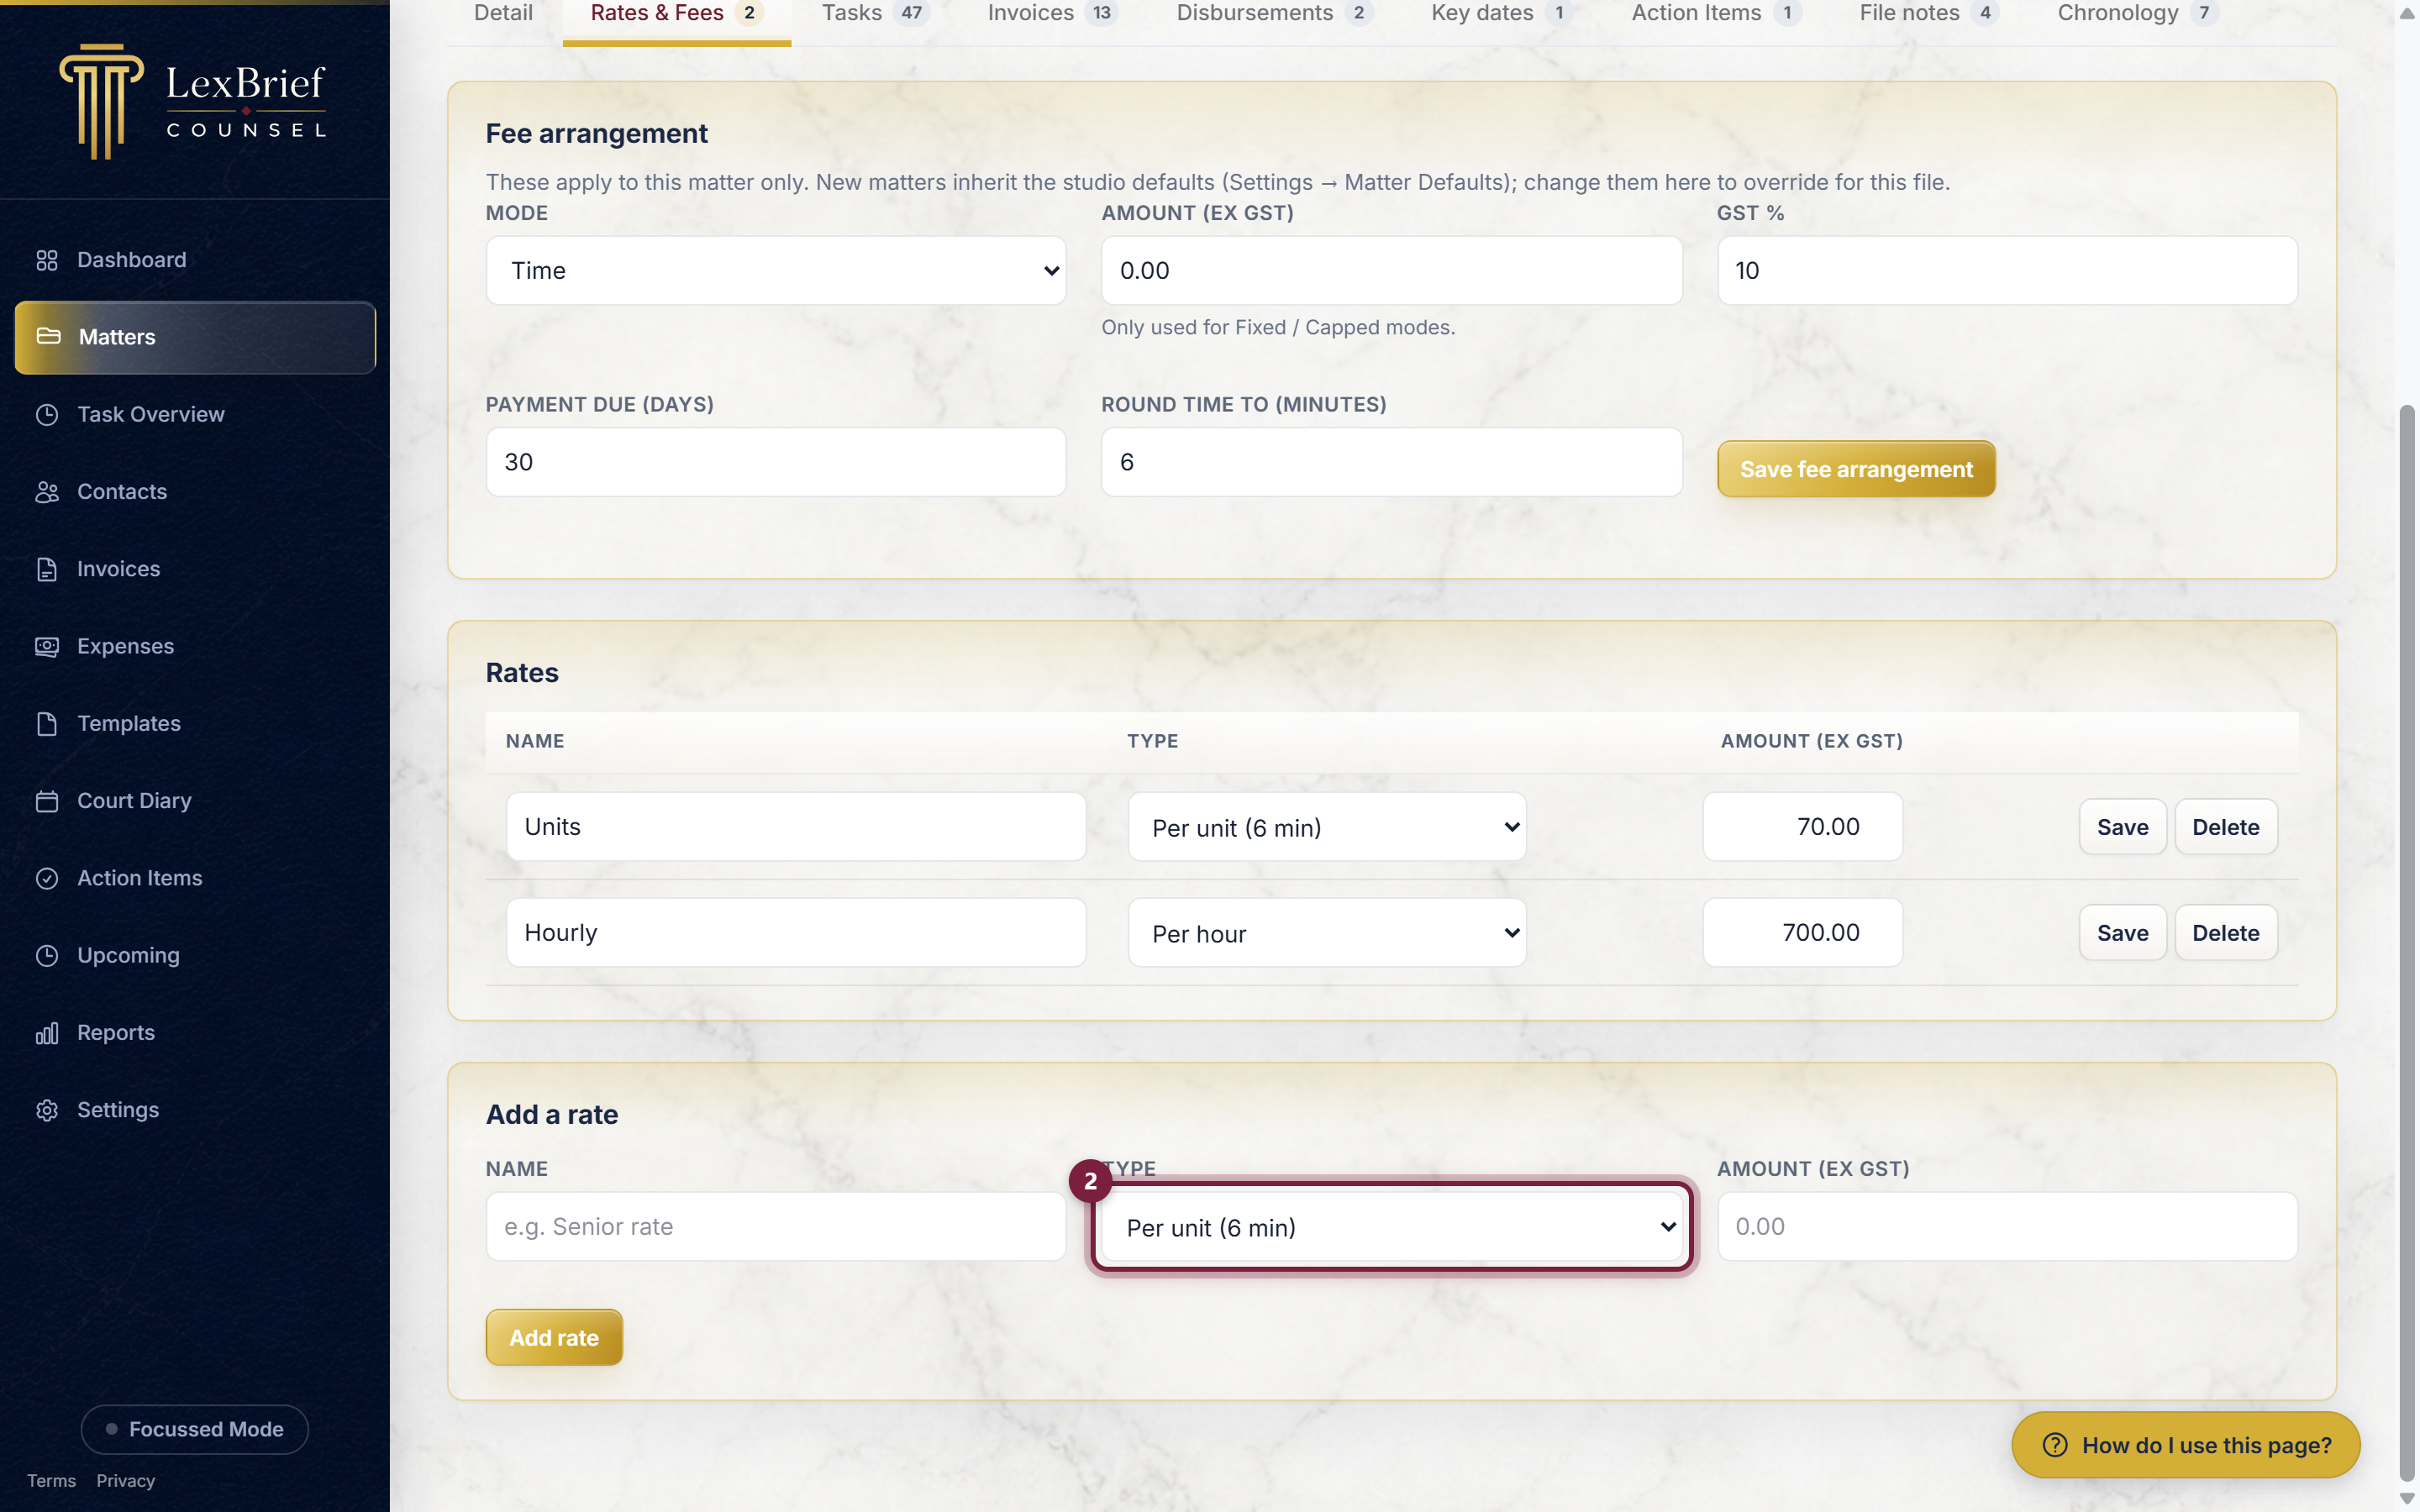
Give the rate a Name (for example Standard rate). Then choose the type:
- Hourly – the amount is per hour (LexBrief works out the time in six-minute units for you).
- Units – the amount is per six-minute unit.
- Fixed – a flat amount, ignoring time.
Then type the amount in dollars (for example 650 for $650 per hour).
4.3 Click "Add rate"
Click the Add rate button. The rate now appears in the list above and is ready to use.
Step 5 – Record your time
Now you record some work. There are two ways: type it in after the fact, or run a live timer while you work. We will show typing it in; the timer is covered at the end.
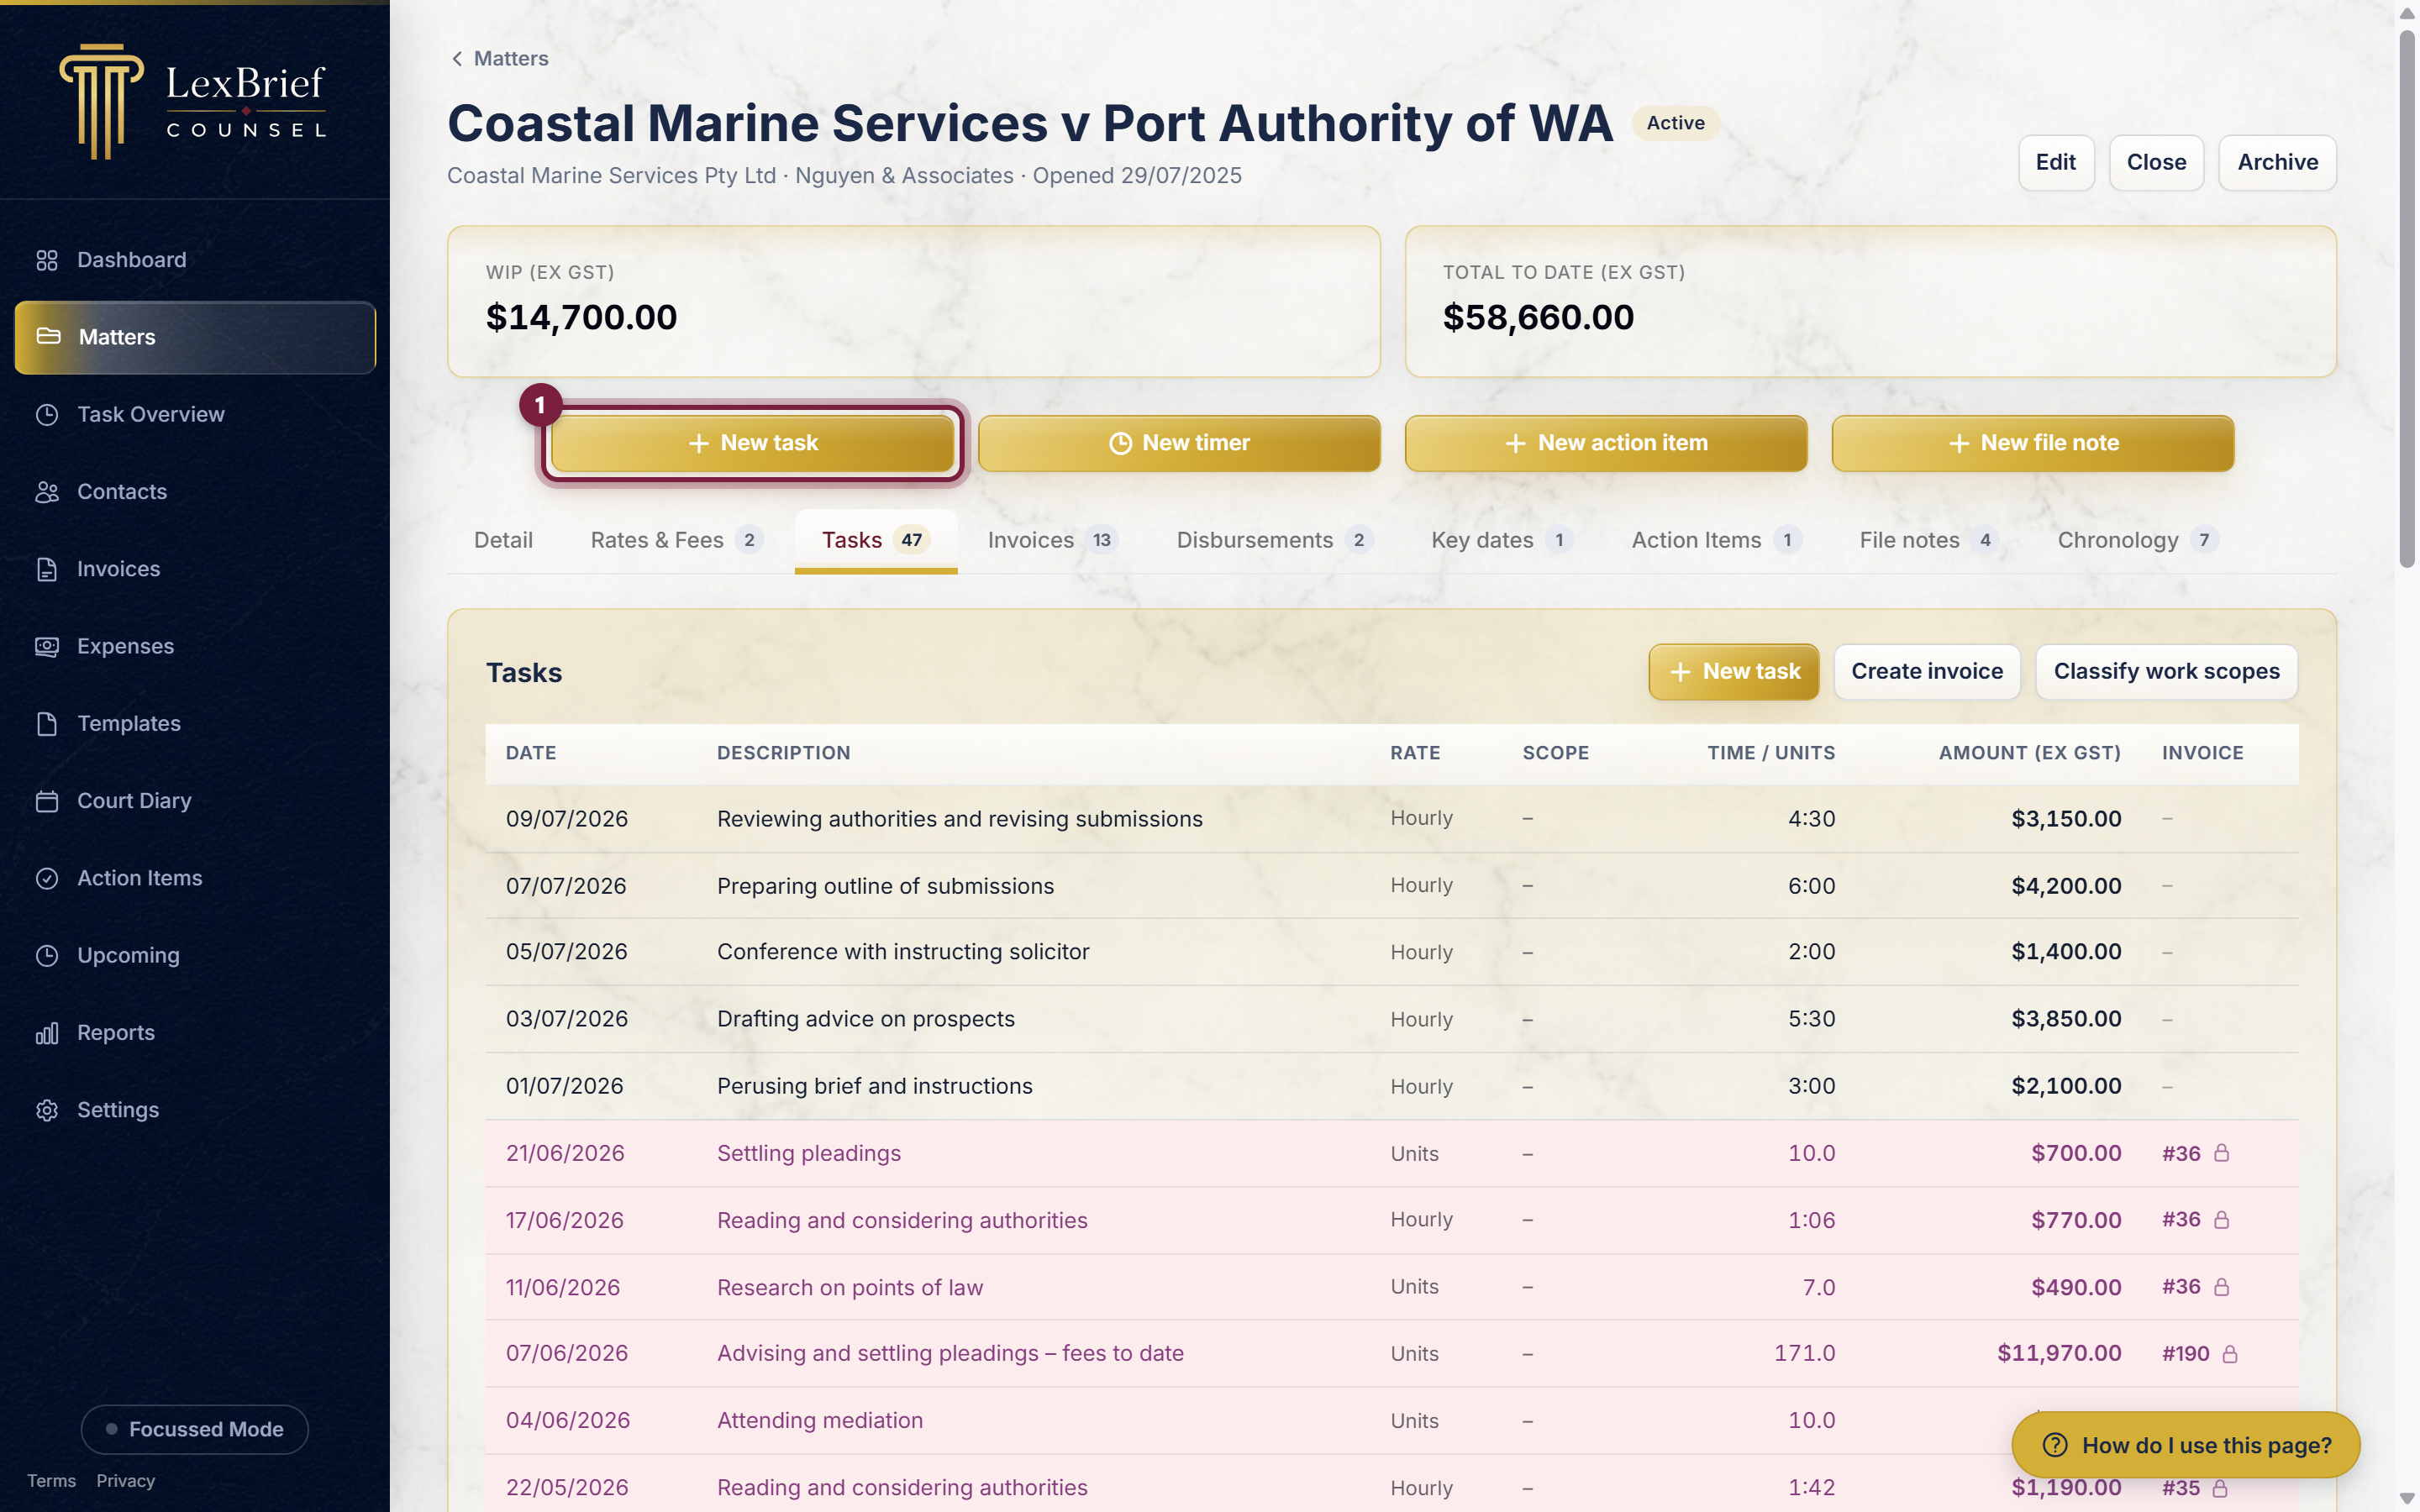
5.1 Open the Tasks tab and click "New task"
On the matter's page, click the Tasks tab, then click the New task button.
5.2 Fill in the task
Fill in the boxes:
- Date – already set to today; change it if the work was on another day.
- Rate – choose the rate you added in Step 4. (This is why the rate had to come first.)
- Description – what you did, for example Drafting outline submissions.
- Units (6 min) – how long it took, in six-minute units. One hour is 10 units; thirty minutes is 5 units.
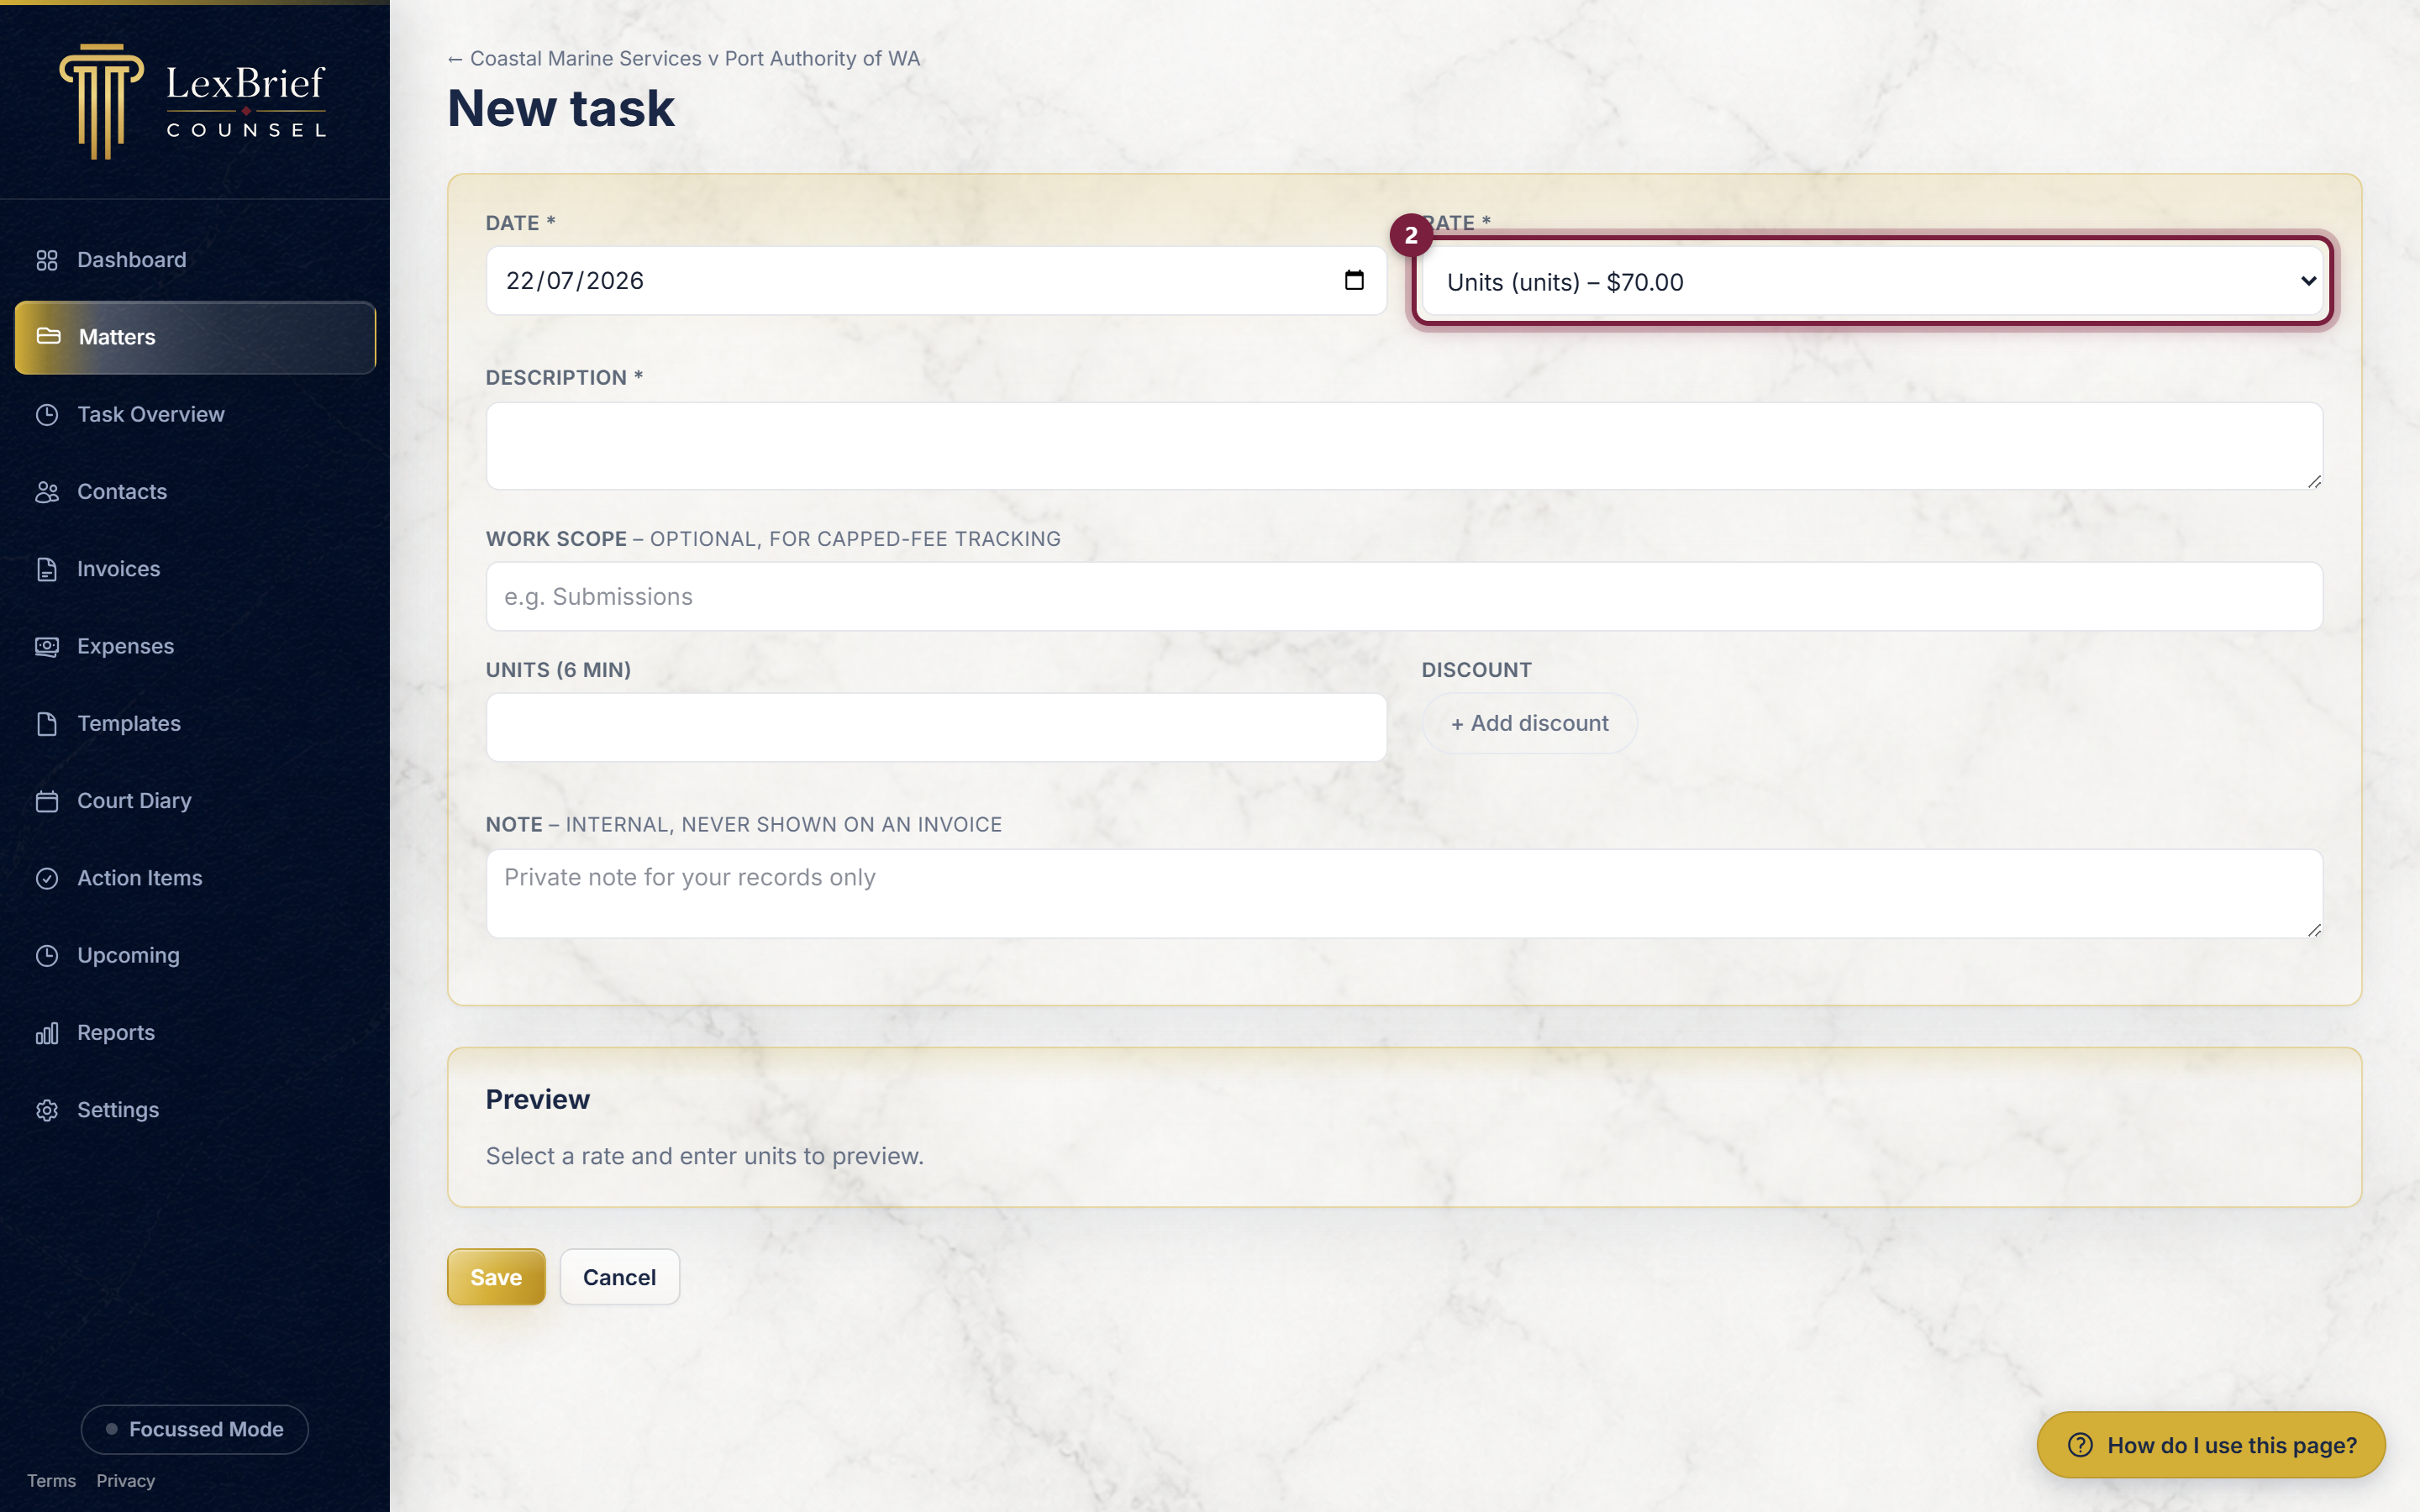
As you fill it in, a Preview at the bottom shows the fee. When it looks right, click Save. The task now appears in your Tasks list and counts towards what you can invoice.
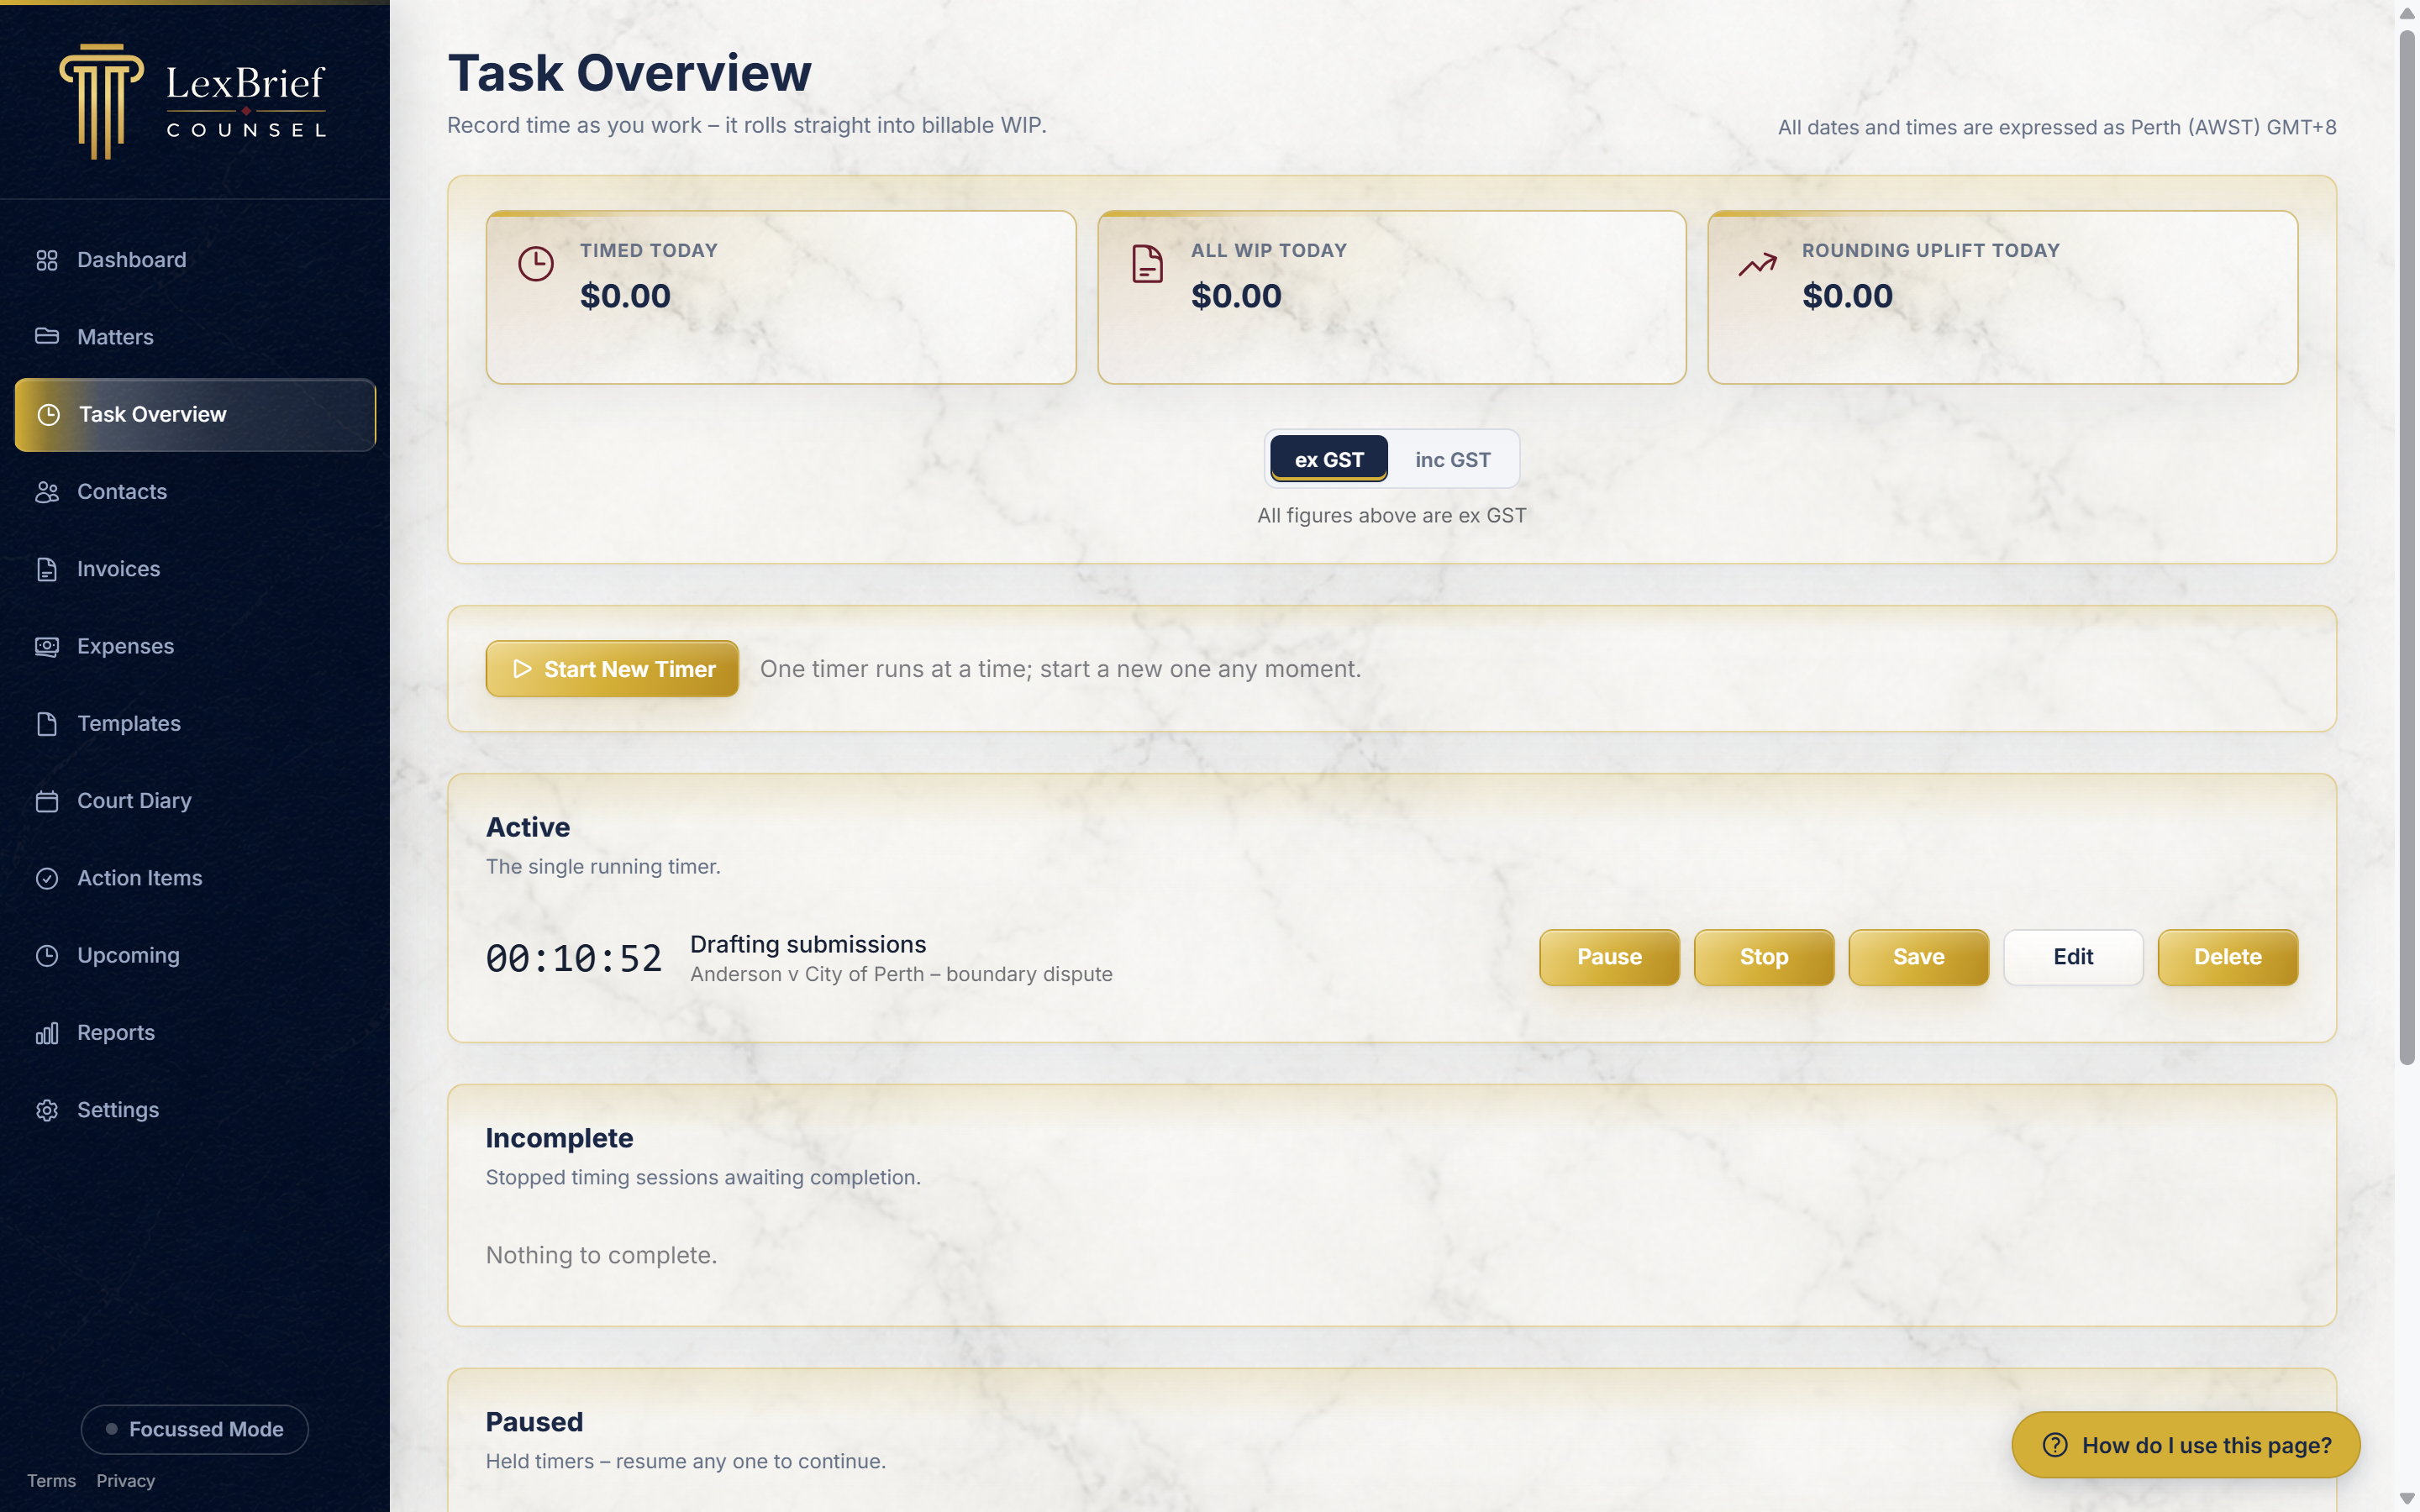
5.3 (Alternative) Use the live timer
If you prefer to time work as you do it, click Task Overview in the left-hand menu. There you can start a timer, pause and resume it, and when you stop it LexBrief turns the elapsed time into a task for you (rounded up to the matter's rounding setting).
Step 6 – Raise an invoice
When you are ready to bill, you turn the recorded time into an invoice.
6.1 Click "Create invoice"
On the matter's Tasks tab, click the gold Create invoice button. LexBrief gathers up the time you have not yet billed and builds a draft invoice from it.
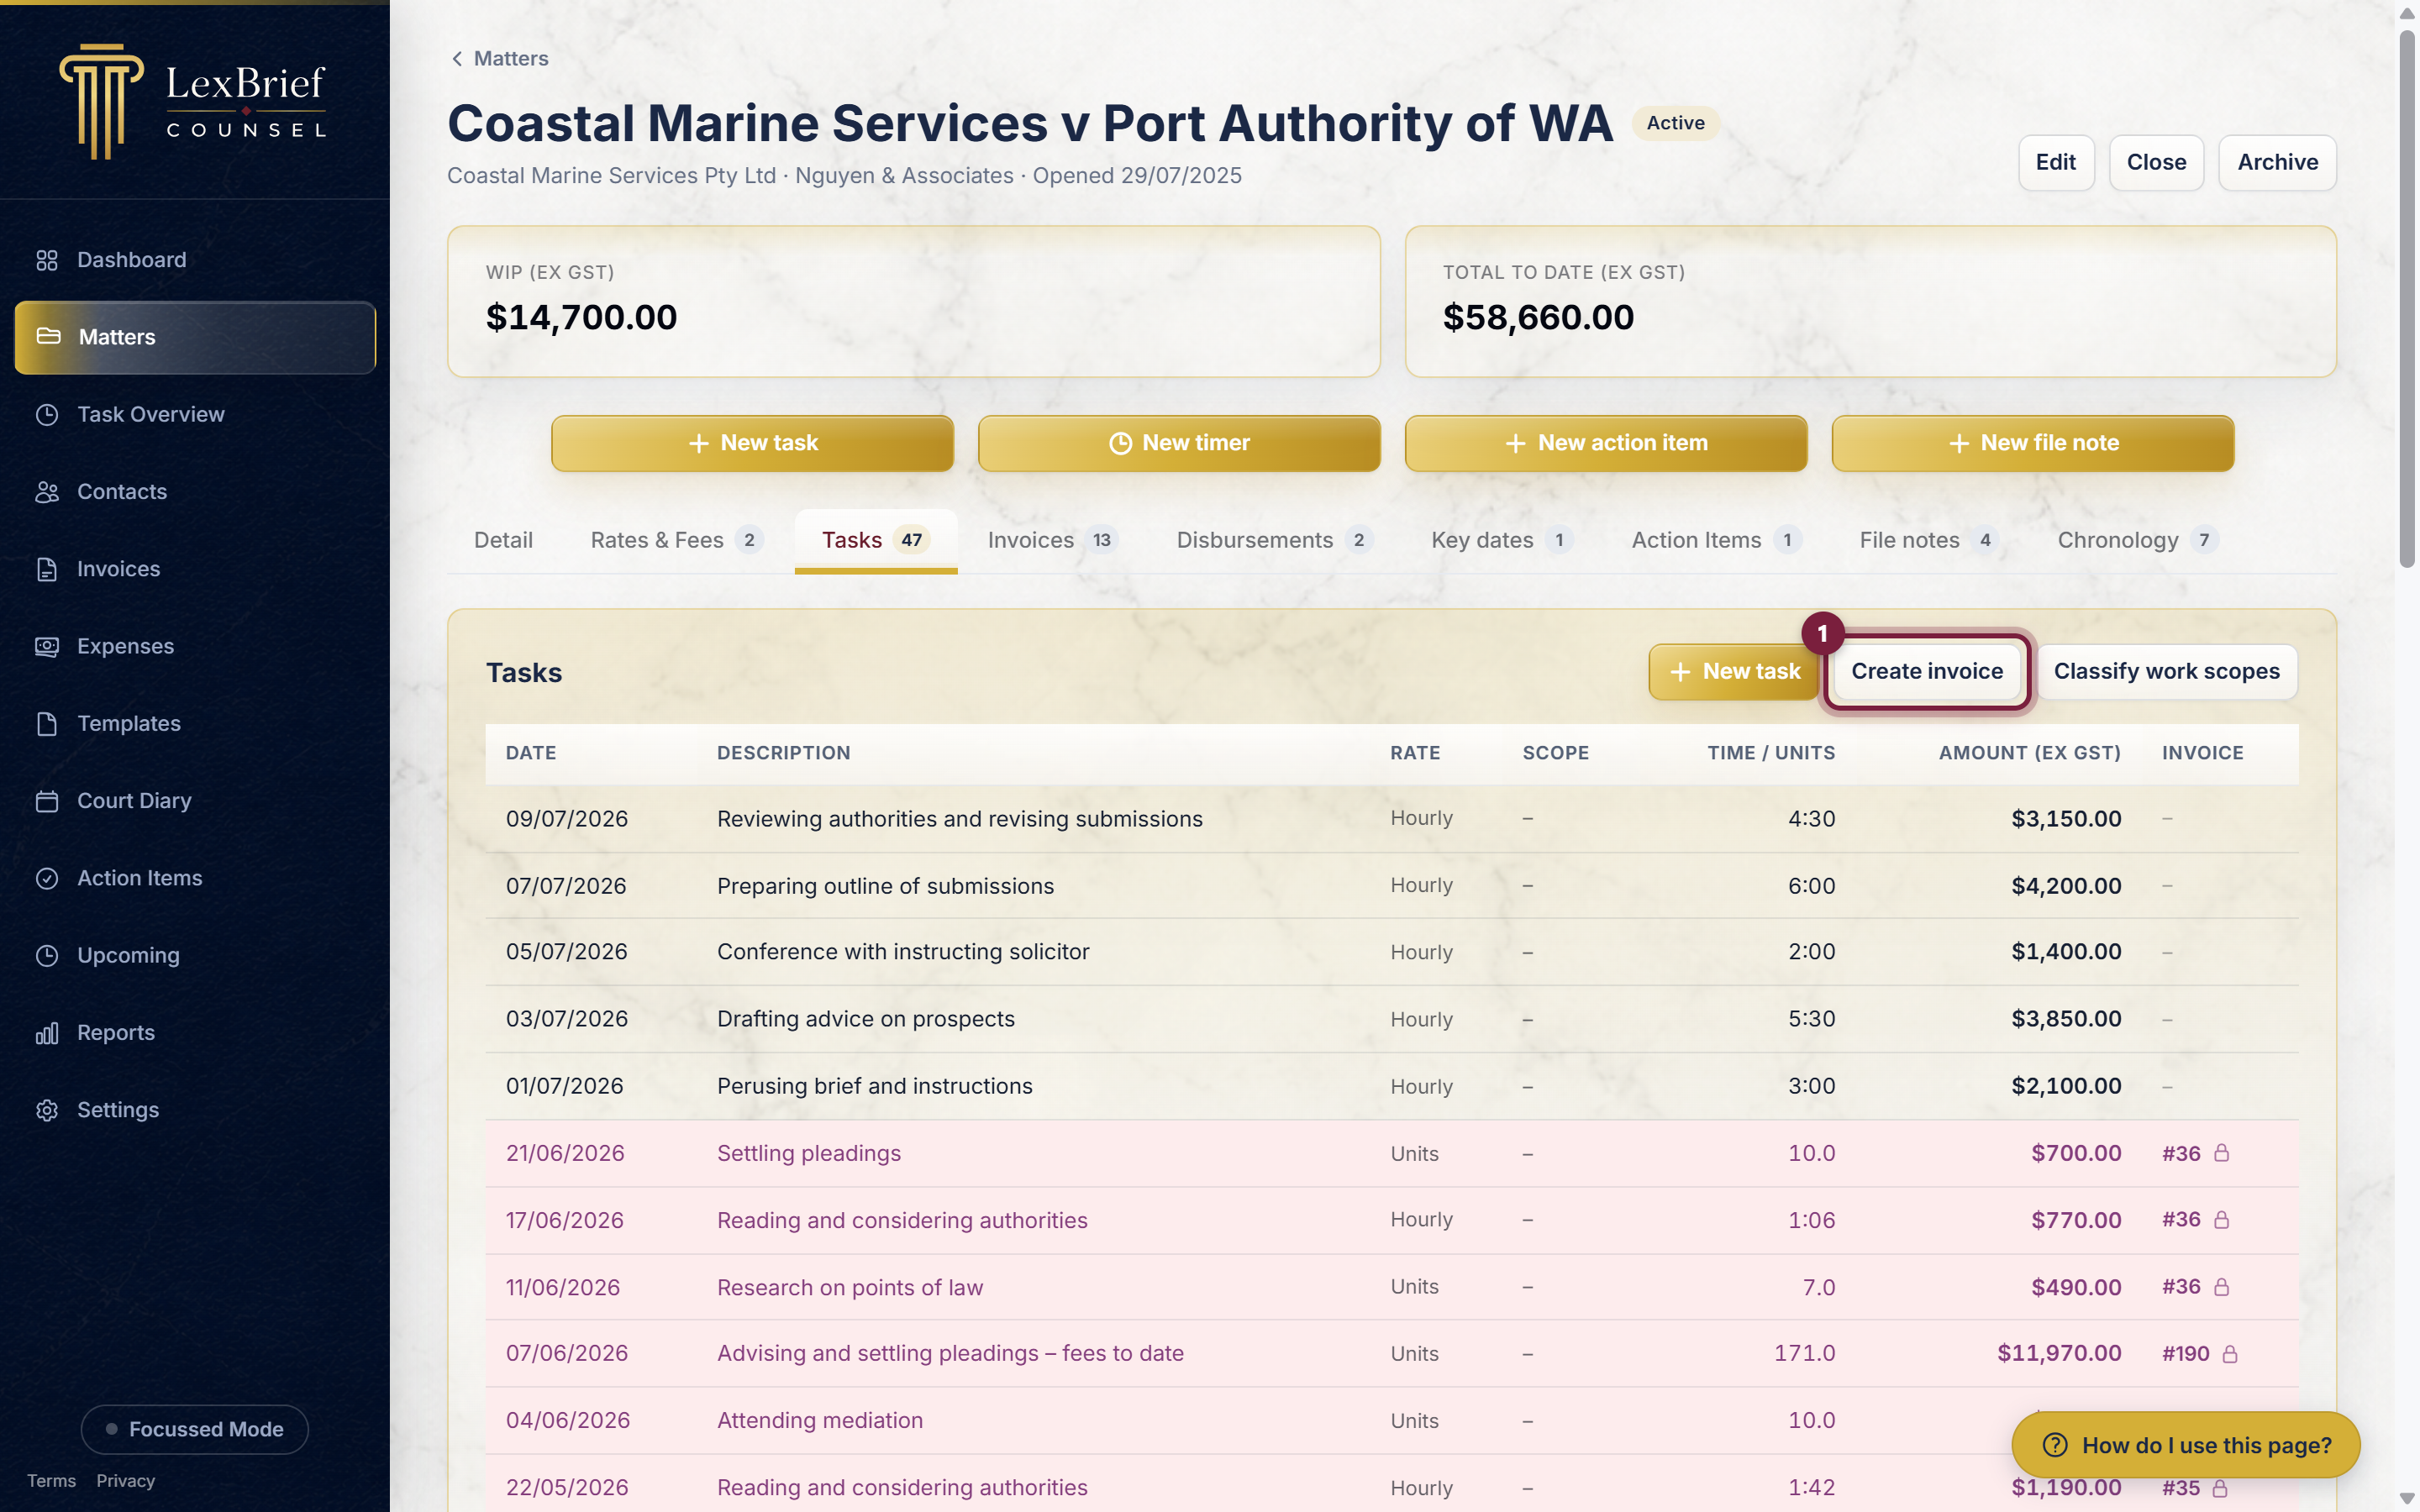
What you should see. A draft invoice, marked DRAFT, showing the fees, GST and total. Below that is a preview of exactly how the invoice will look when it prints (using your invoice template).
6.2 Issue the invoice
A draft is not yet a real invoice – you can still change it. When you are happy, click the Issue button at the top. This gives it its invoice number and locks it in.
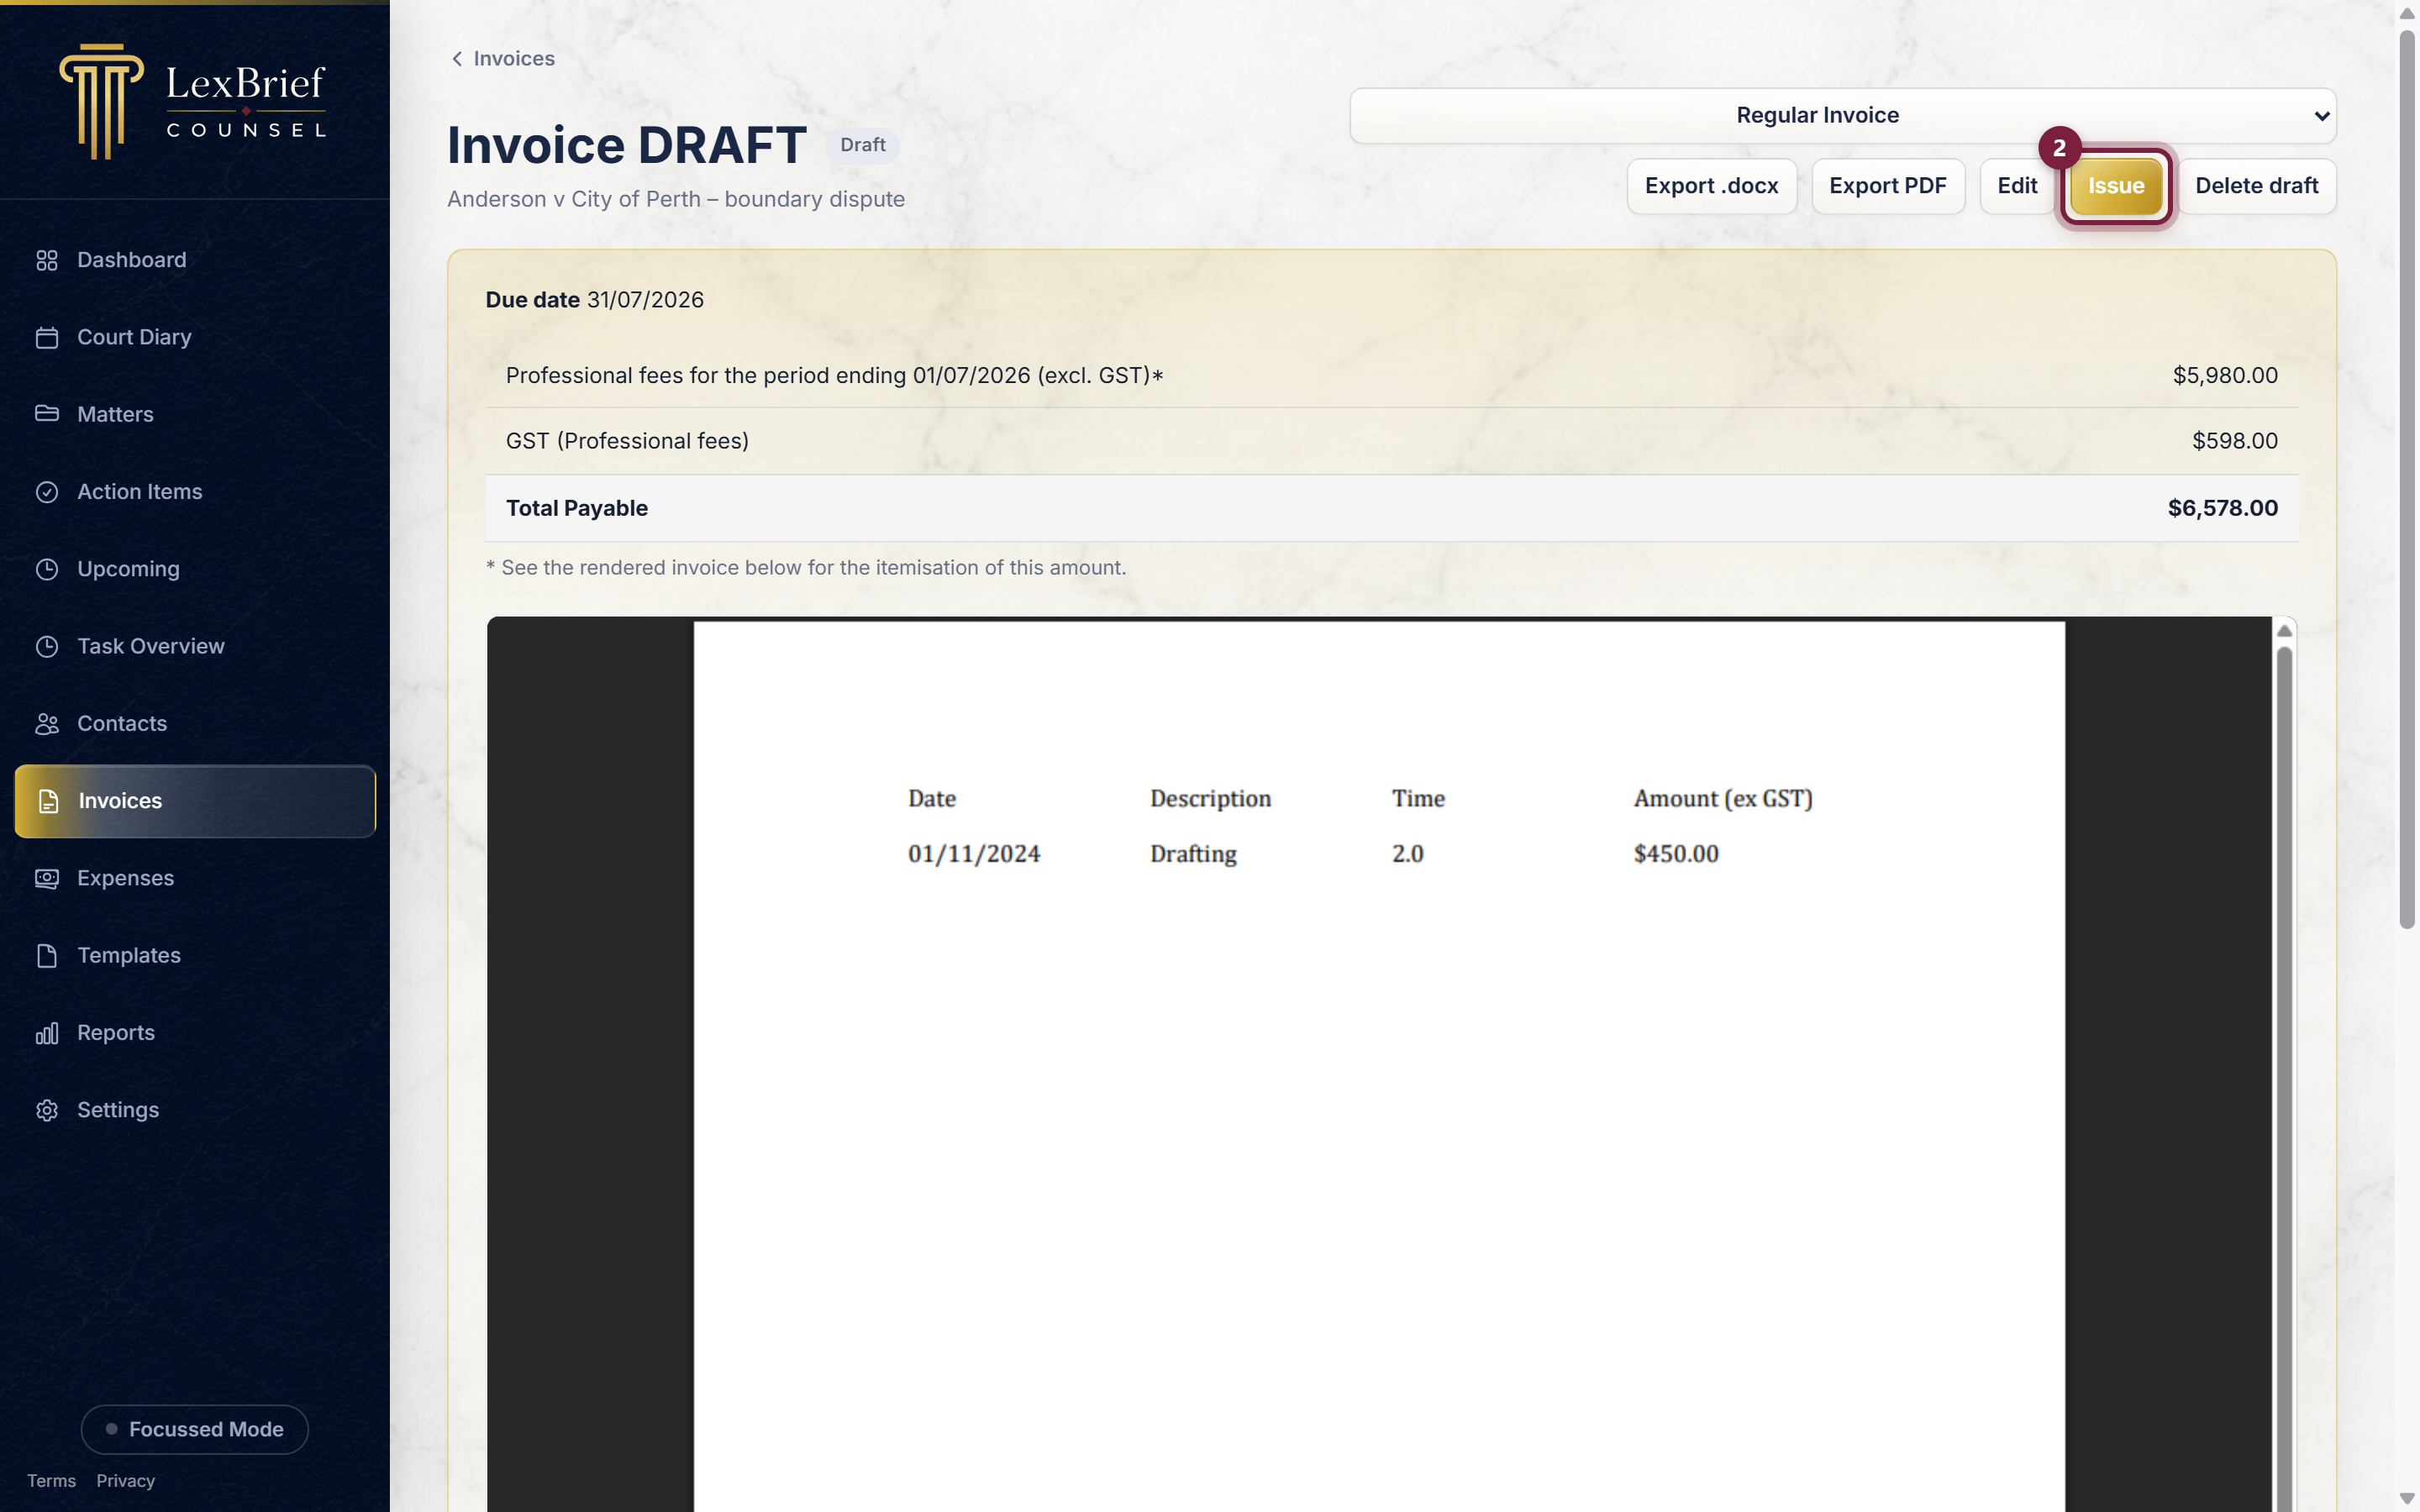
To send it, use Export PDF (or Export .docx) at the top to save a copy you can email to the instructing firm.
Step 7 – Record a payment
When the money arrives, tell LexBrief so the invoice shows as paid and your income figures stay right.
7.1 Open the invoice and click "Record payment"
Open the issued invoice (from the Invoices menu, or the matter's Invoices tab) and click the Record payment button at the top.
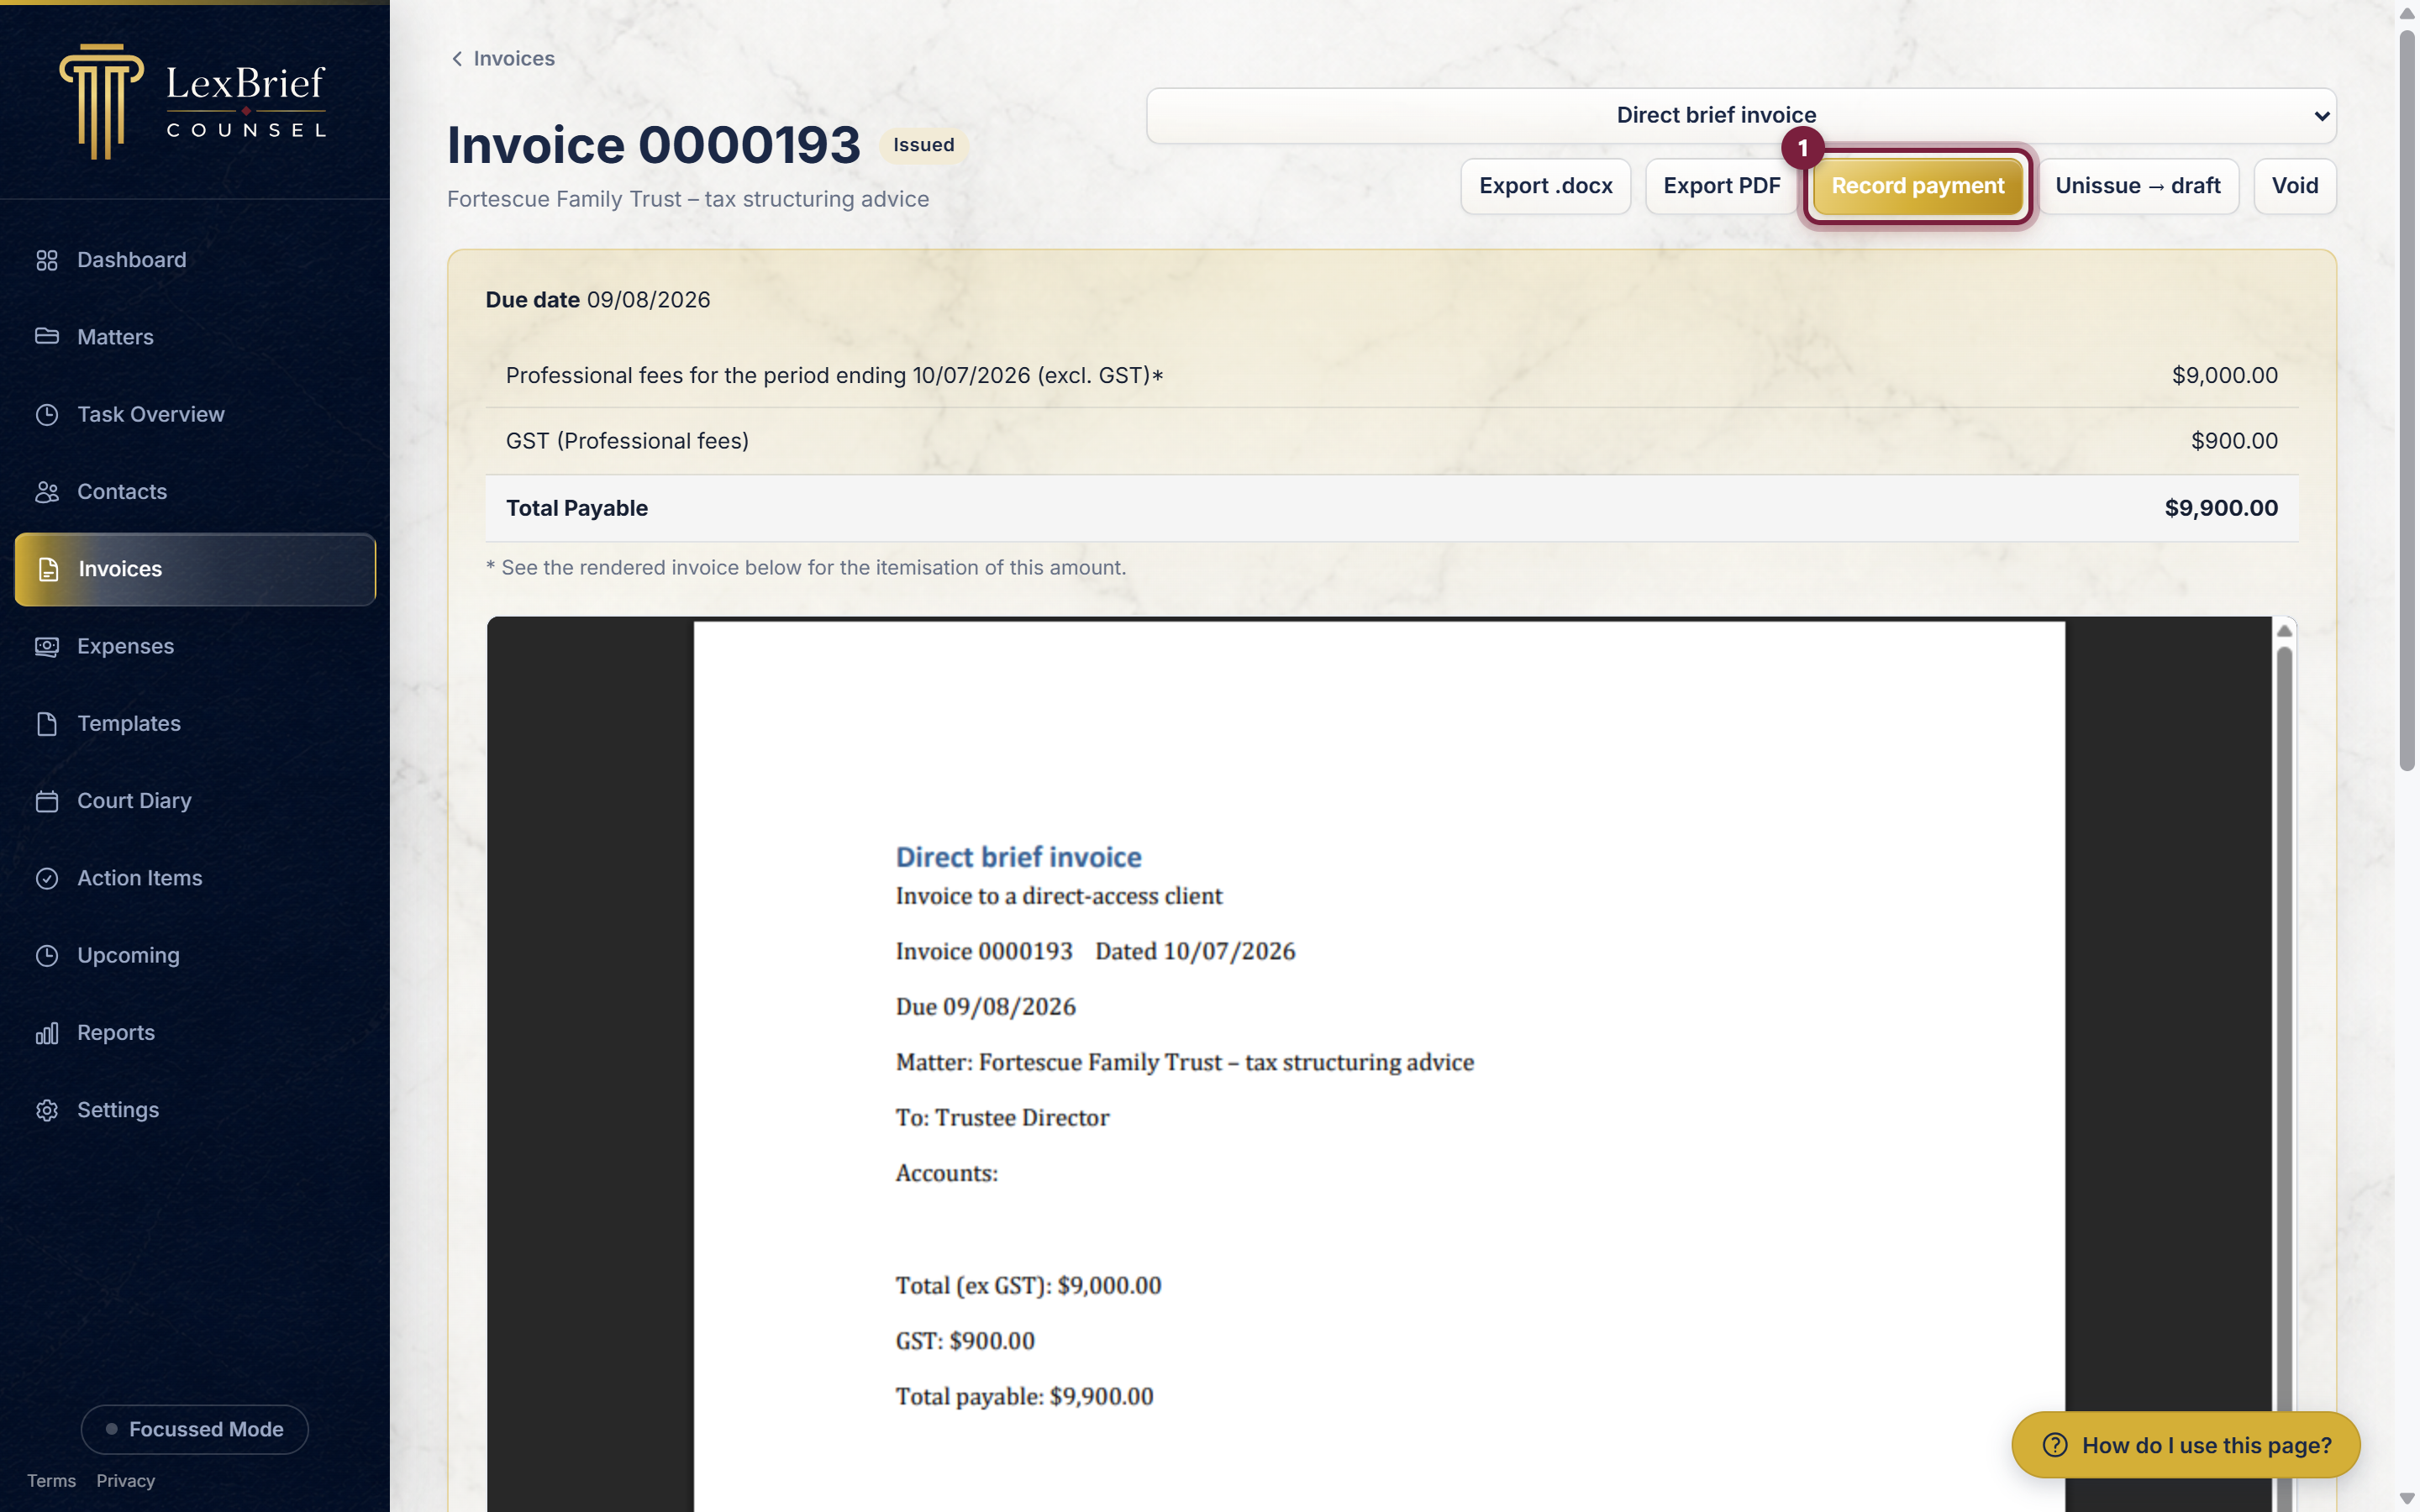
Enter the amount received and the date it was banked, then save. If it is the full amount, the invoice flips to Paid. If it is part of the amount, LexBrief tracks the balance still owing for you – you can record more payments later.
What next
That is the whole cycle – matter, time, invoice, payment. Everything else in LexBrief builds on these same steps. When you are ready to go deeper, the other guides cover each area in the same plain, step-by-step way:
Stuck on anything at all? Email support@lexbrief.au – a real person reads it, usually the same working day.