

If at any point your screen does not look like the picture, stop and email support@lexbrief.au – we would rather help than have you guess.
Before you start
File notes live inside a matter, so you need a matter open first. If you have not created one yet, the Matters guide walks you through it. That is the only thing you need before you begin.
A note on wording: the dark strip of links down the left-hand side of the screen is the menu. A matter is a single file or brief you are working on. The row of words across the top of an open matter (Detail, Rates, Tasks, and so on) are the tabs – clicking one shows a different part of that matter.
What a file note is
A file note is simply a note-to-file: your own written record of an interaction on a matter. For example:
- “Client called and said she is happy to settle in the $40,000–$55,000 range.”
- “Instructor confirmed the discovery deadline is 30 June.”
- “Conference with counsel opposite – agreed to exchange outlines by Friday.”
Each note records when it happened, what kind of interaction it was (a phone call, a conference, an instruction, or something else), an optional short title, and the note itself in your own words.
- File notes record what has already happened – your interactions on the file.
- The Court Diary (a matter’s Key dates) records future court dates and deadlines – what is coming up.
- The Chronology tab records the events of the dispute itself (who did what, when) – the story of the case, for a document you can produce.
Opening a matter’s File notes
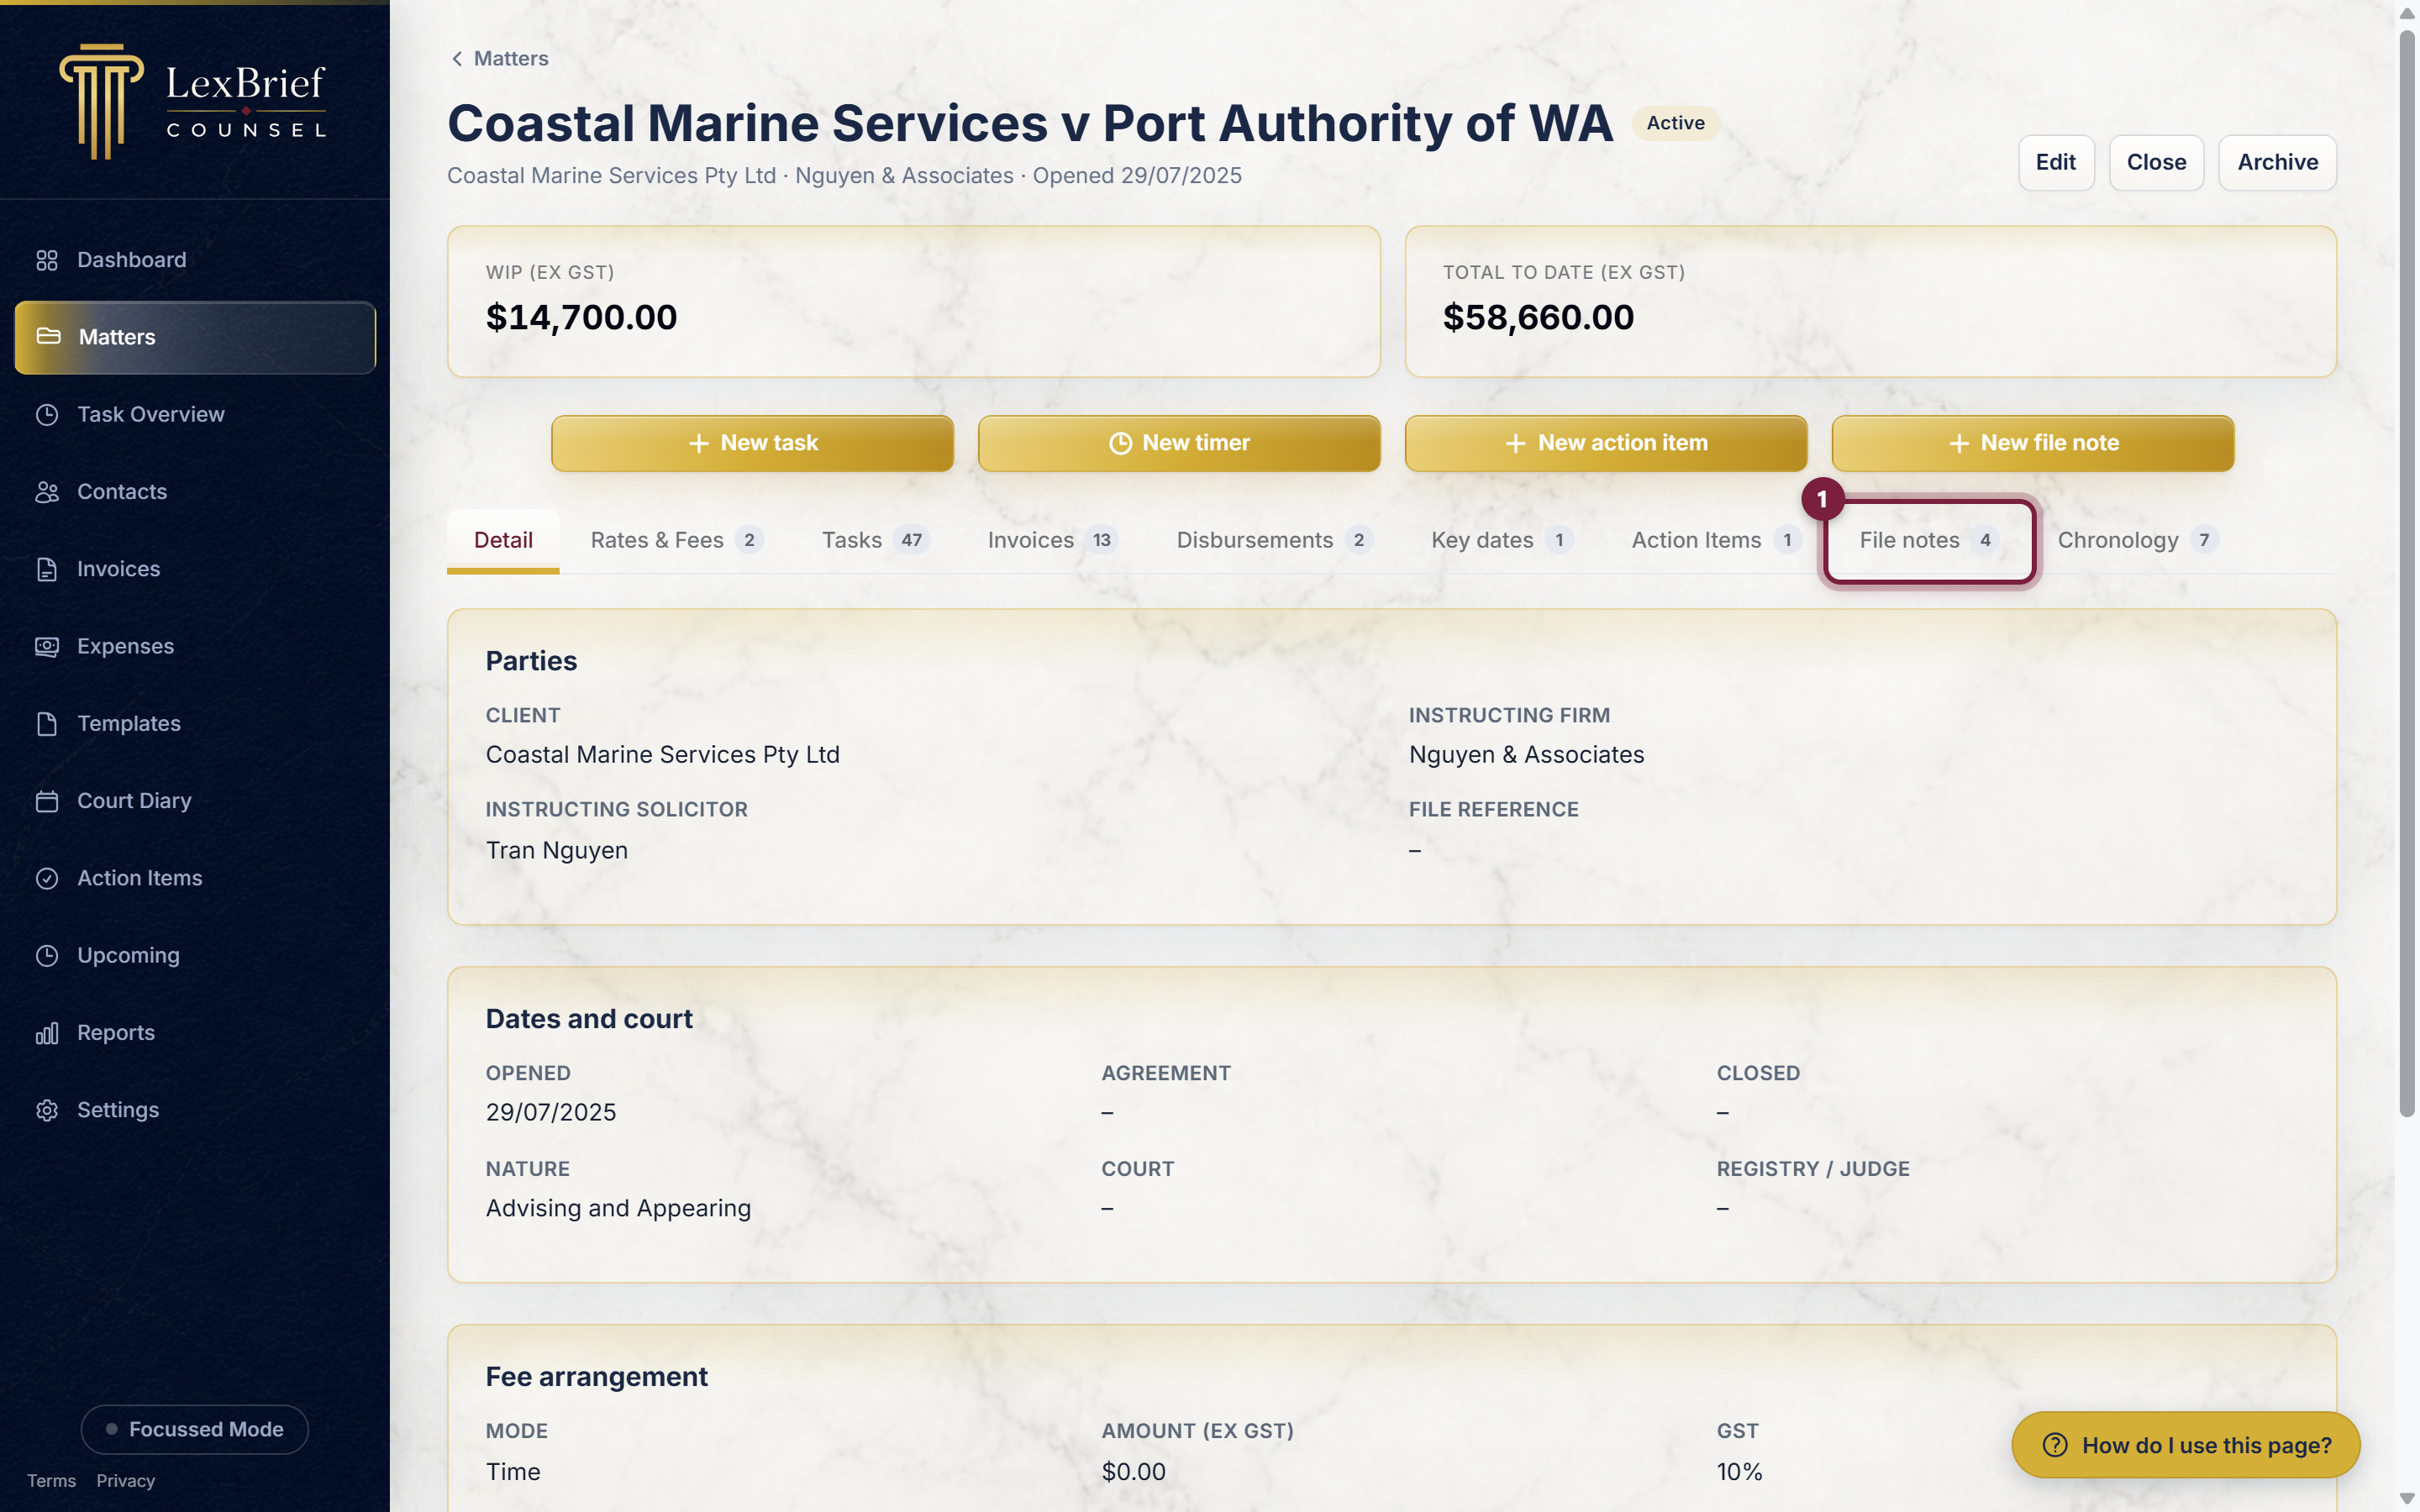
Open the matter you want (click Matters in the left-hand menu, then click the matter’s name). Along the top of the matter you will see a row of tabs. Click the File notes tab.
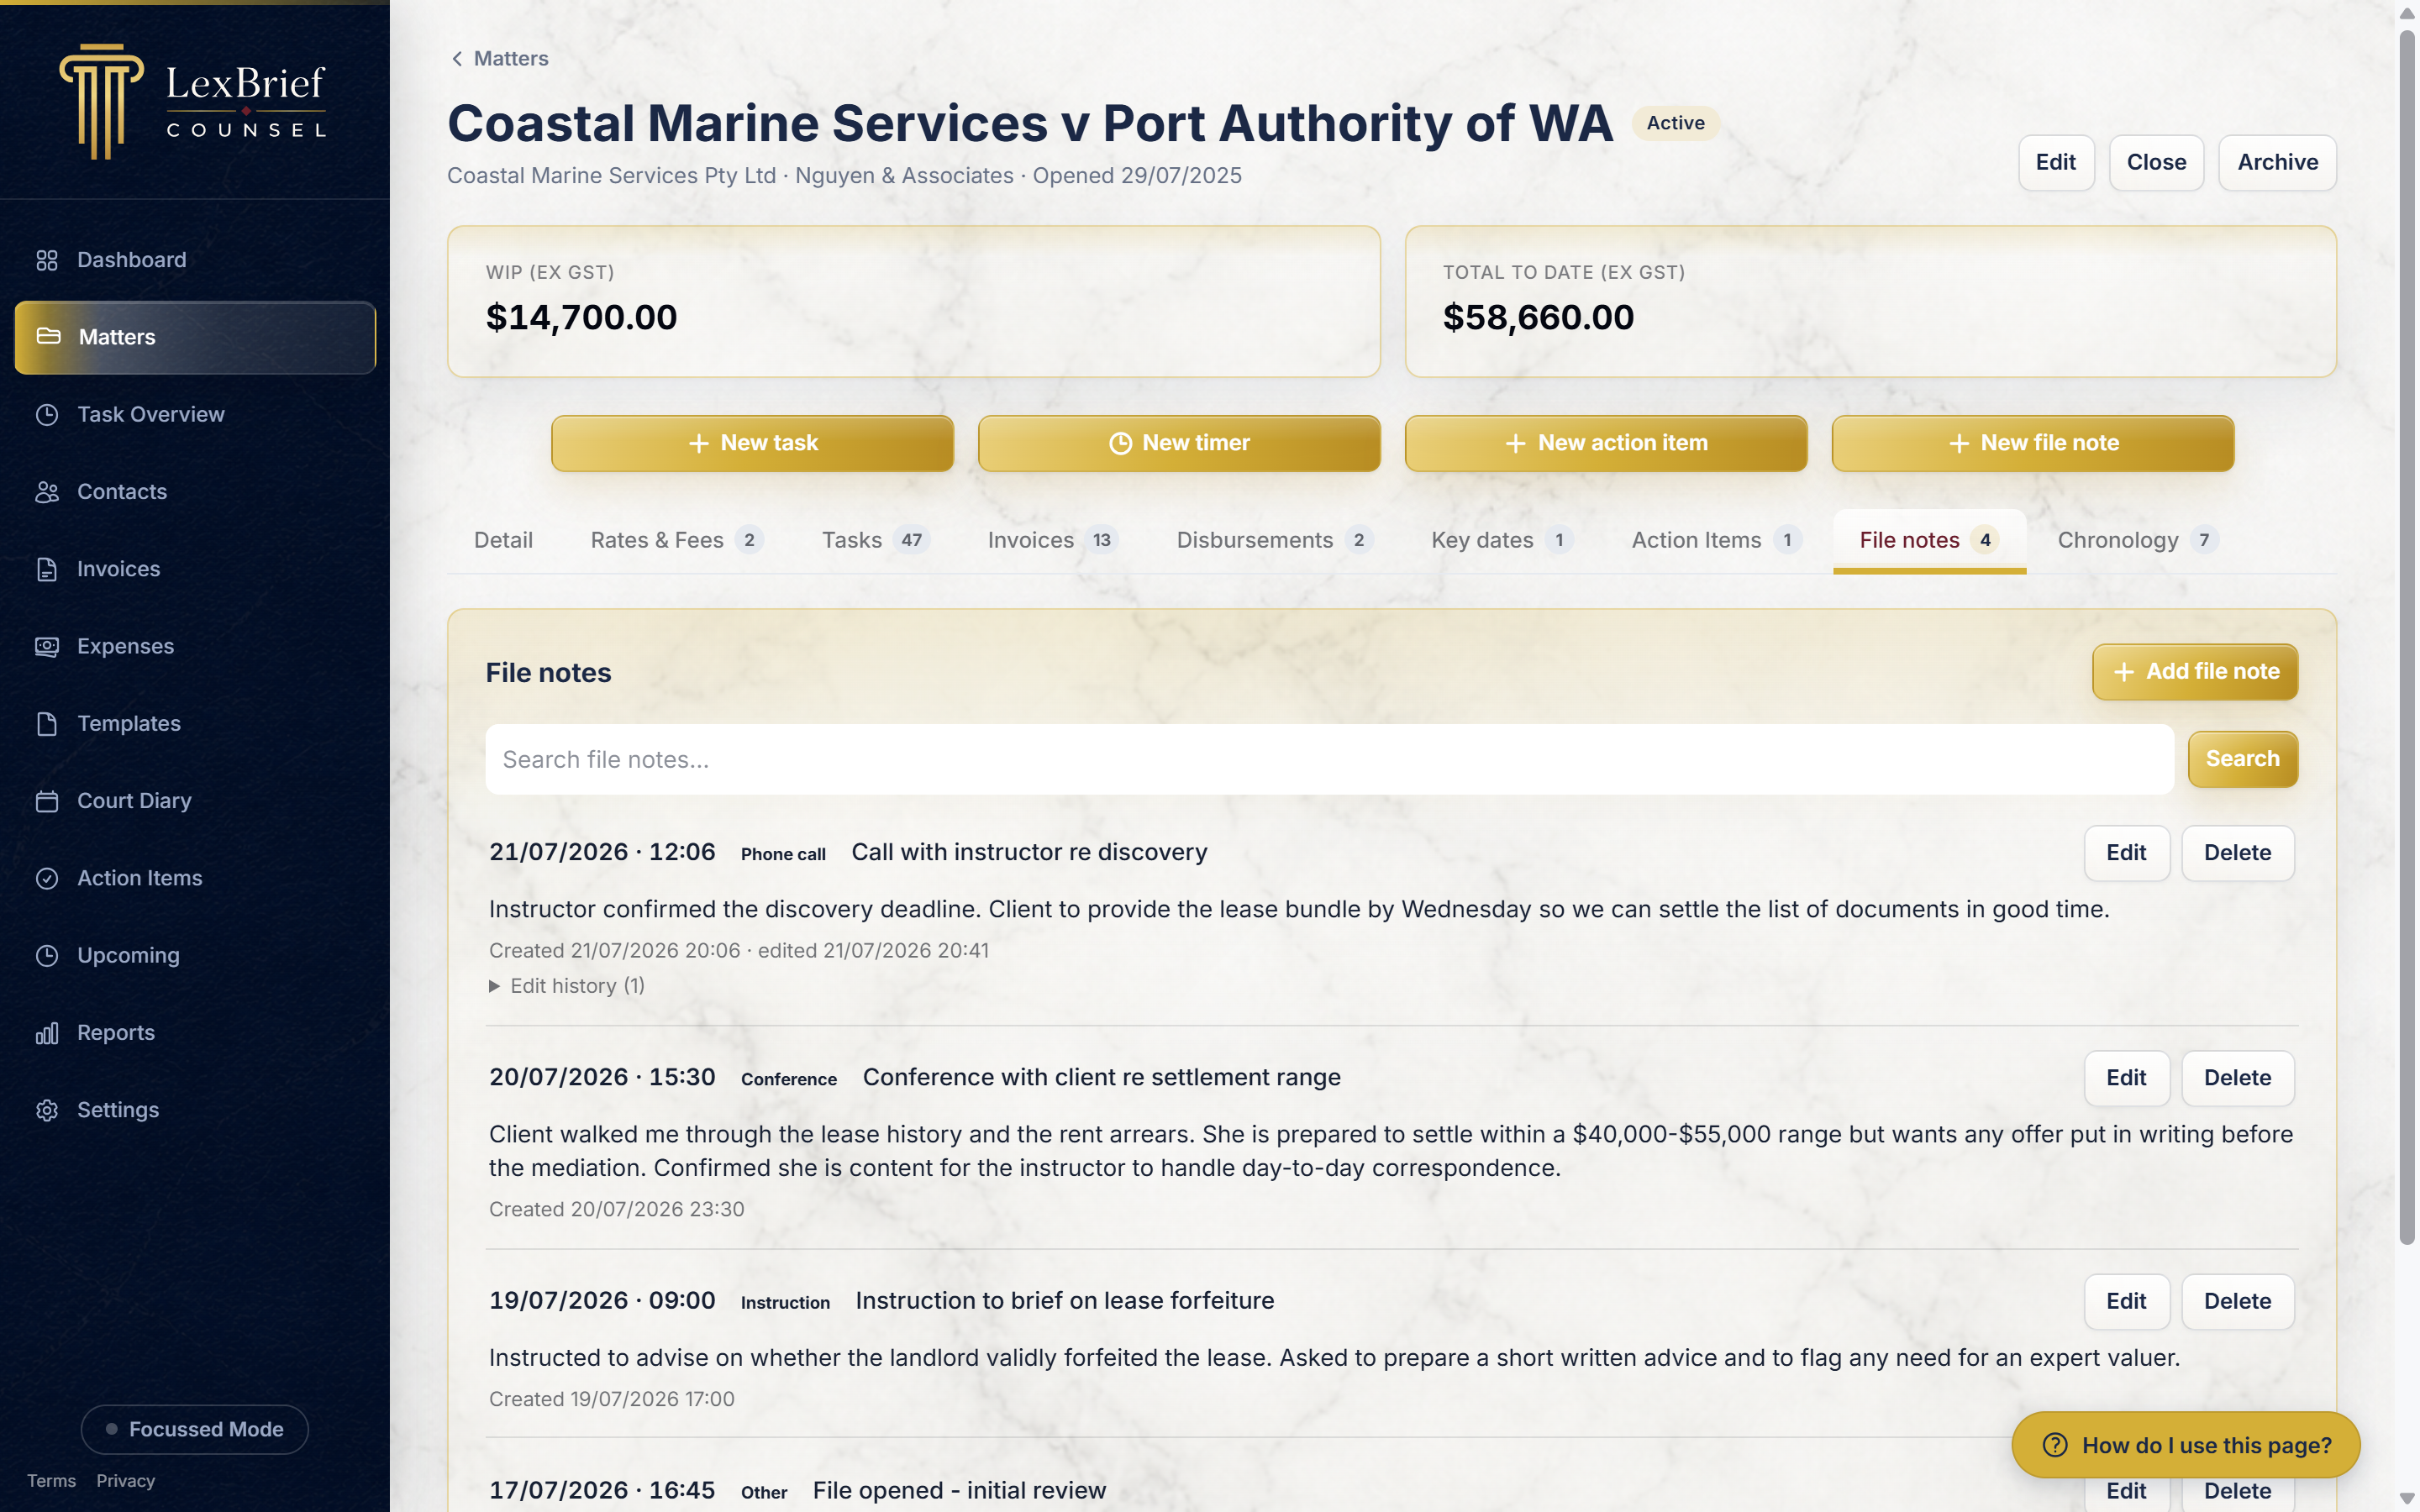
What you should see. The File notes area opens. Any notes already on this matter appear as a list, newest first. If there are none yet, you will see a short “No file notes yet” message instead – that is fine, you are about to add one.
Adding a file note
1. Click the Add file note button at the top-right of the File notes area.
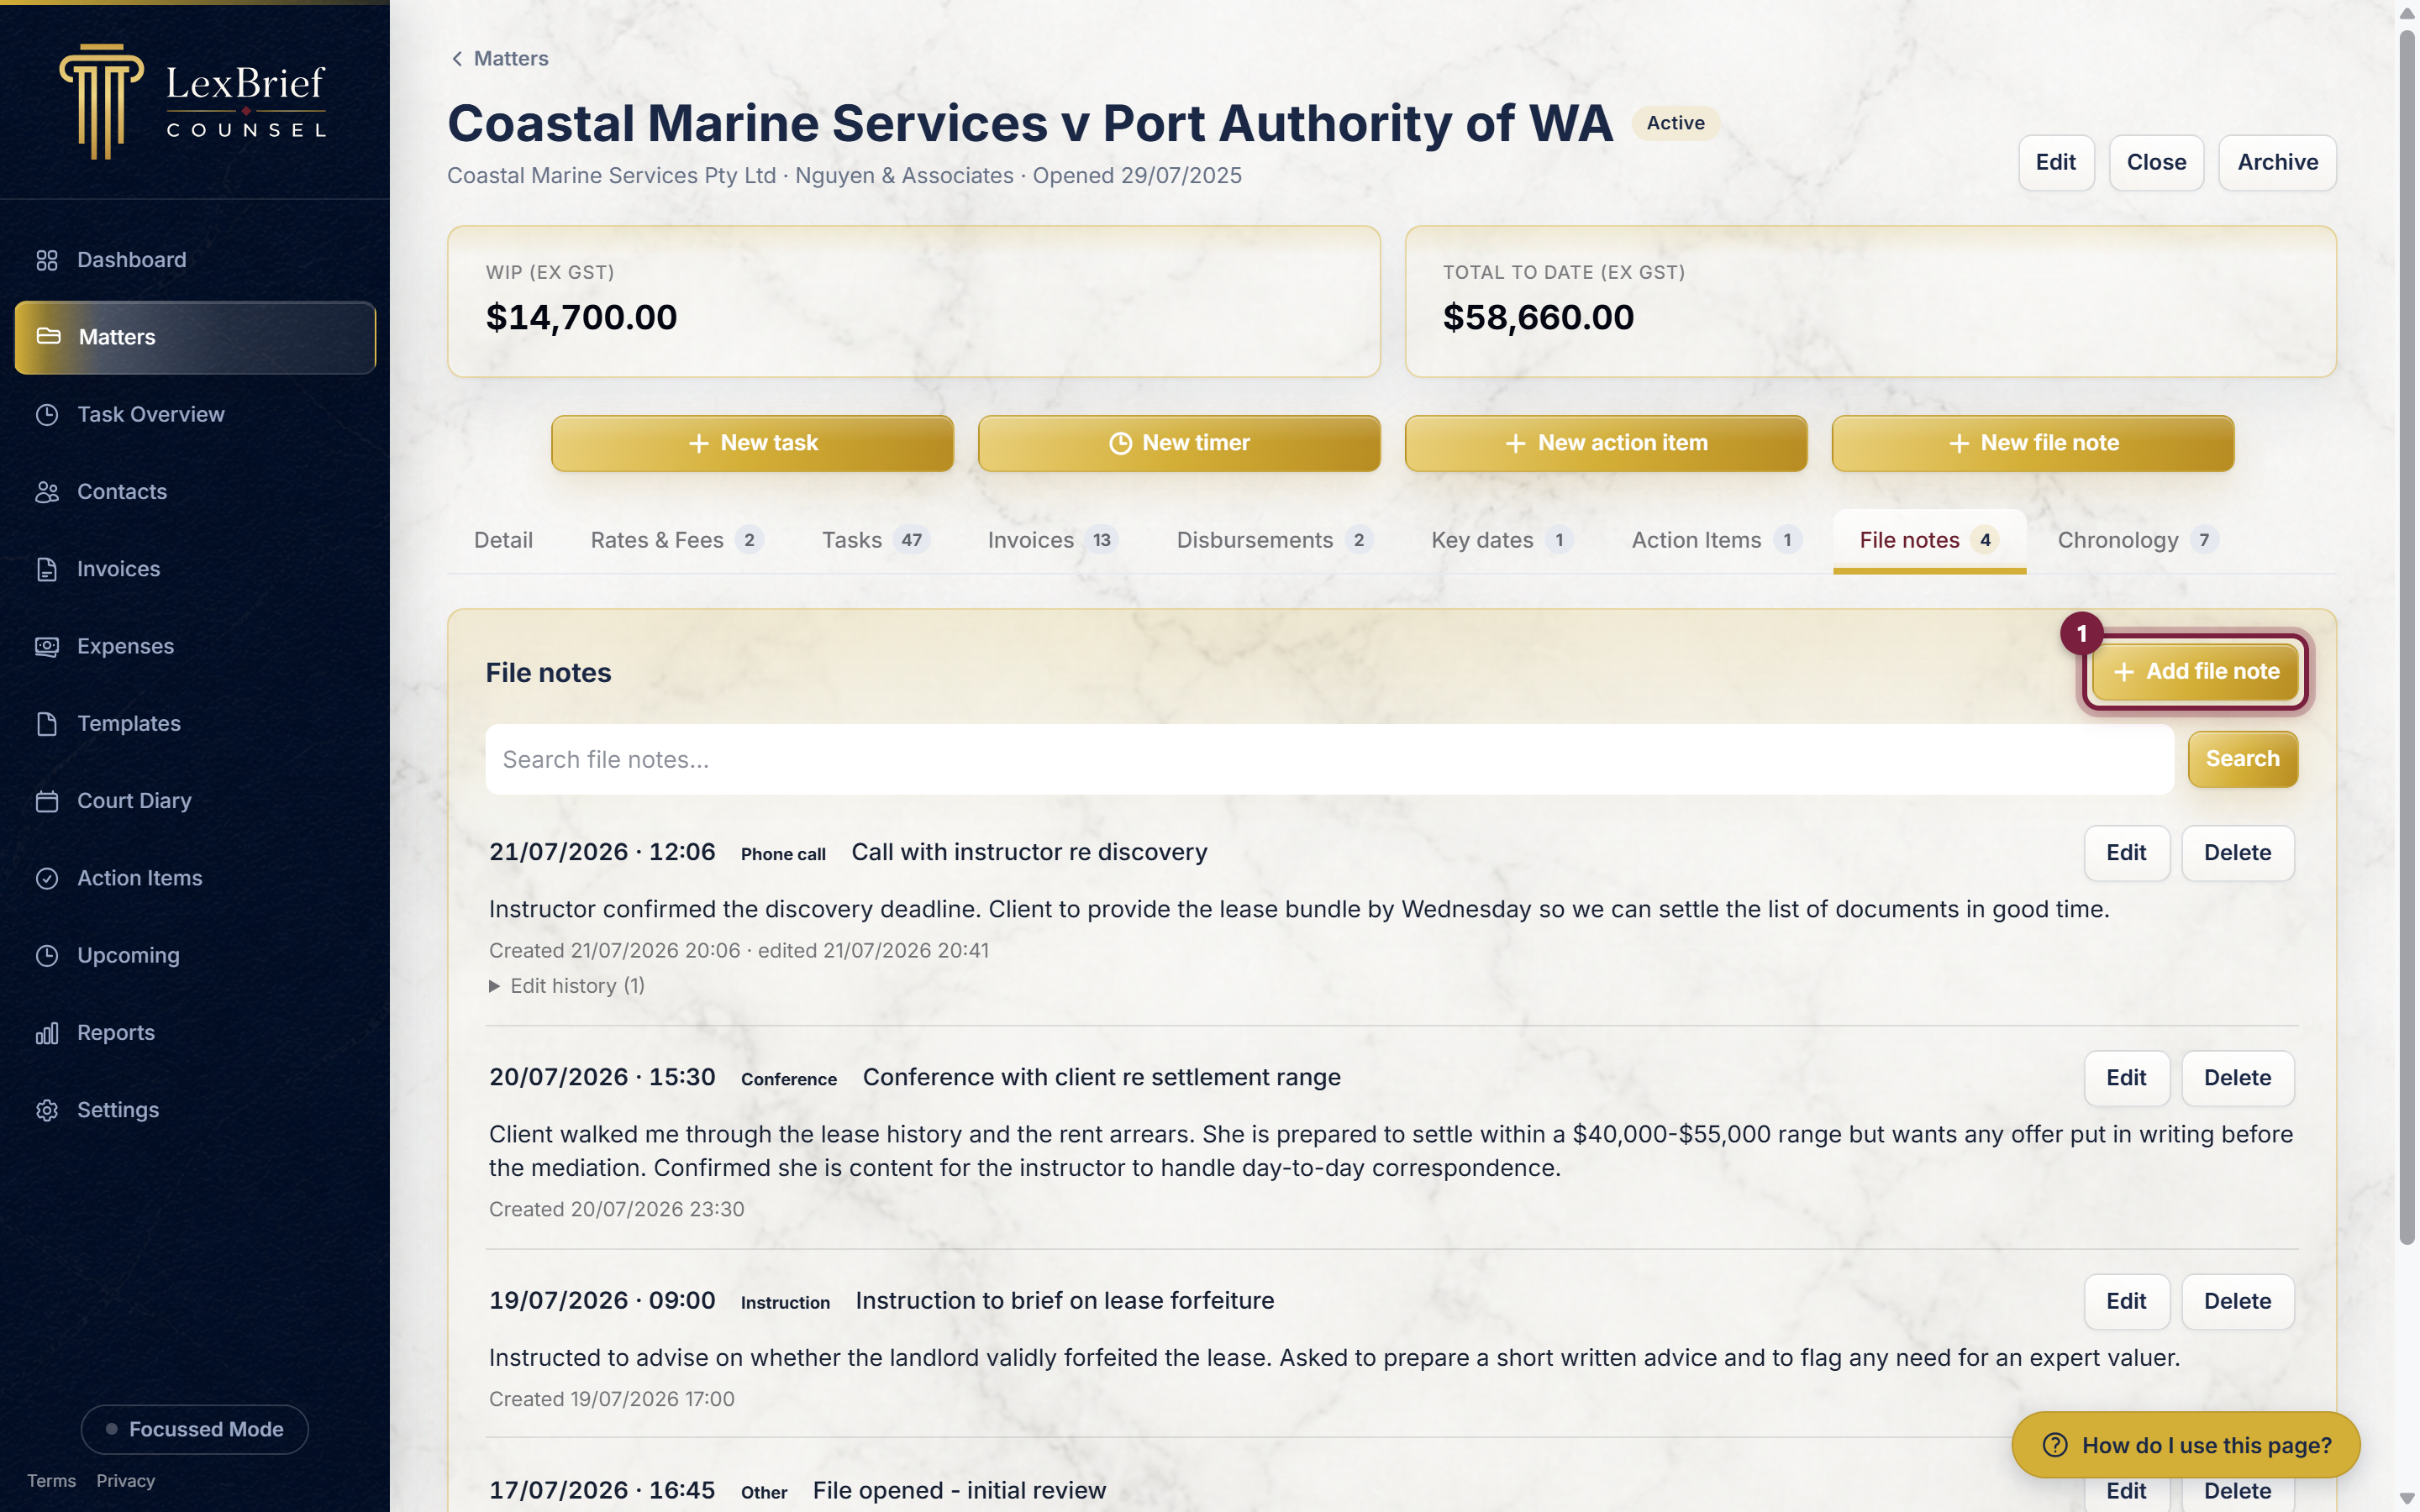
A small form opens on the same page. There is no separate page to go to – you fill it in right here.
2. Check the Date and Time. LexBrief fills them in with the current date and time for you, so if you are writing the note as the call ends you can leave them. The date and time are your record of when the interaction happened, not when you typed it up – so if you are writing up yesterday’s call, just change the date to yesterday. The Time is optional; clear it if it does not matter.
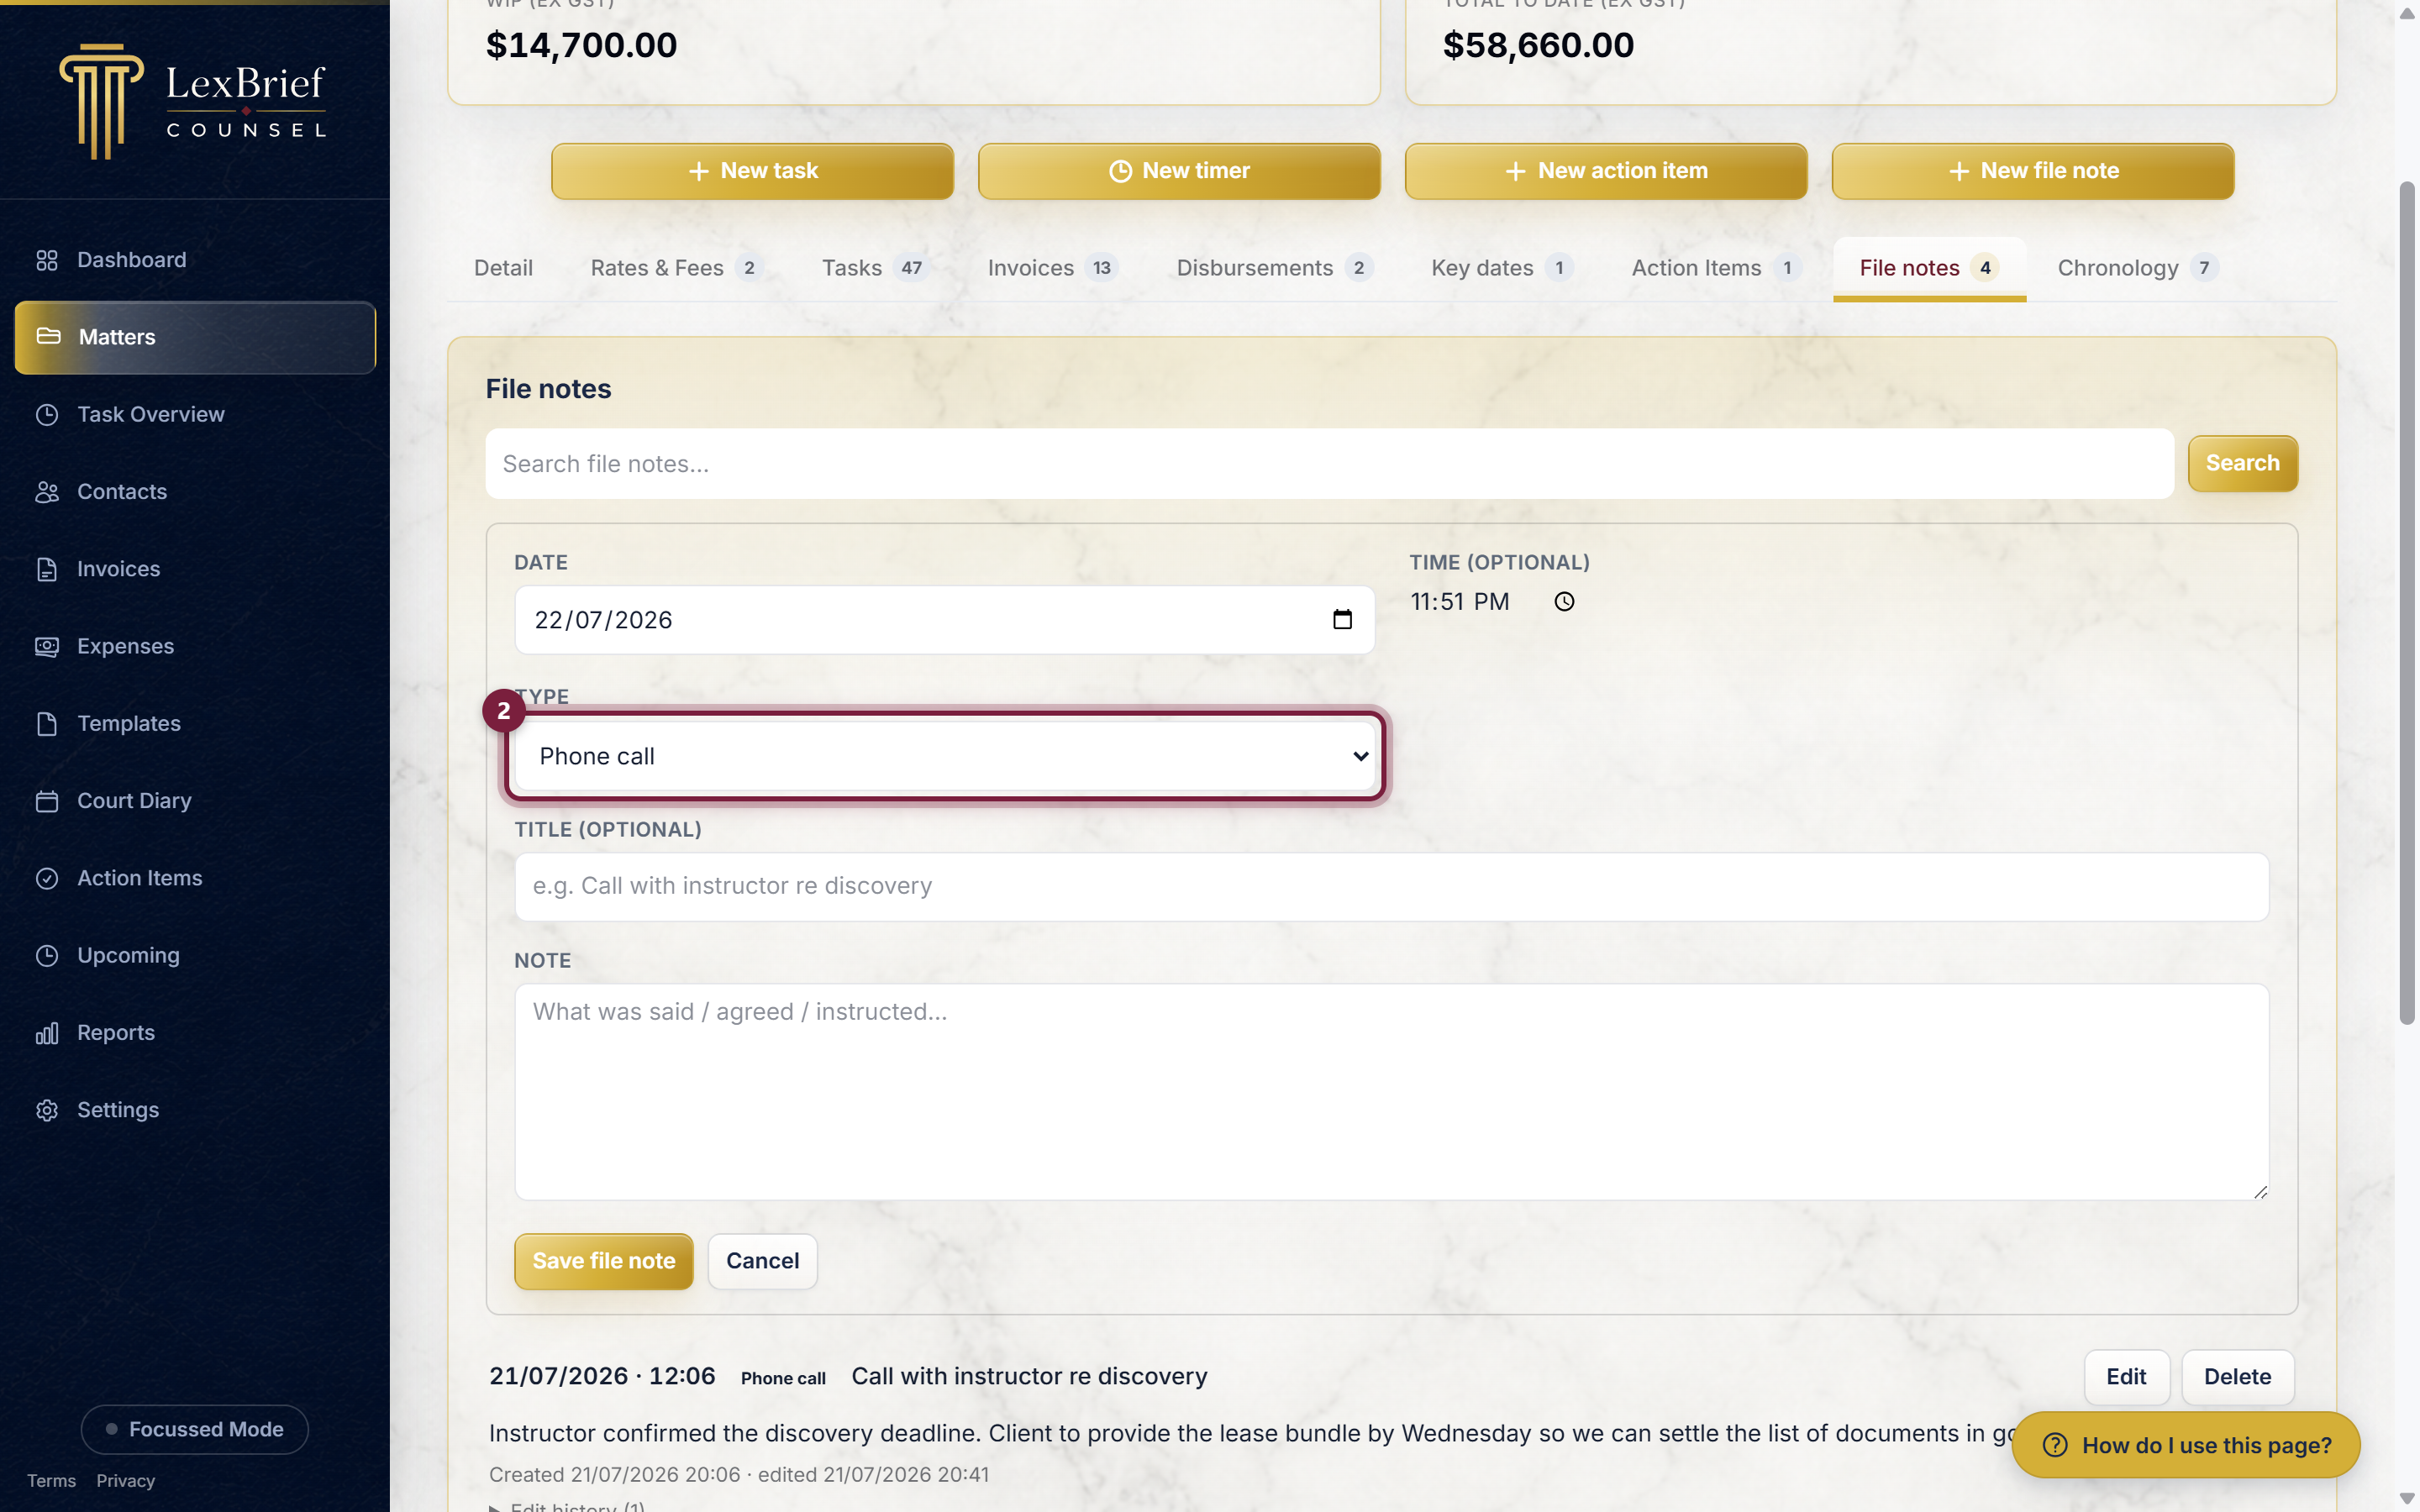
3. In the Type box, choose what kind of interaction this was – a Phone call, a Conference, an Instruction, or Other. Click the box and pick from the short list that appears.
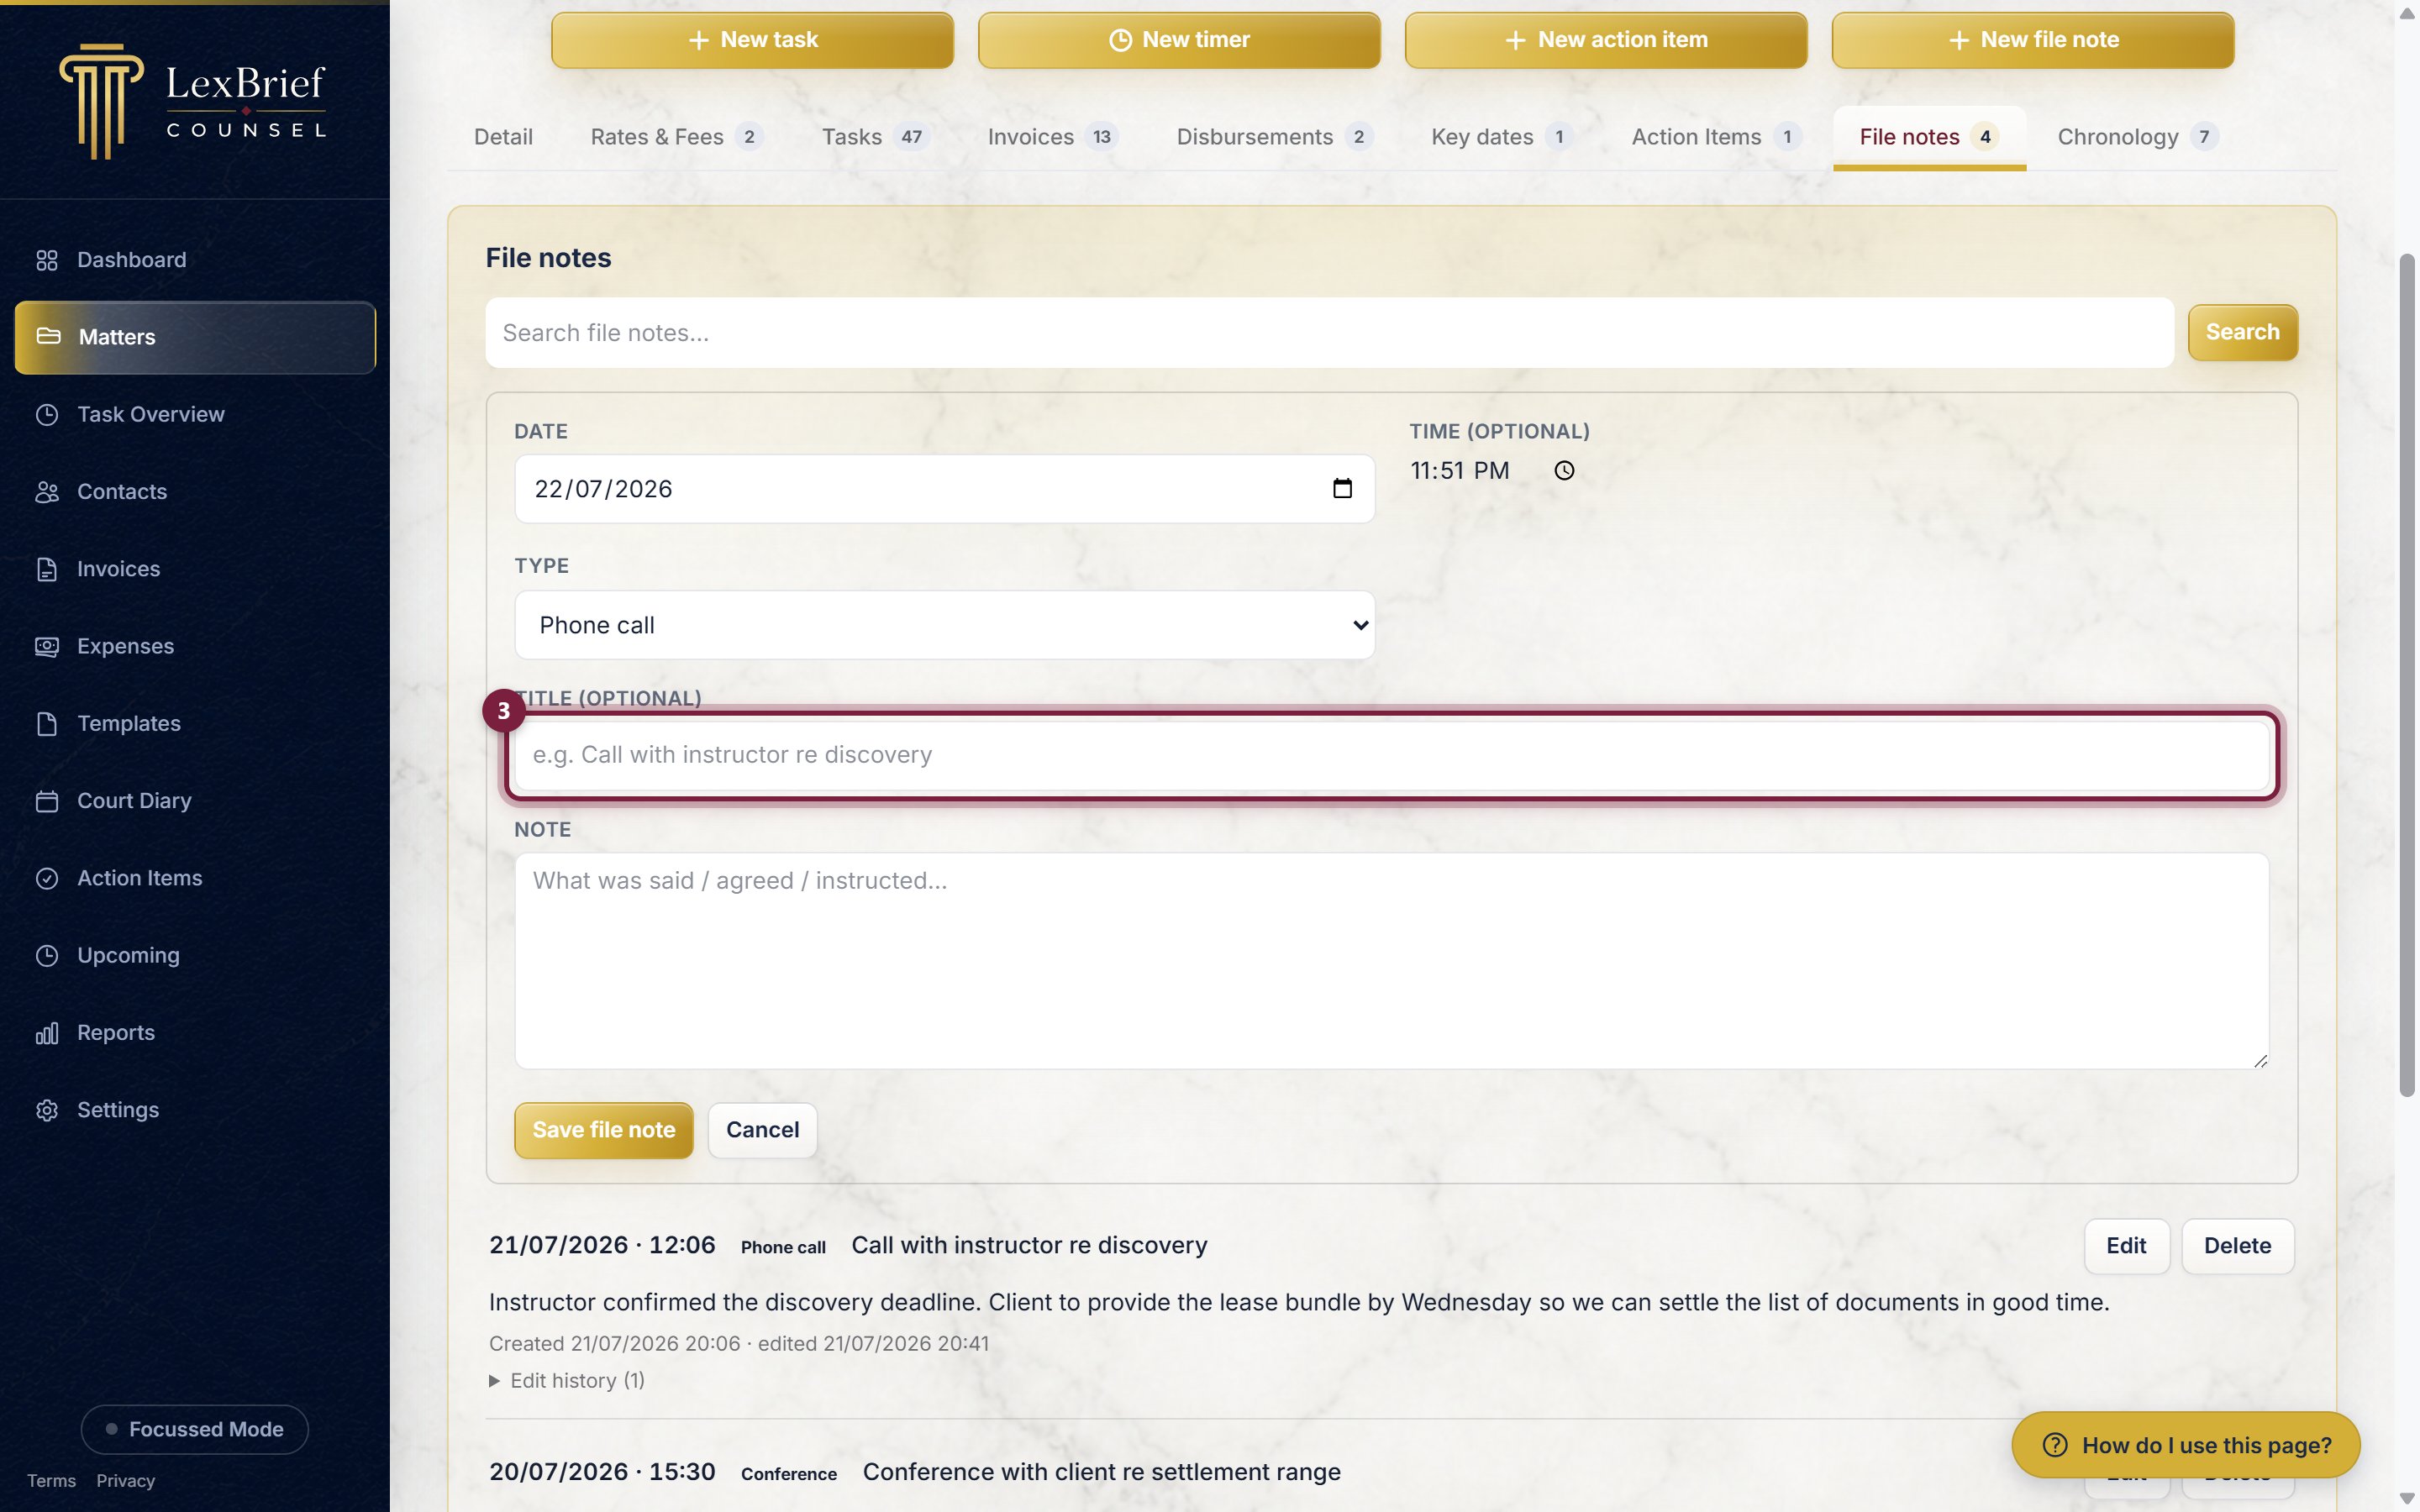
4. In the Title box, type an optional short heading – something you would recognise at a glance later, like “Call with instructor re discovery”. You can leave this blank if you like.
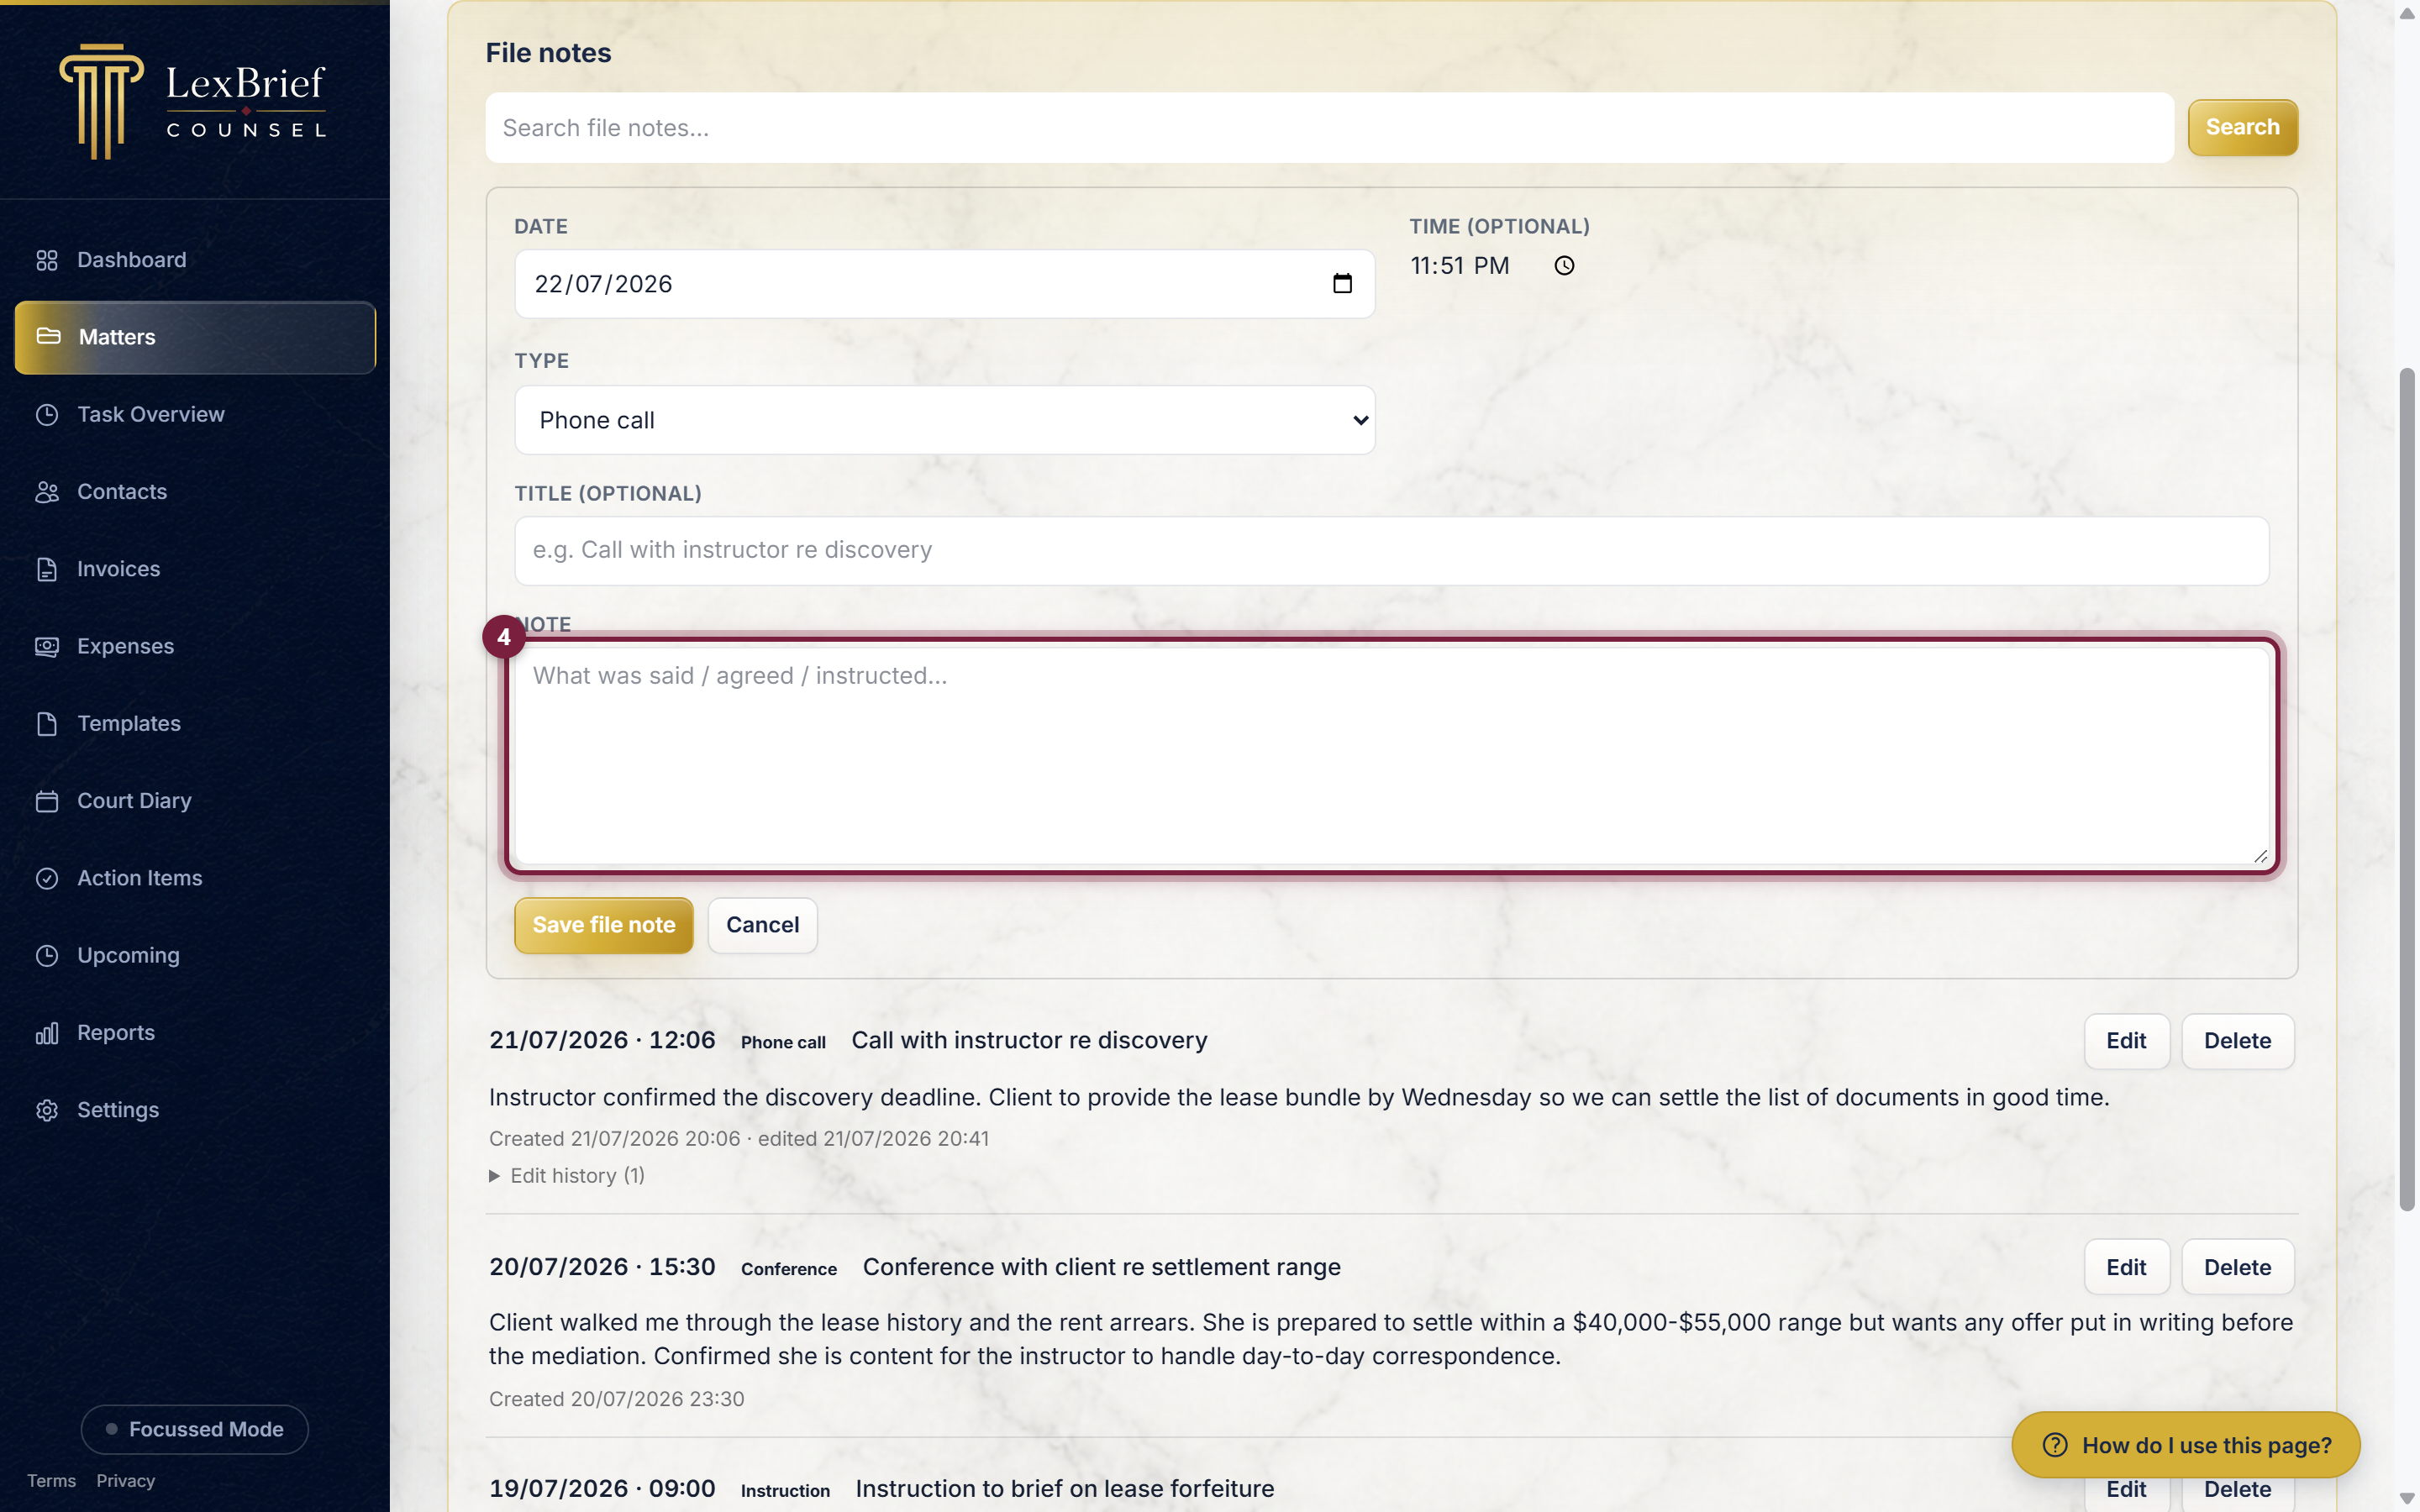
5. In the Note box, type the note itself – what was said, agreed, or instructed, in your own words. This is the only part you must fill in.
6. Click the Save file note button at the bottom of the form.
What you should see. The form closes and your new note appears at the top of the list, showing its date, time, type and text.
Editing or deleting a note
Every note in the list has an Edit button and a Delete button on its right.
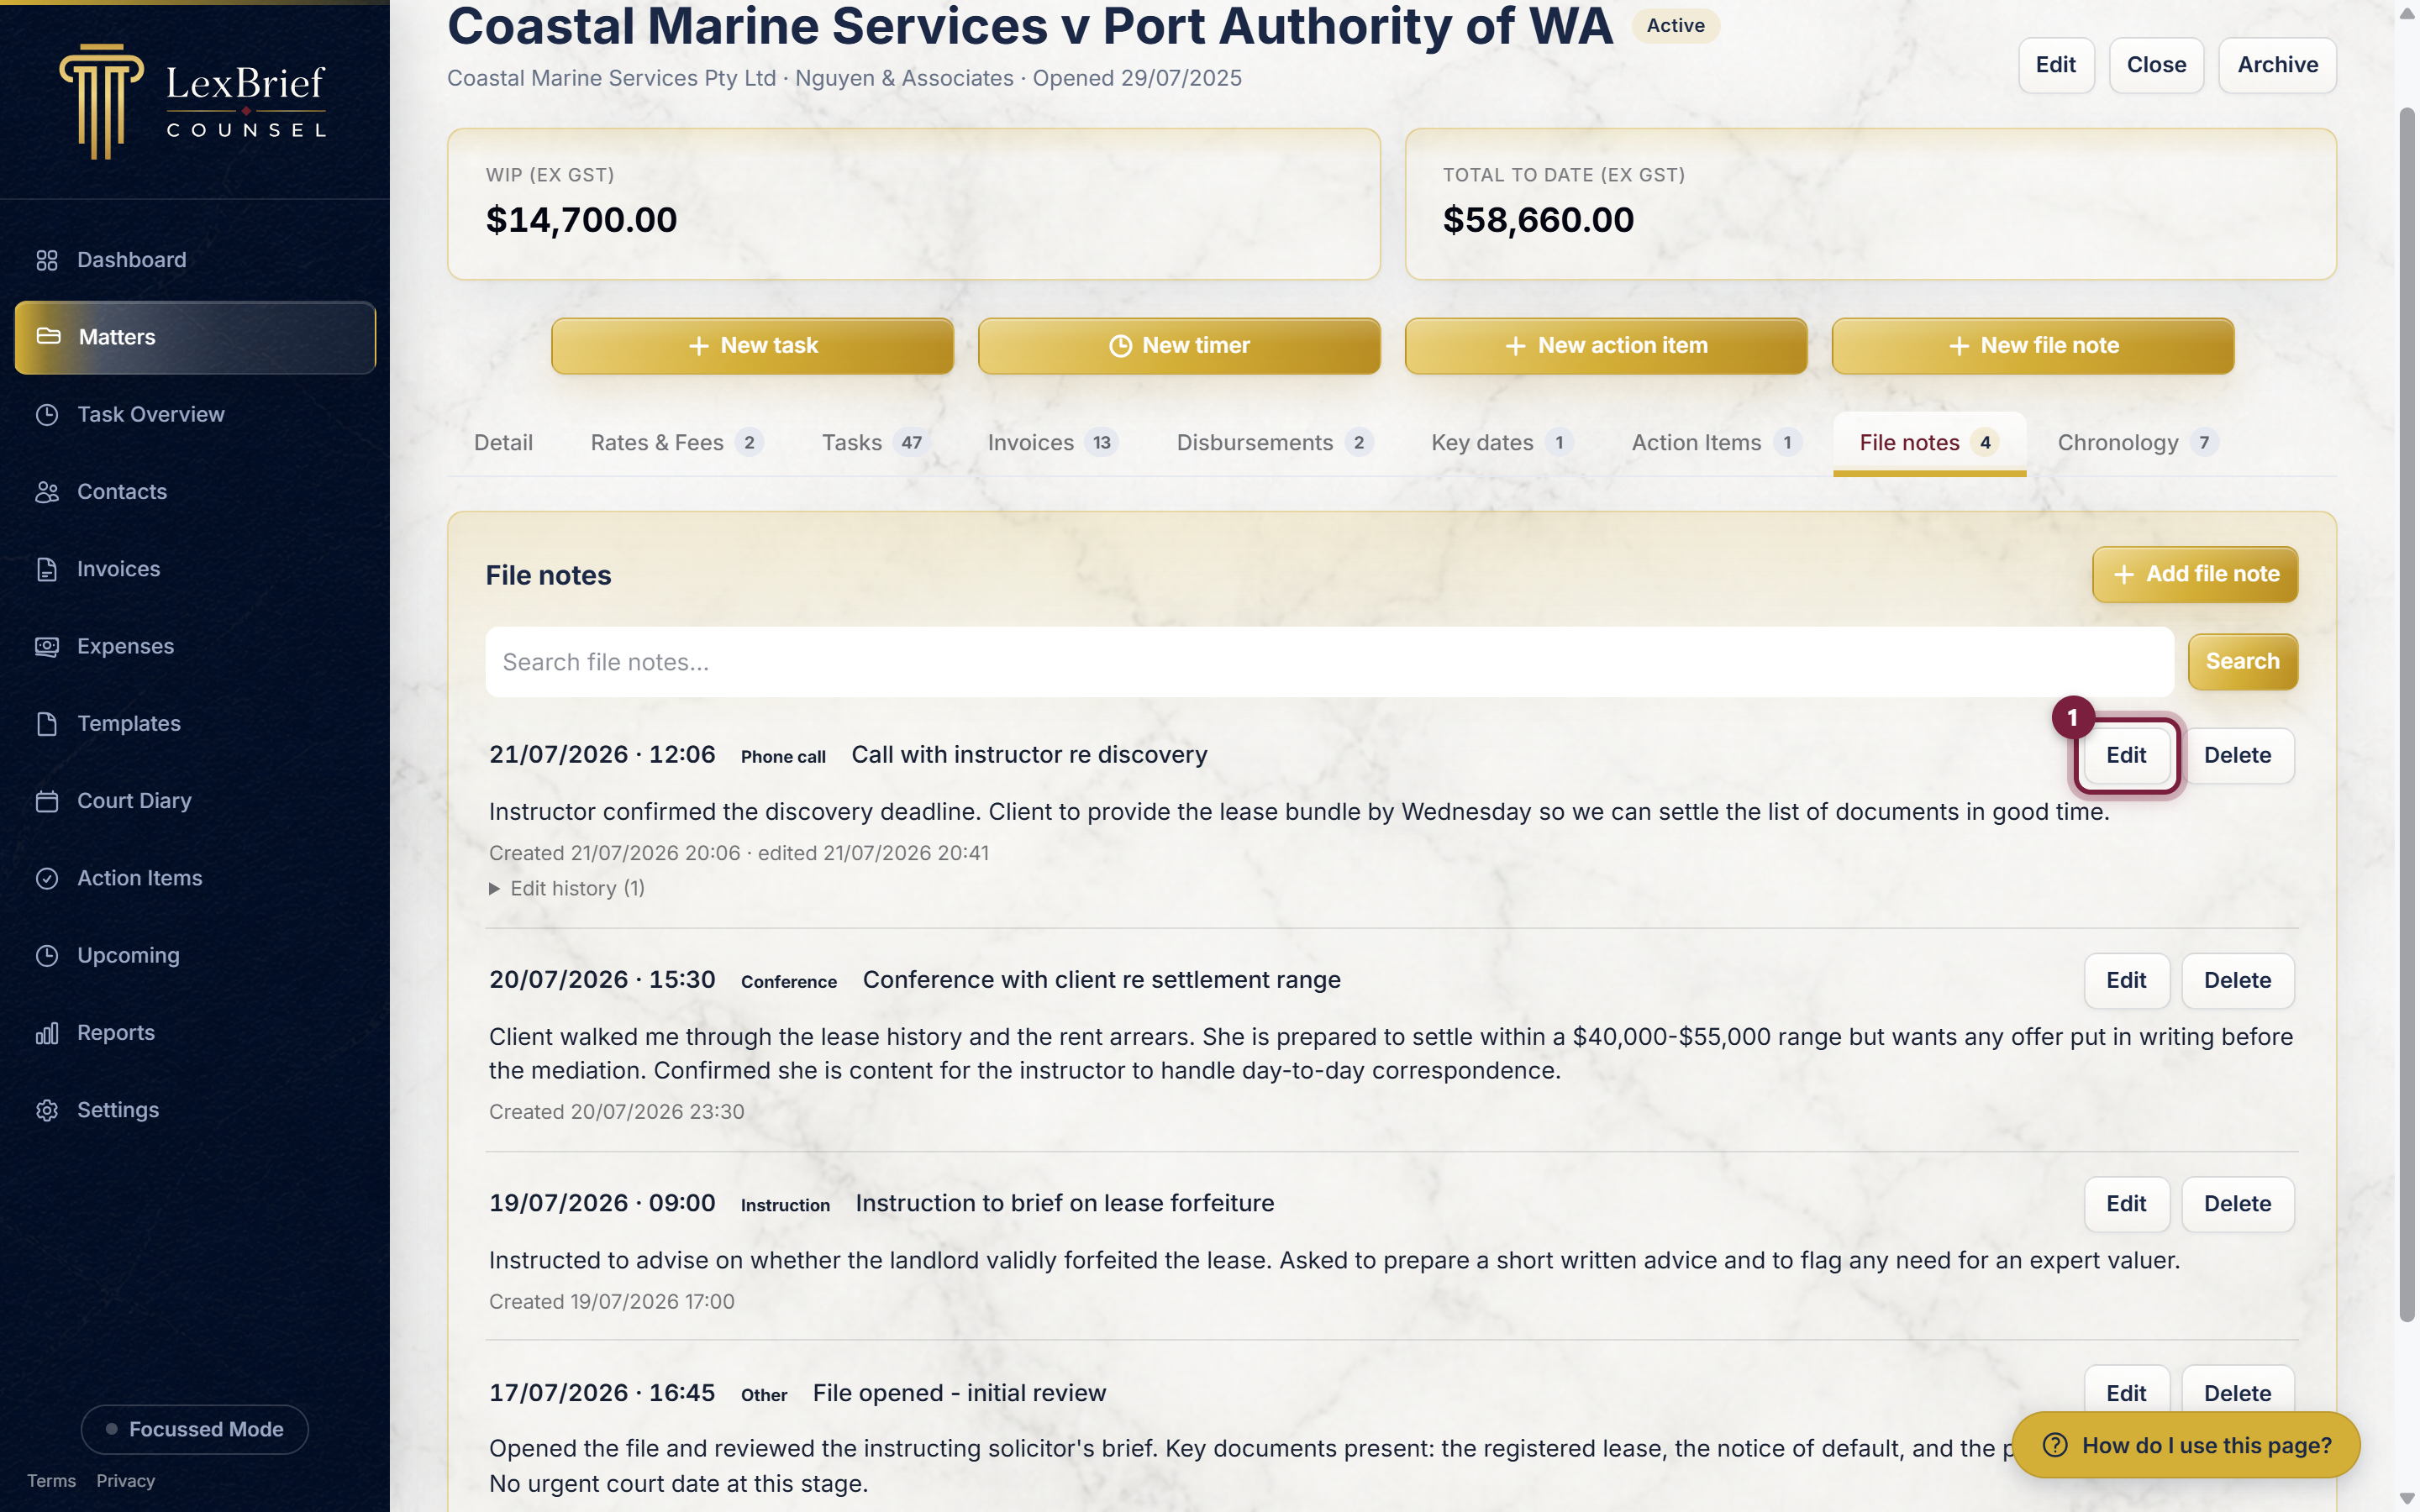
- Click Edit to open that note in a small form (the same form as when you added it) so you can change the date, time, type, title or text. Then click Save changes.
- Click Delete to remove the note. LexBrief asks you to confirm first, so you cannot delete one by accident.
The two edit modes
LexBrief can handle edits to your file notes in one of two ways. You choose which, once, and it applies to every matter.
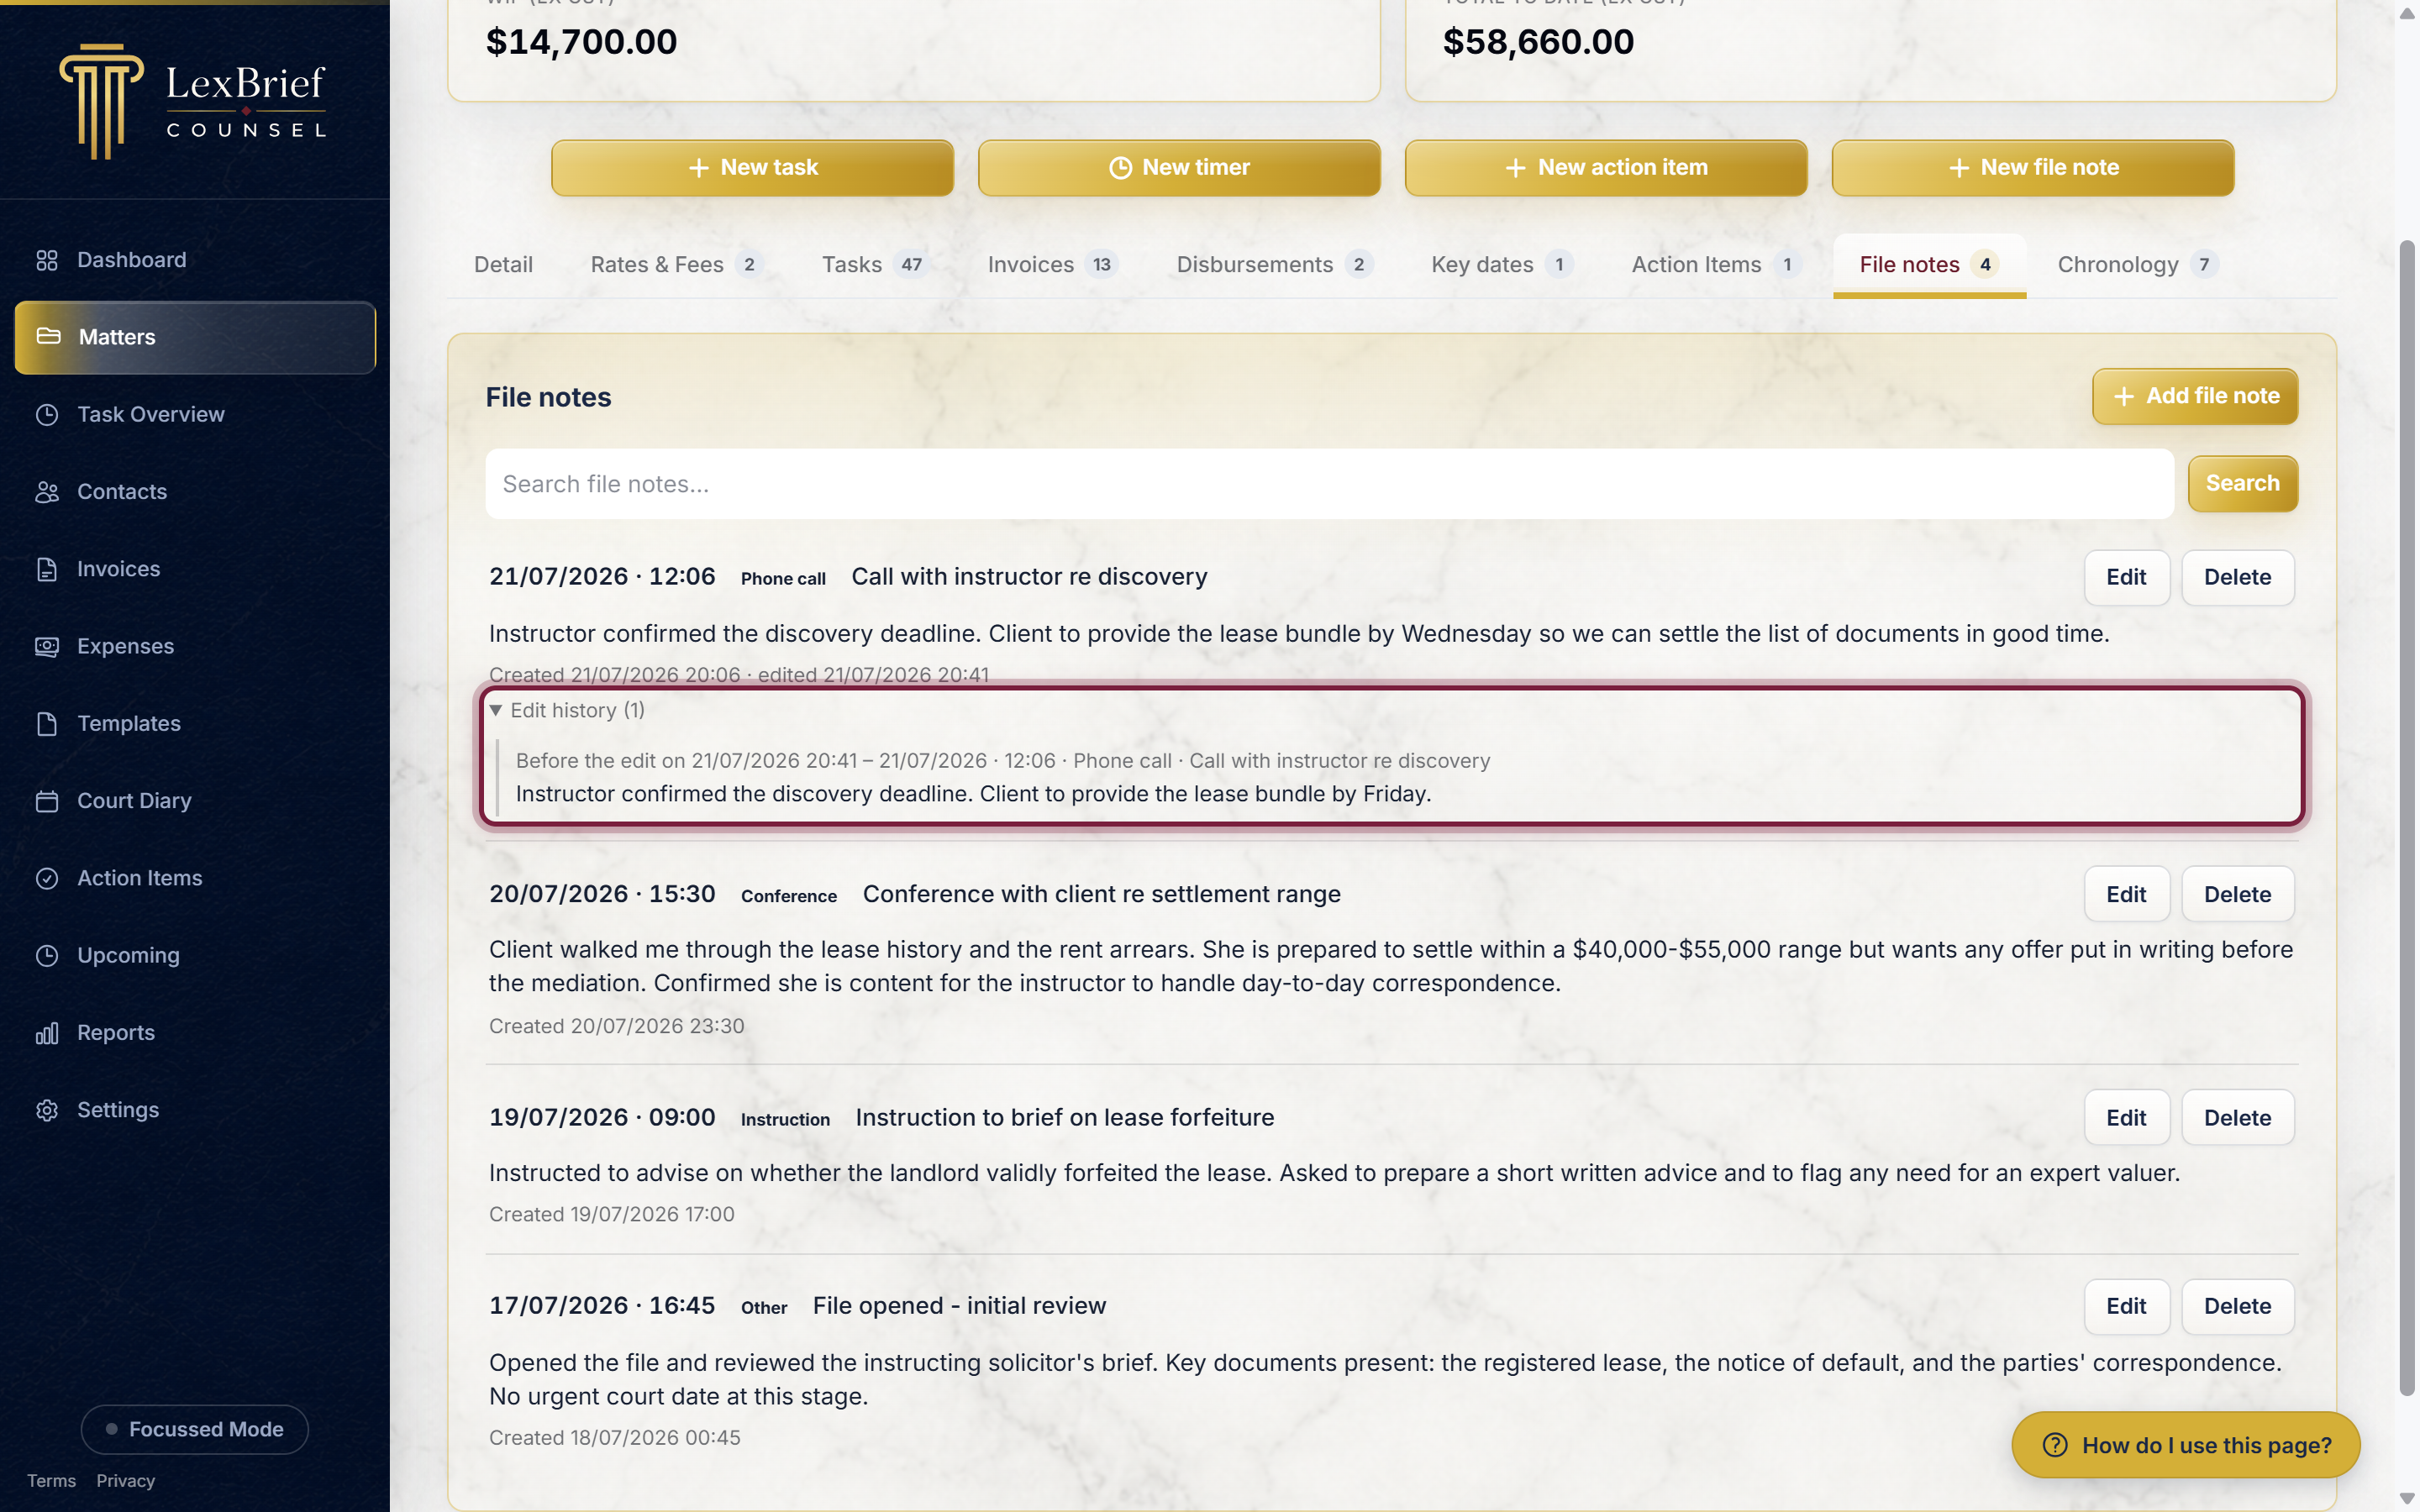
- Keep an edit history (the recommended setting, and the one you start with). Every time you edit or delete a note, LexBrief quietly keeps a copy of the previous version. Each note shows when it was created and when it was last edited, and an expandable Edit history line lets you see exactly what it said before. Nothing is lost.
- Plain editing. Edits and deletions are made with no history kept. Simpler, but there is no record of what a note used to say.
When the edit history is on, an edited note looks like this – note the “Edit history” line, opened here to show the previous wording:
Where to switch the edit mode
1. Click Settings in the left-hand menu.
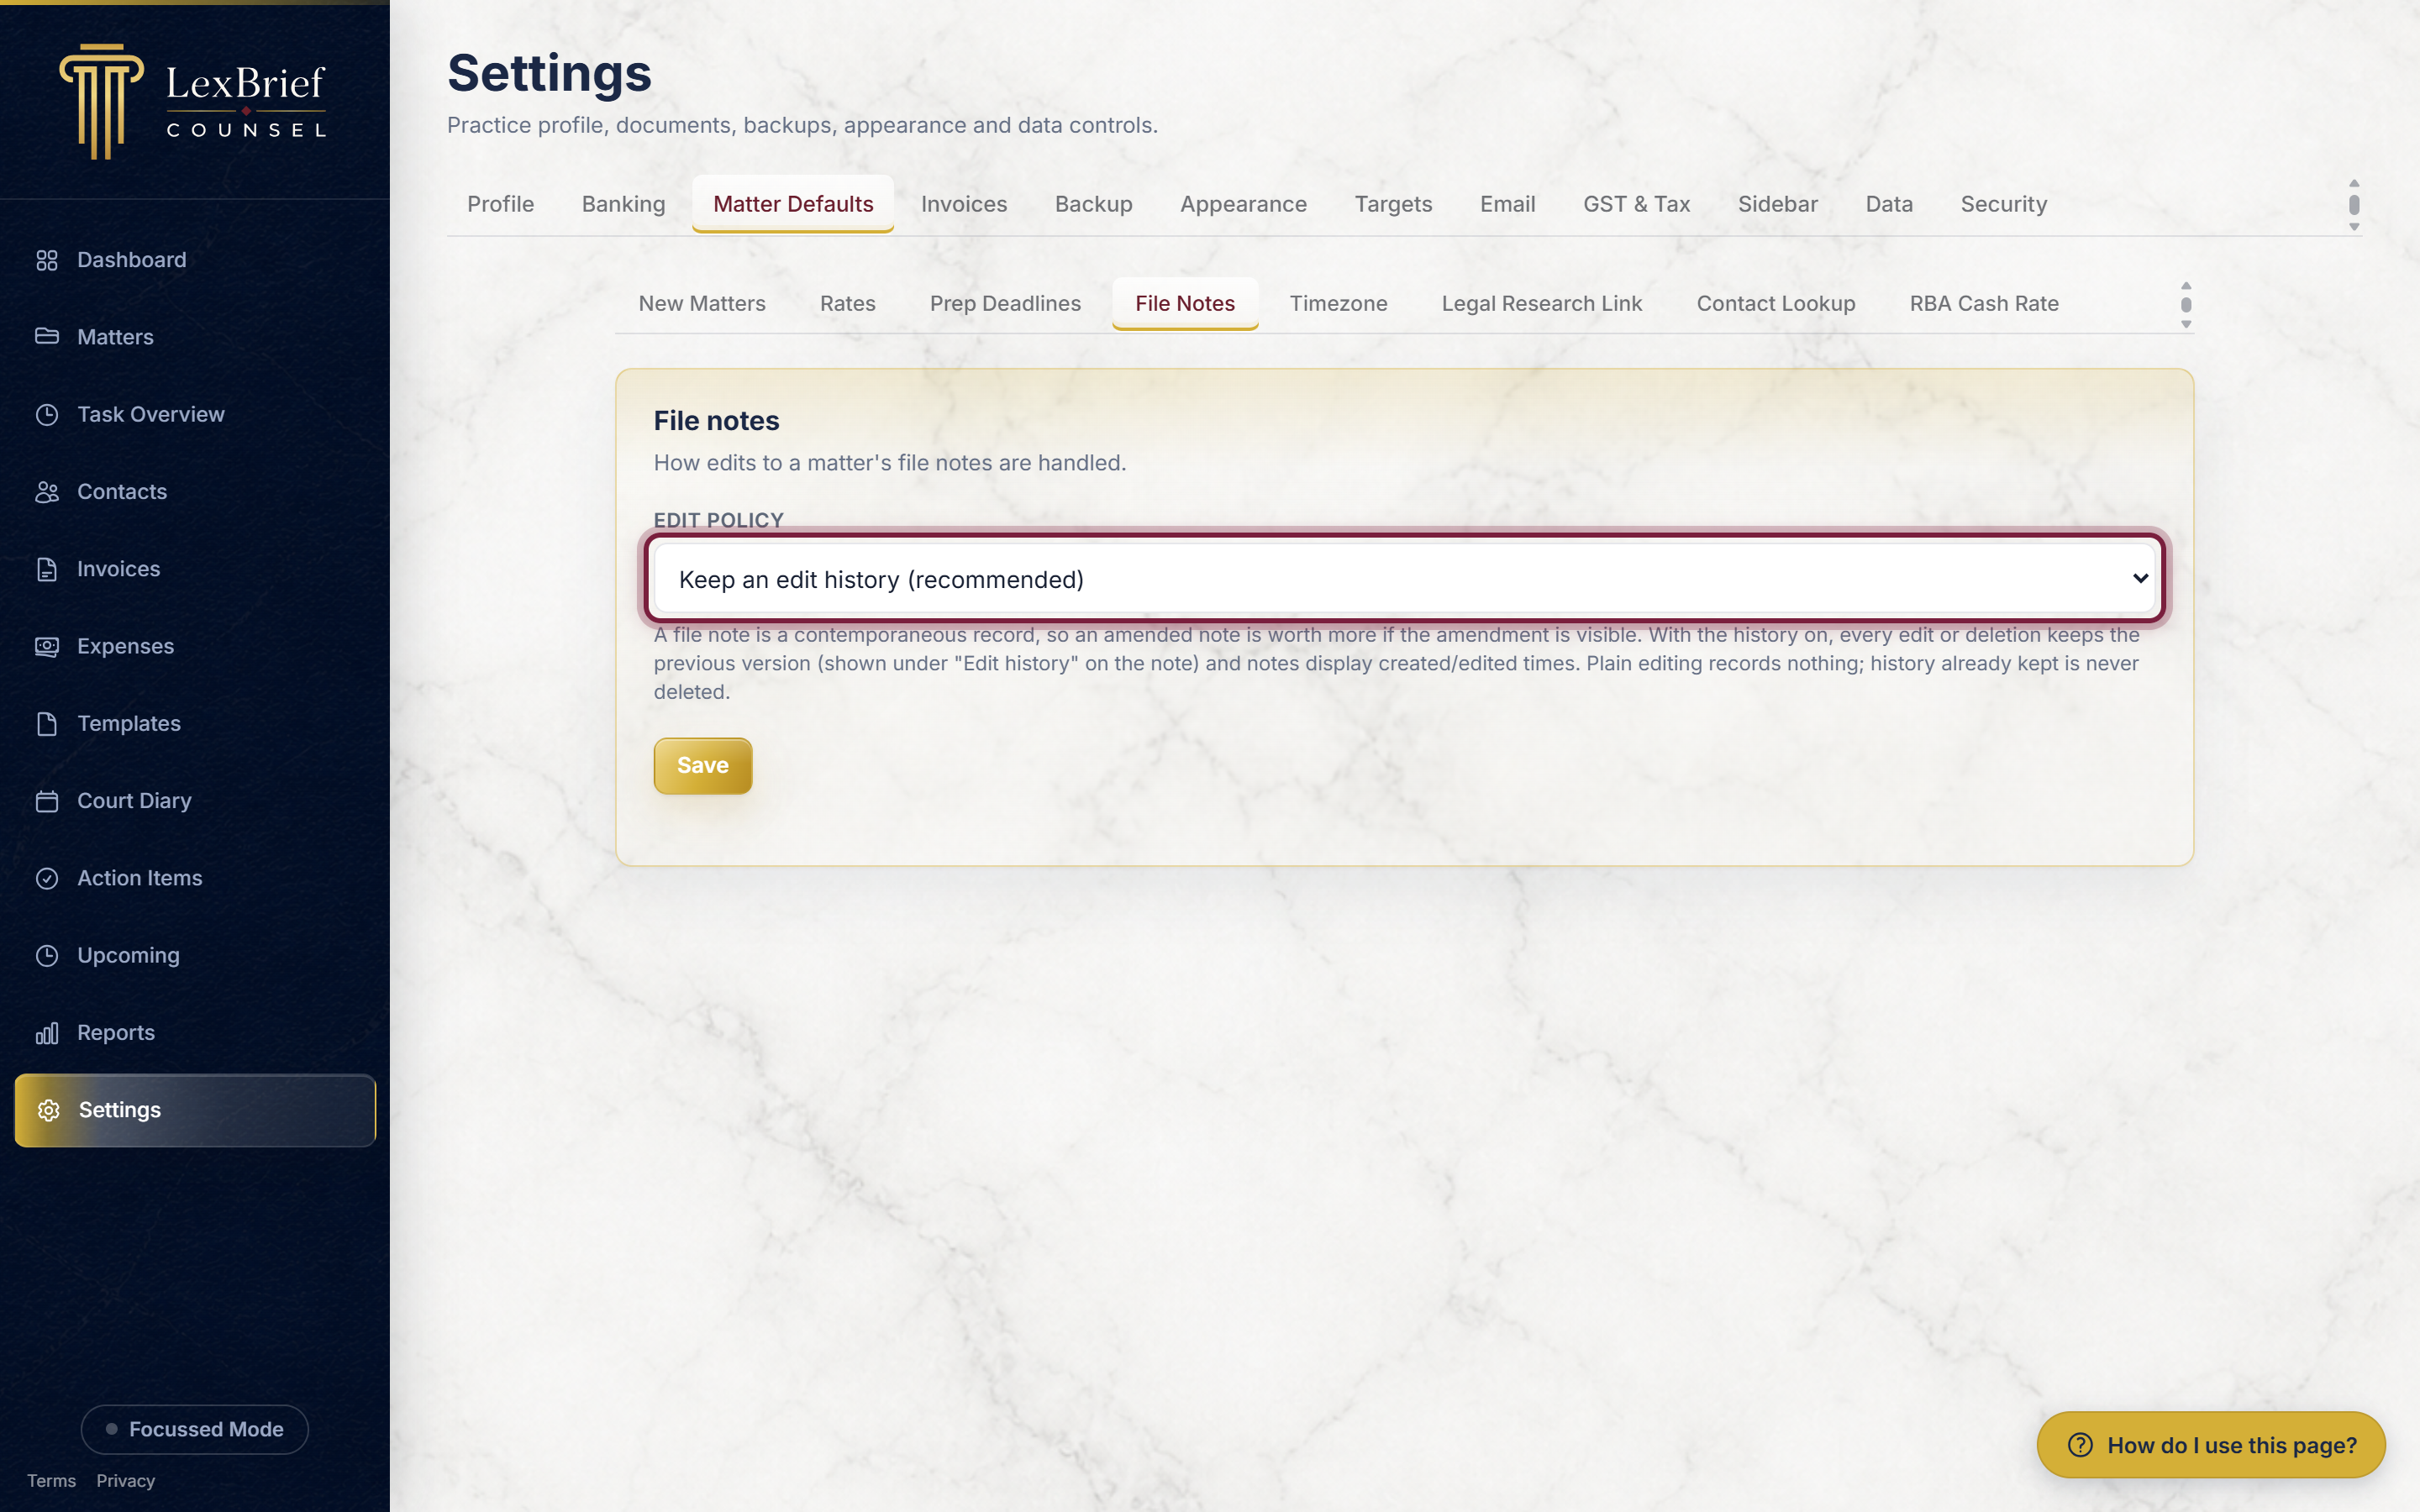
2. Click the Matter Defaults tab across the top, then the File notes tab in the second row of tabs beneath it.
3. In the Edit policy box, choose Keep an edit history (recommended) or Plain editing (no history), then click Save.
Searching your notes
Once a matter has a few notes, you can search them. At the top of the File notes area is a Search file notes box.
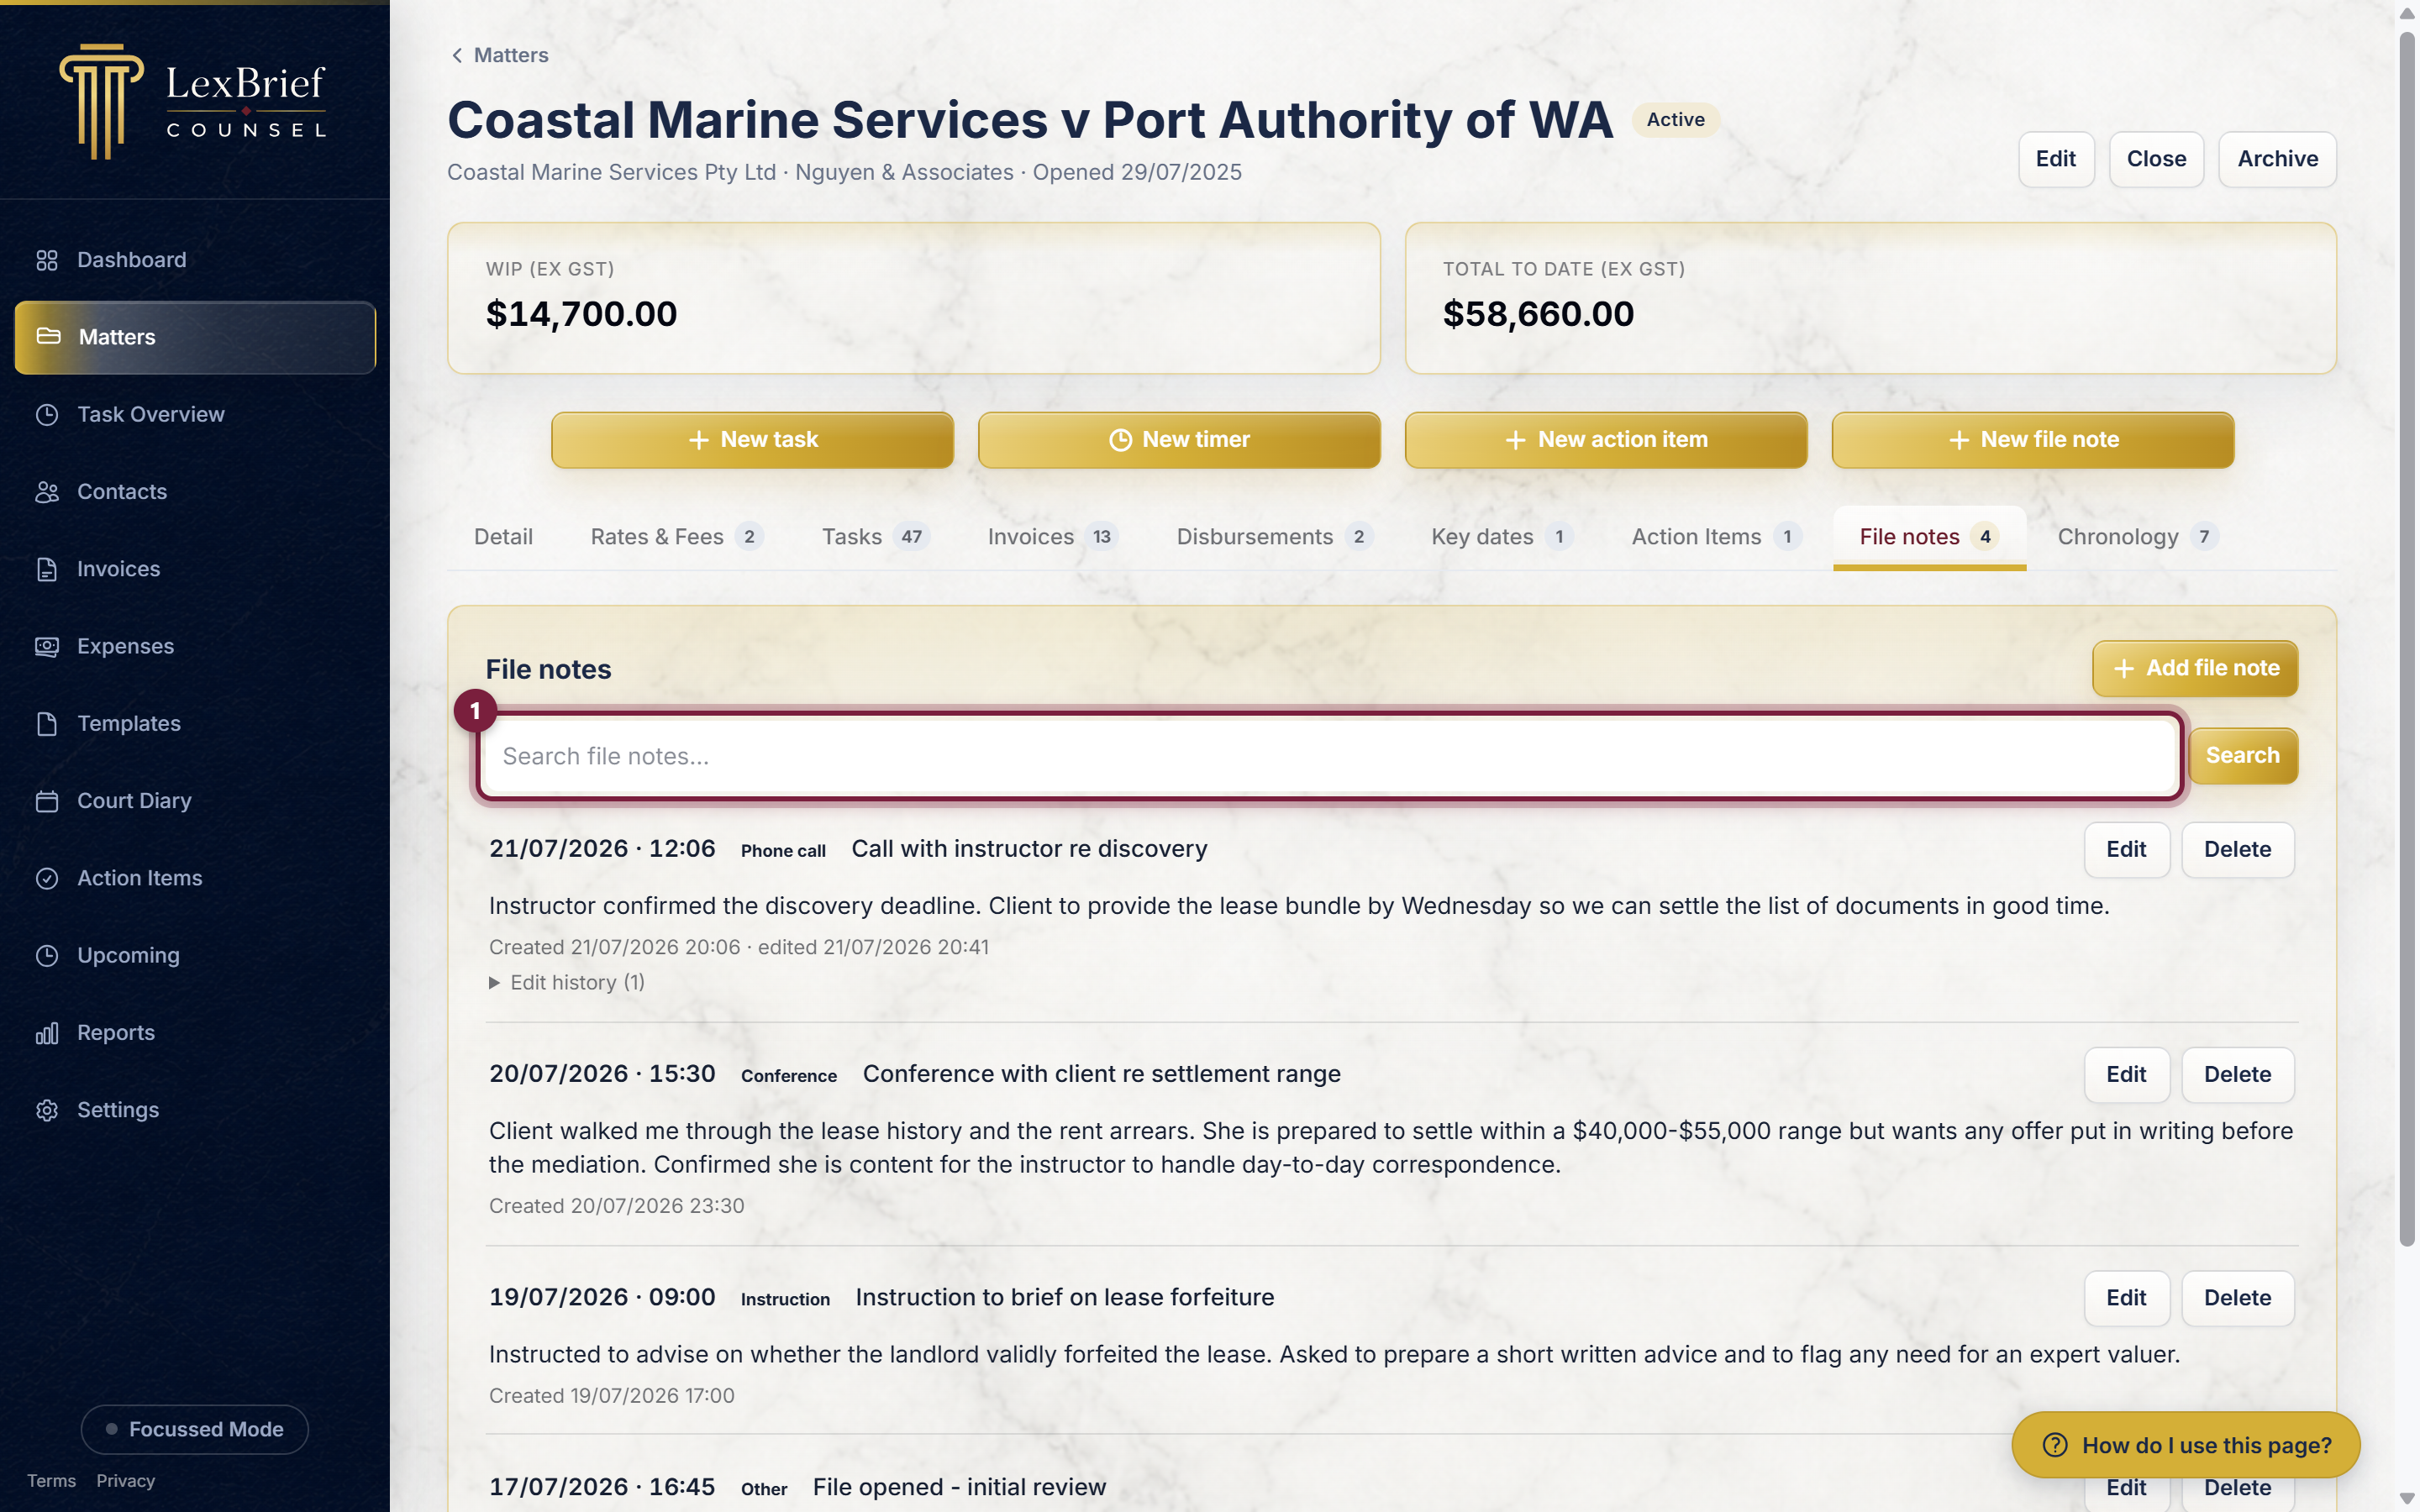
Type a word or two – a name, a topic, a deadline – and click Search. LexBrief looks through the title and the text of every note on this matter and shows the closest matches first. Click Clear to go back to the full list.
What next
File notes are one of three dated lists on a matter. The others are worth knowing:
- Matters – creating and managing the files your notes belong to.
- Court Diary – recording your future court dates and deadlines.
- Browse all help guides
Stuck on anything at all? Email support@lexbrief.au – a real person reads it, usually the same working day.