

If at any point your screen does not look like the picture, stop and email support@lexbrief.au – we would rather help than have you guess.
Before you start
Every action item belongs to a matter, so you need a matter to attach it to. If you have not created one yet, read Matters first – it walks you through creating one.
A note on wording: the dark strip of links down the left-hand side of the screen is the menu. When we say "click Action Items in the left-hand menu", we mean click the words Action Items in that dark strip.
What Action Items are
An action item is a single thing you need to do on a matter. It is your practical to-do list – separate from, and simpler than, the other dated things in LexBrief:
- Action Items are your to-do list – jobs you need to get done.
- the Court Diary holds court dates and deadlines imposed on you – hearings, filing dates (see Court Diary).
- File notes are a record of what has already happened – "client called and said X".
If it is a job you have to do, it is an action item.
The Action Items page
Click Action Items in the left-hand menu. This page gathers the open jobs from all your matters into one to-do list, so you can see everything you owe at a glance.
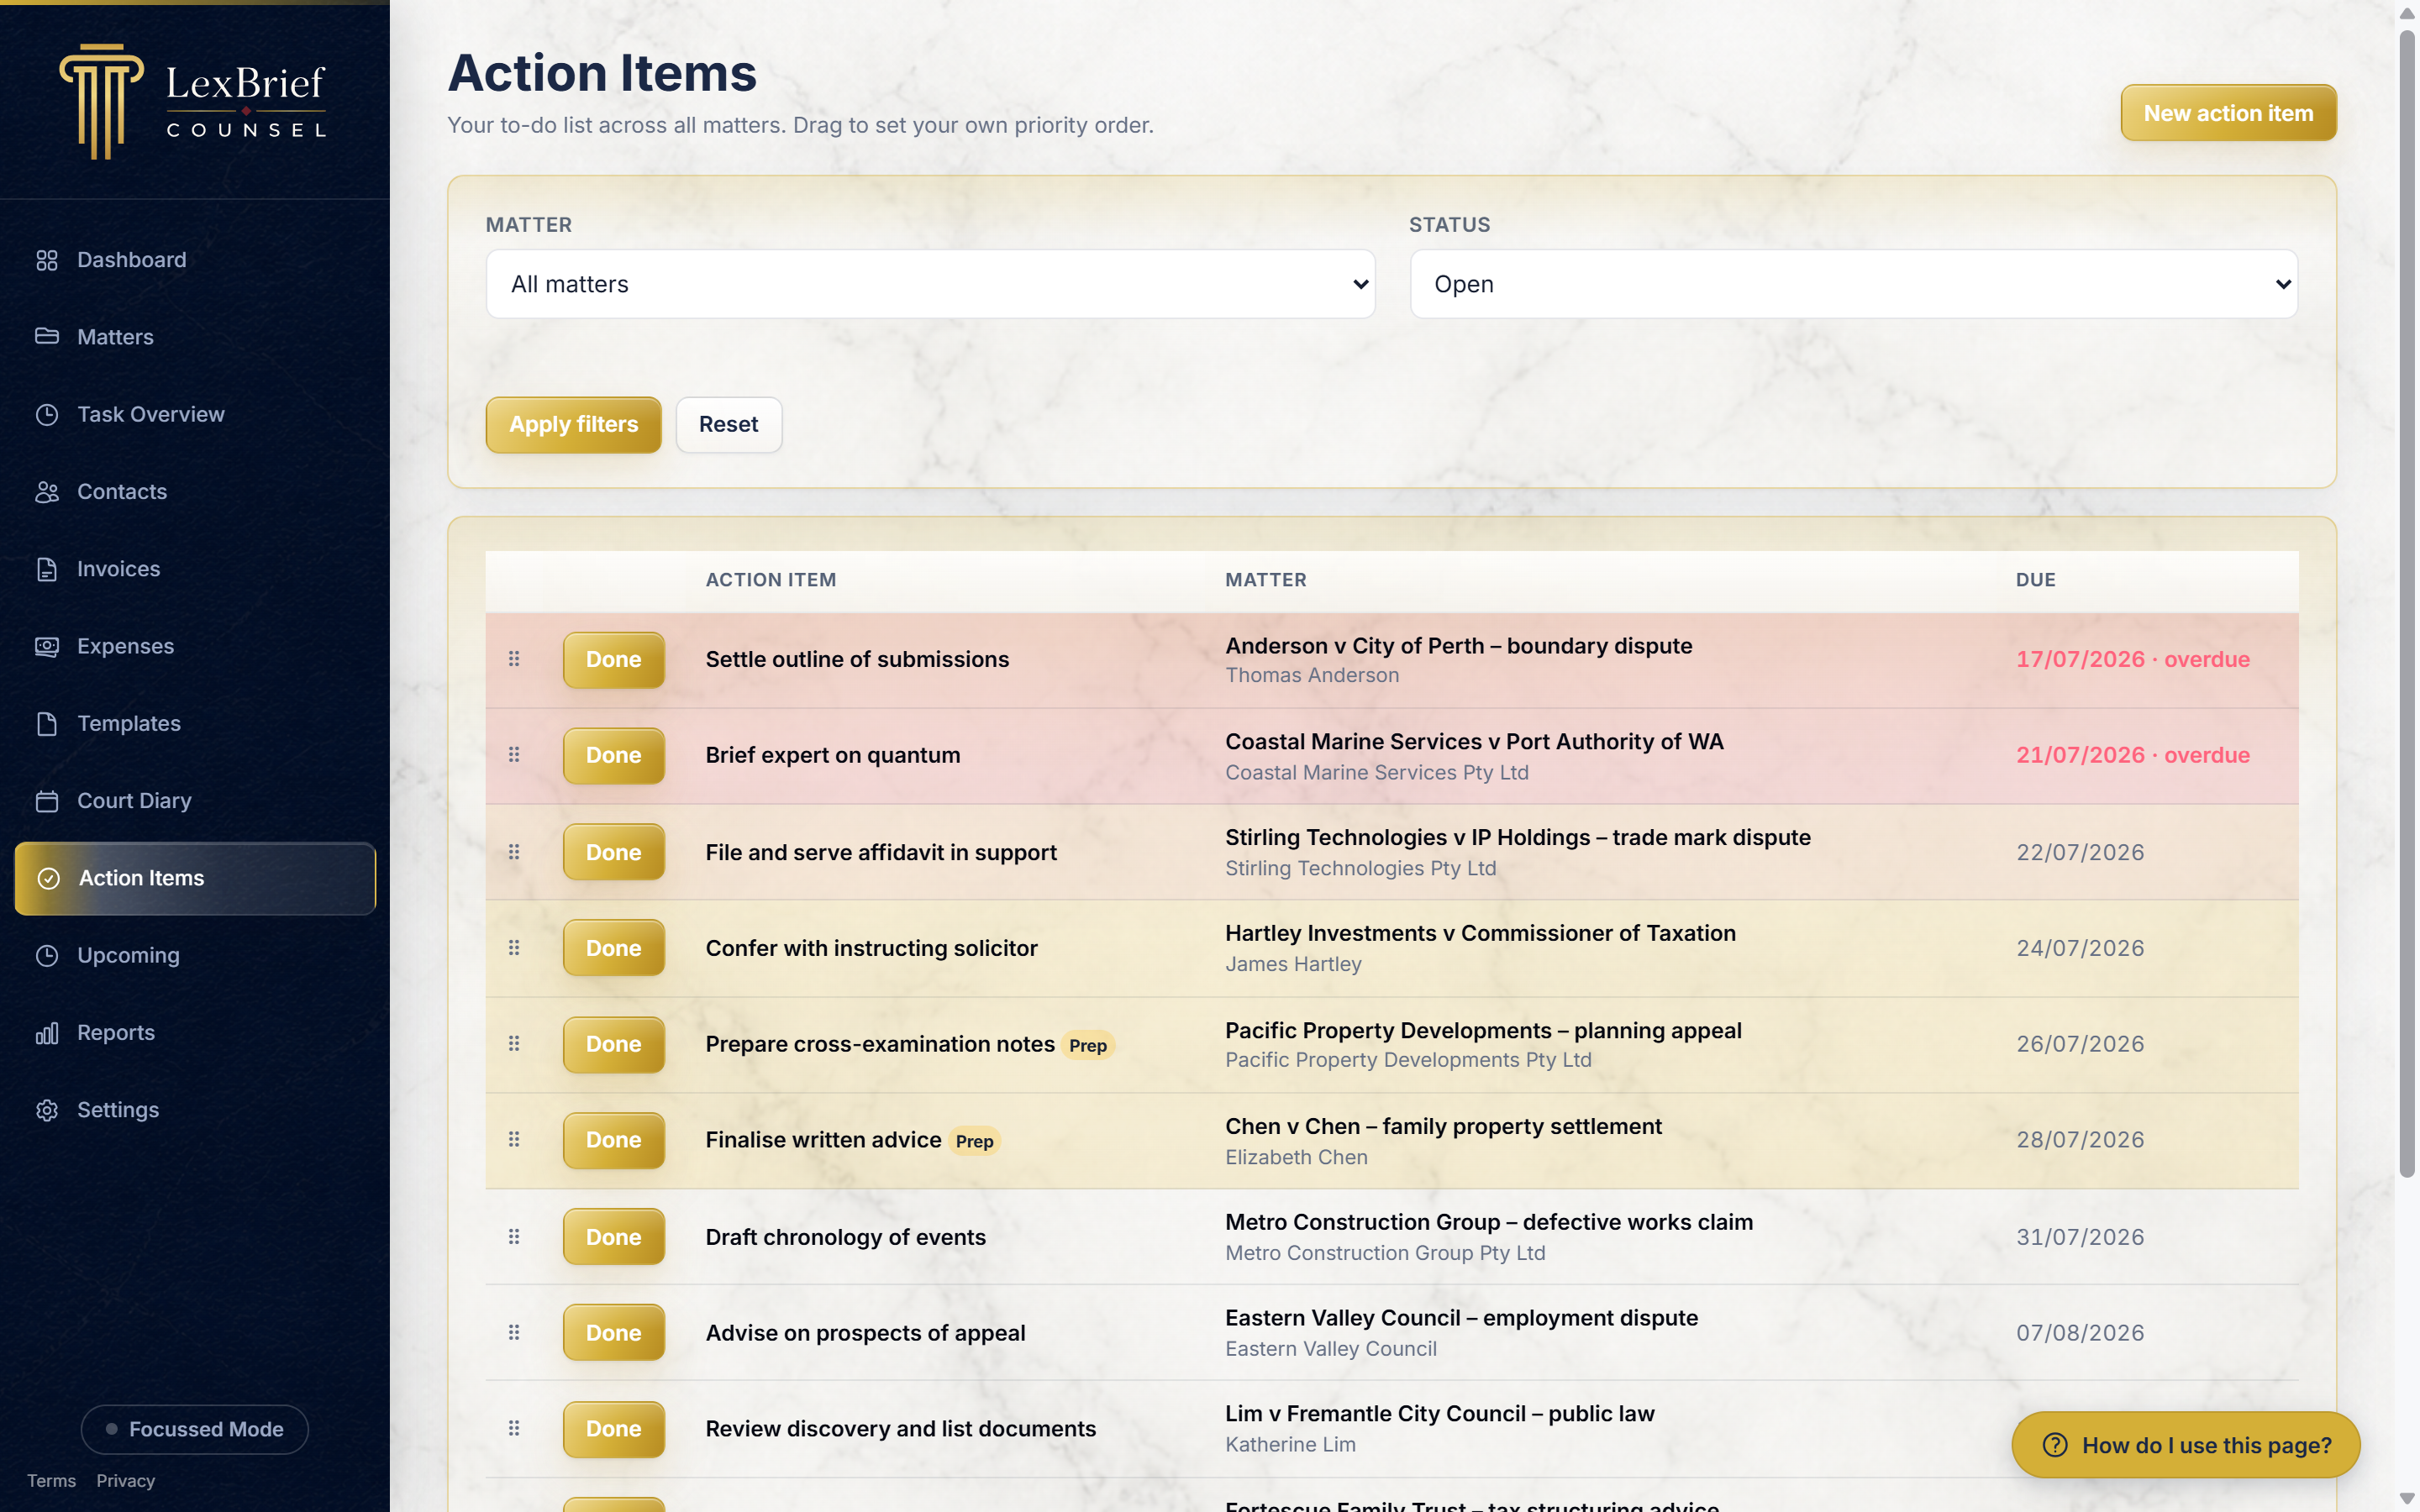
Each row shows the job, the matter it belongs to, and its due date. The Done button on the left of a row ticks that item off; a done item drops out of your open list. You can also drag rows by the small handle on the far left to set your own priority order.
What the row colours mean
Open items with a due date are tinted by how urgent they are, so the pressing ones jump out:
- Red – the due date has already passed (overdue).
- Orange – it is due today.
- Amber – it is due within the next week.
Items with no due date, and items you have marked done, are not tinted. You do not have to do anything to switch the colours on – they are on by default. If you want to change or turn off a colour, you can do that under Settings → Appearance, in the Action items section.
Add an action item
You can add an item from this page (and pick which matter it belongs to), or from inside a matter (where the matter is already filled in). Here is the from-this-page way.
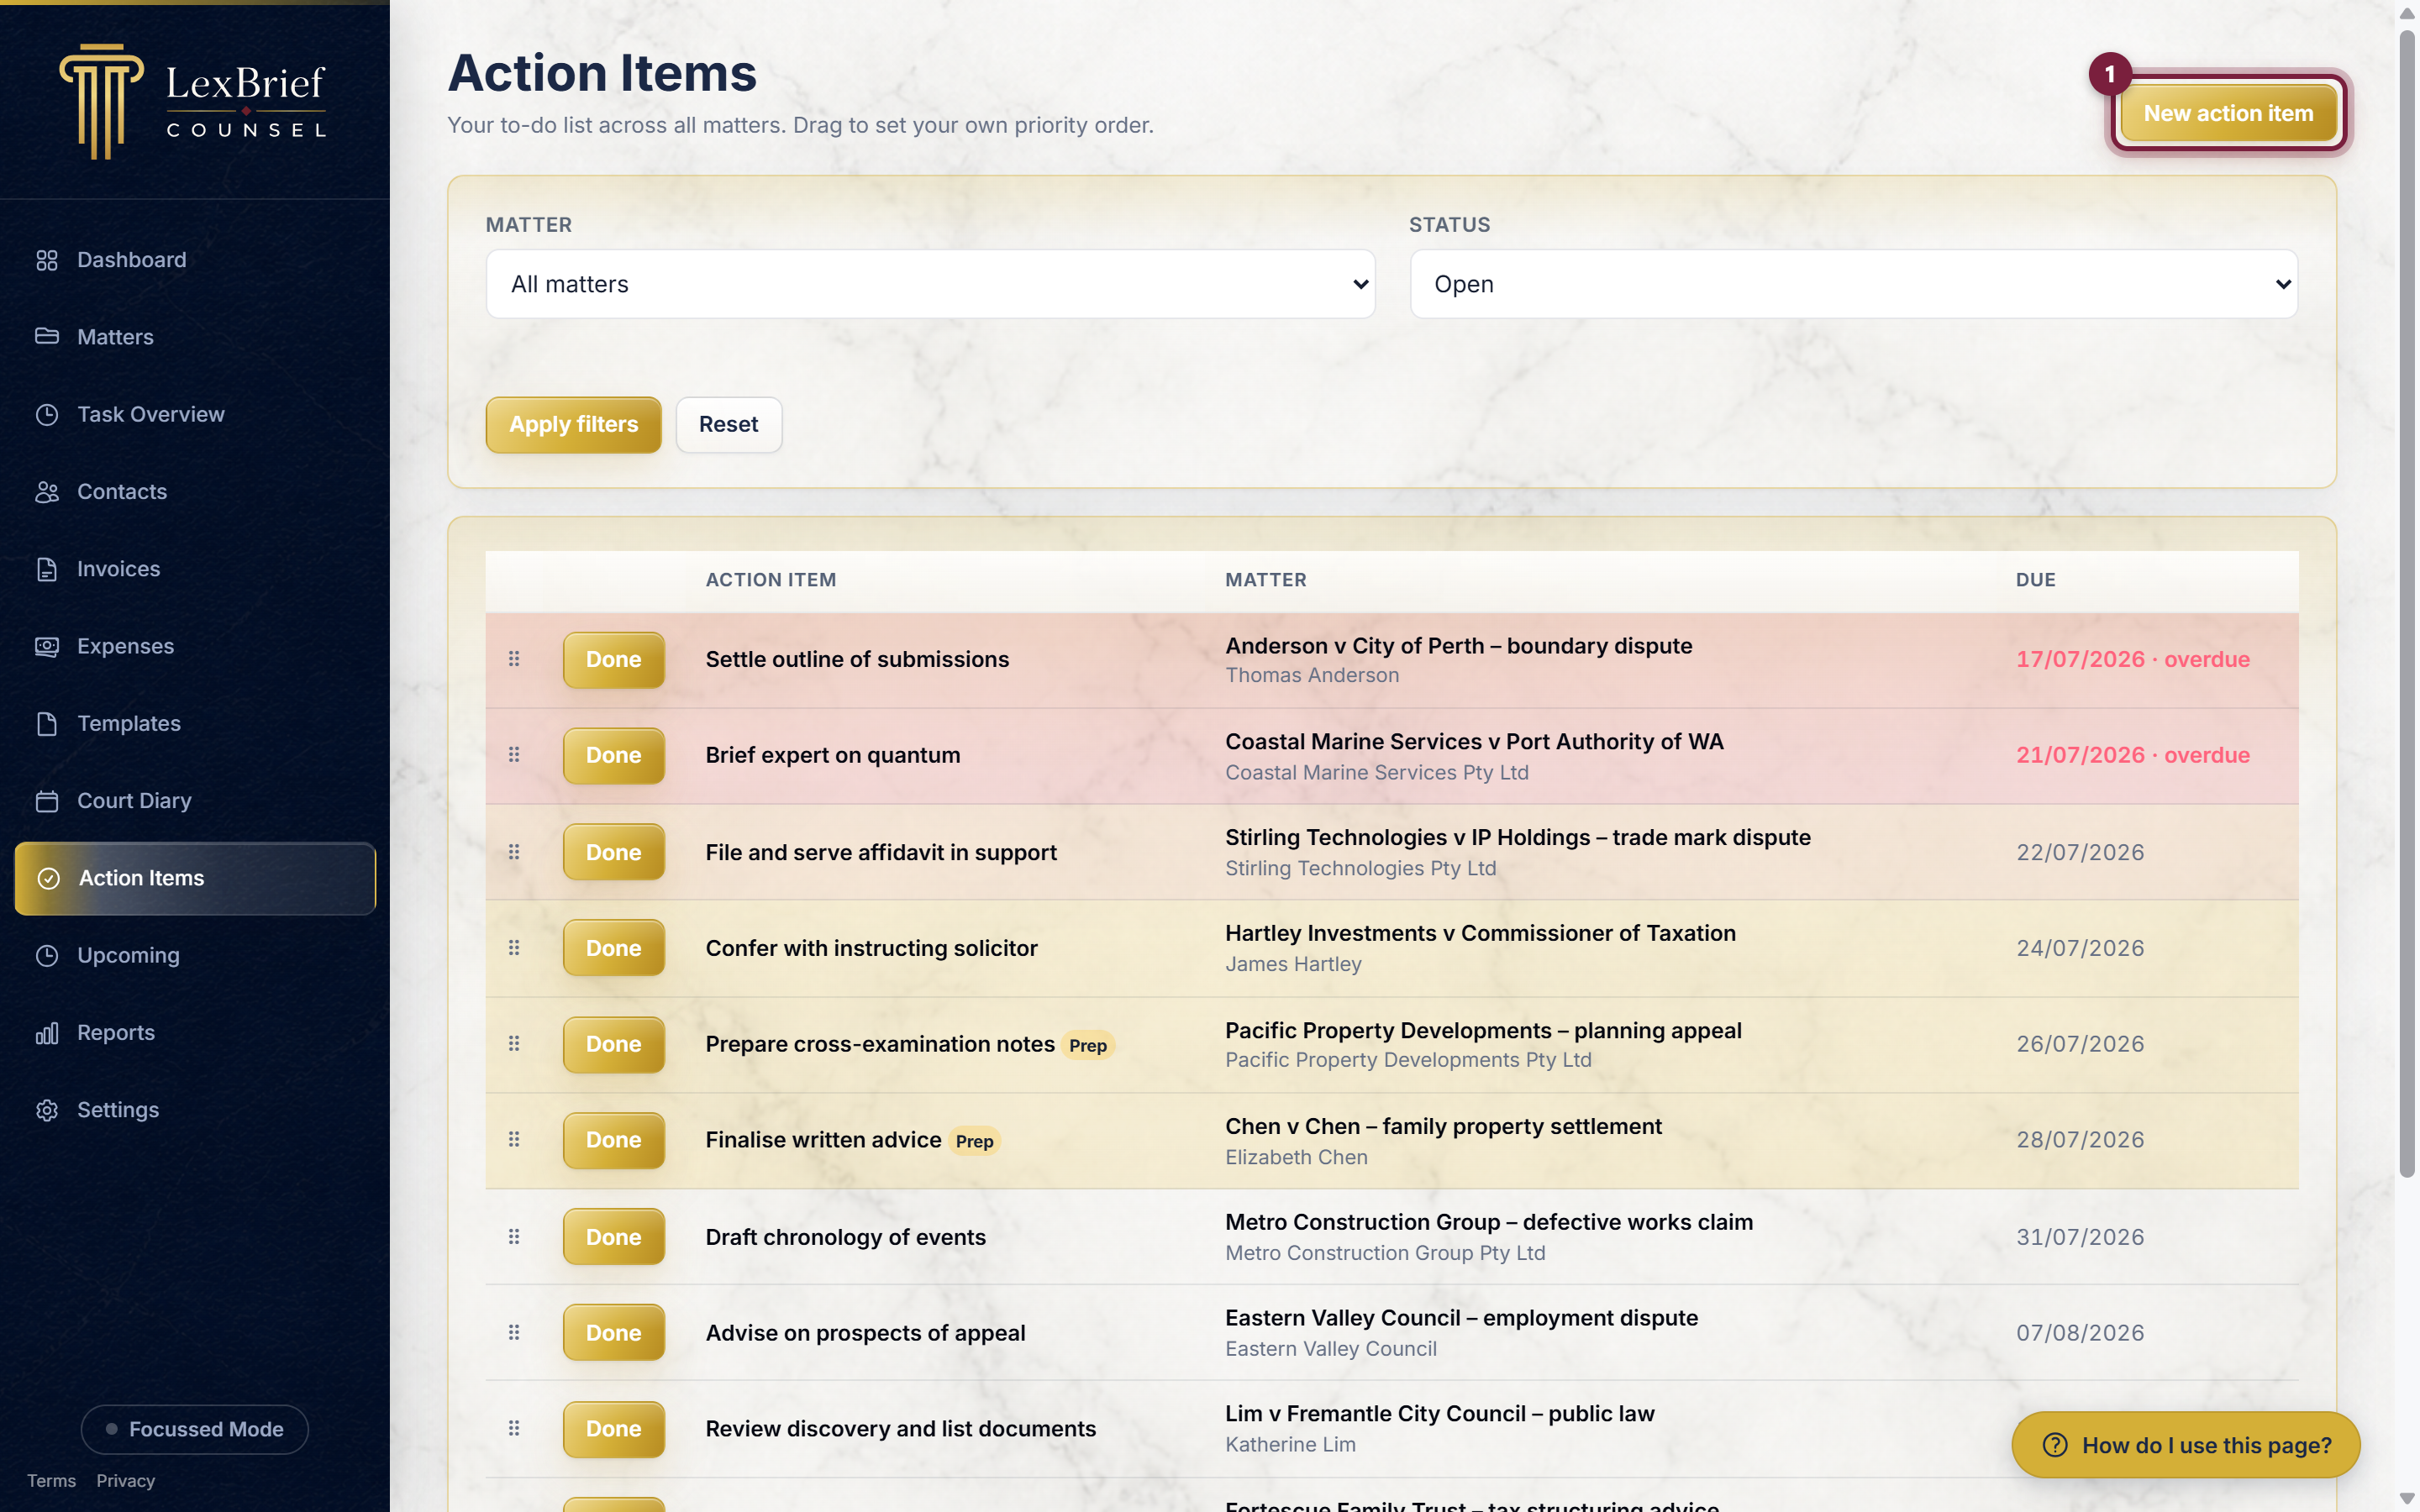
1. Click "New action item"
On the Action Items page, click the gold New action item button in the top-right corner.
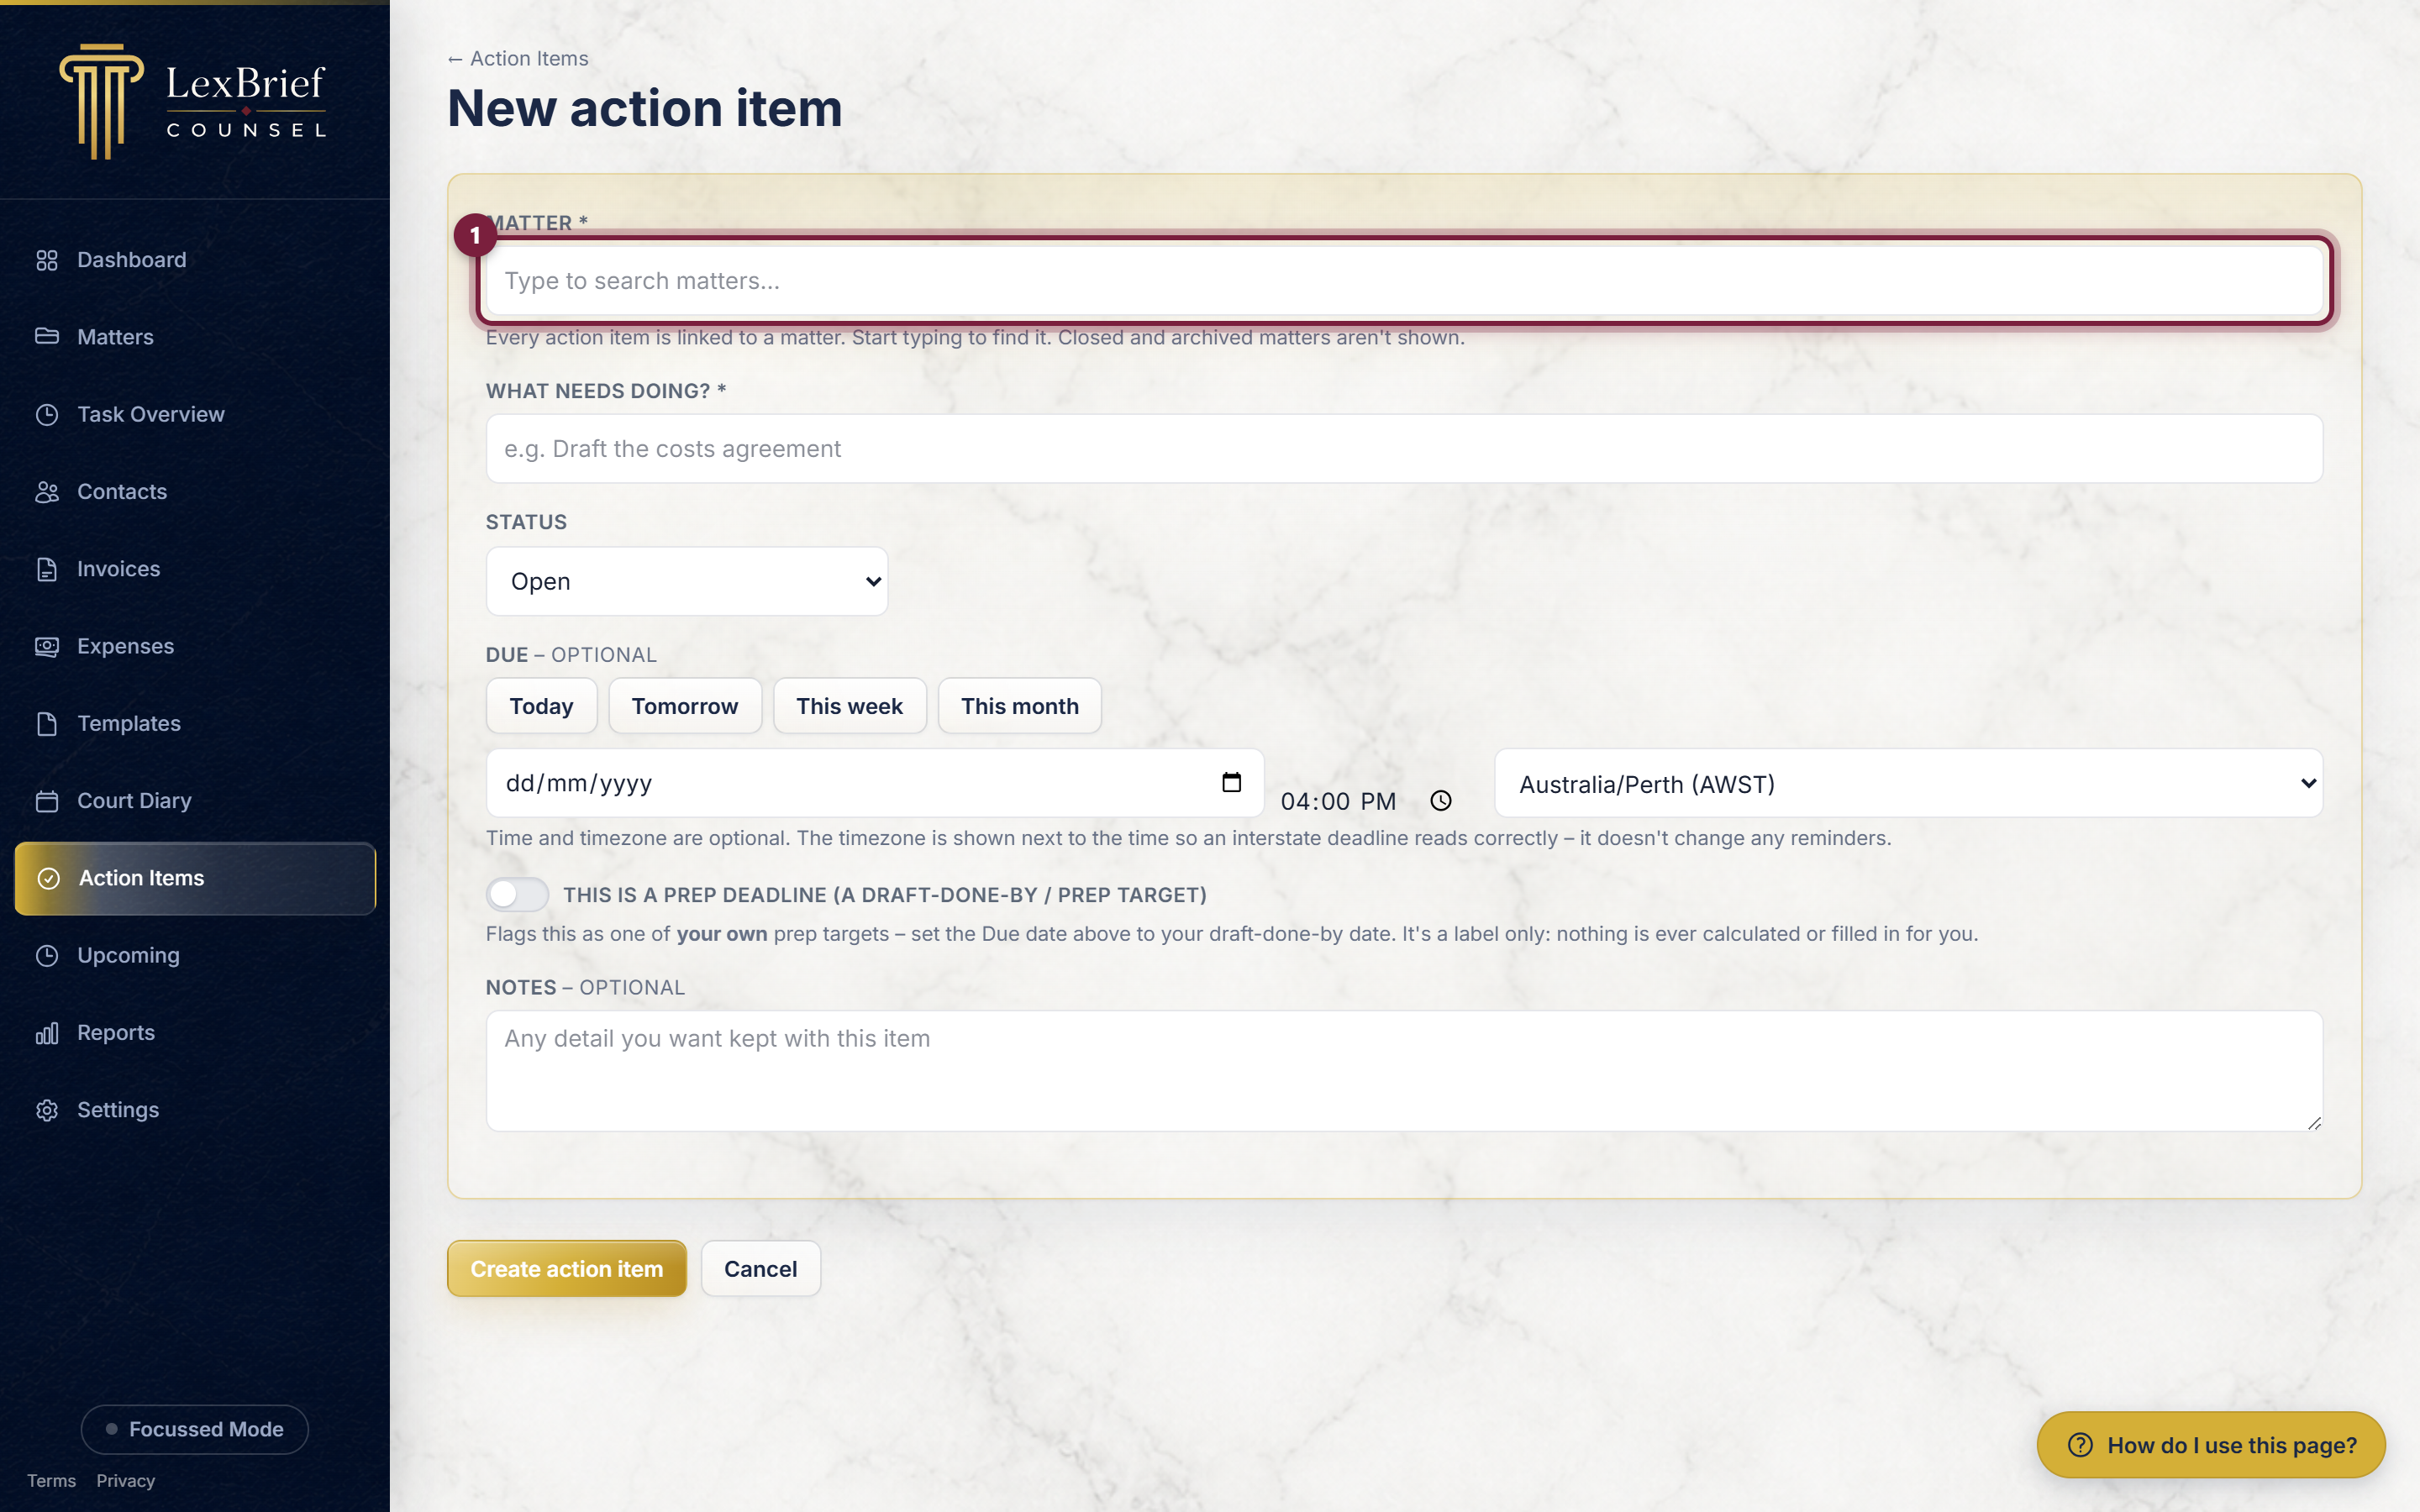
2. Choose the matter
The Matter box is where you say which file this job is for. Start typing the matter's name and choose it from the short list that appears. Only your active matters show up here.
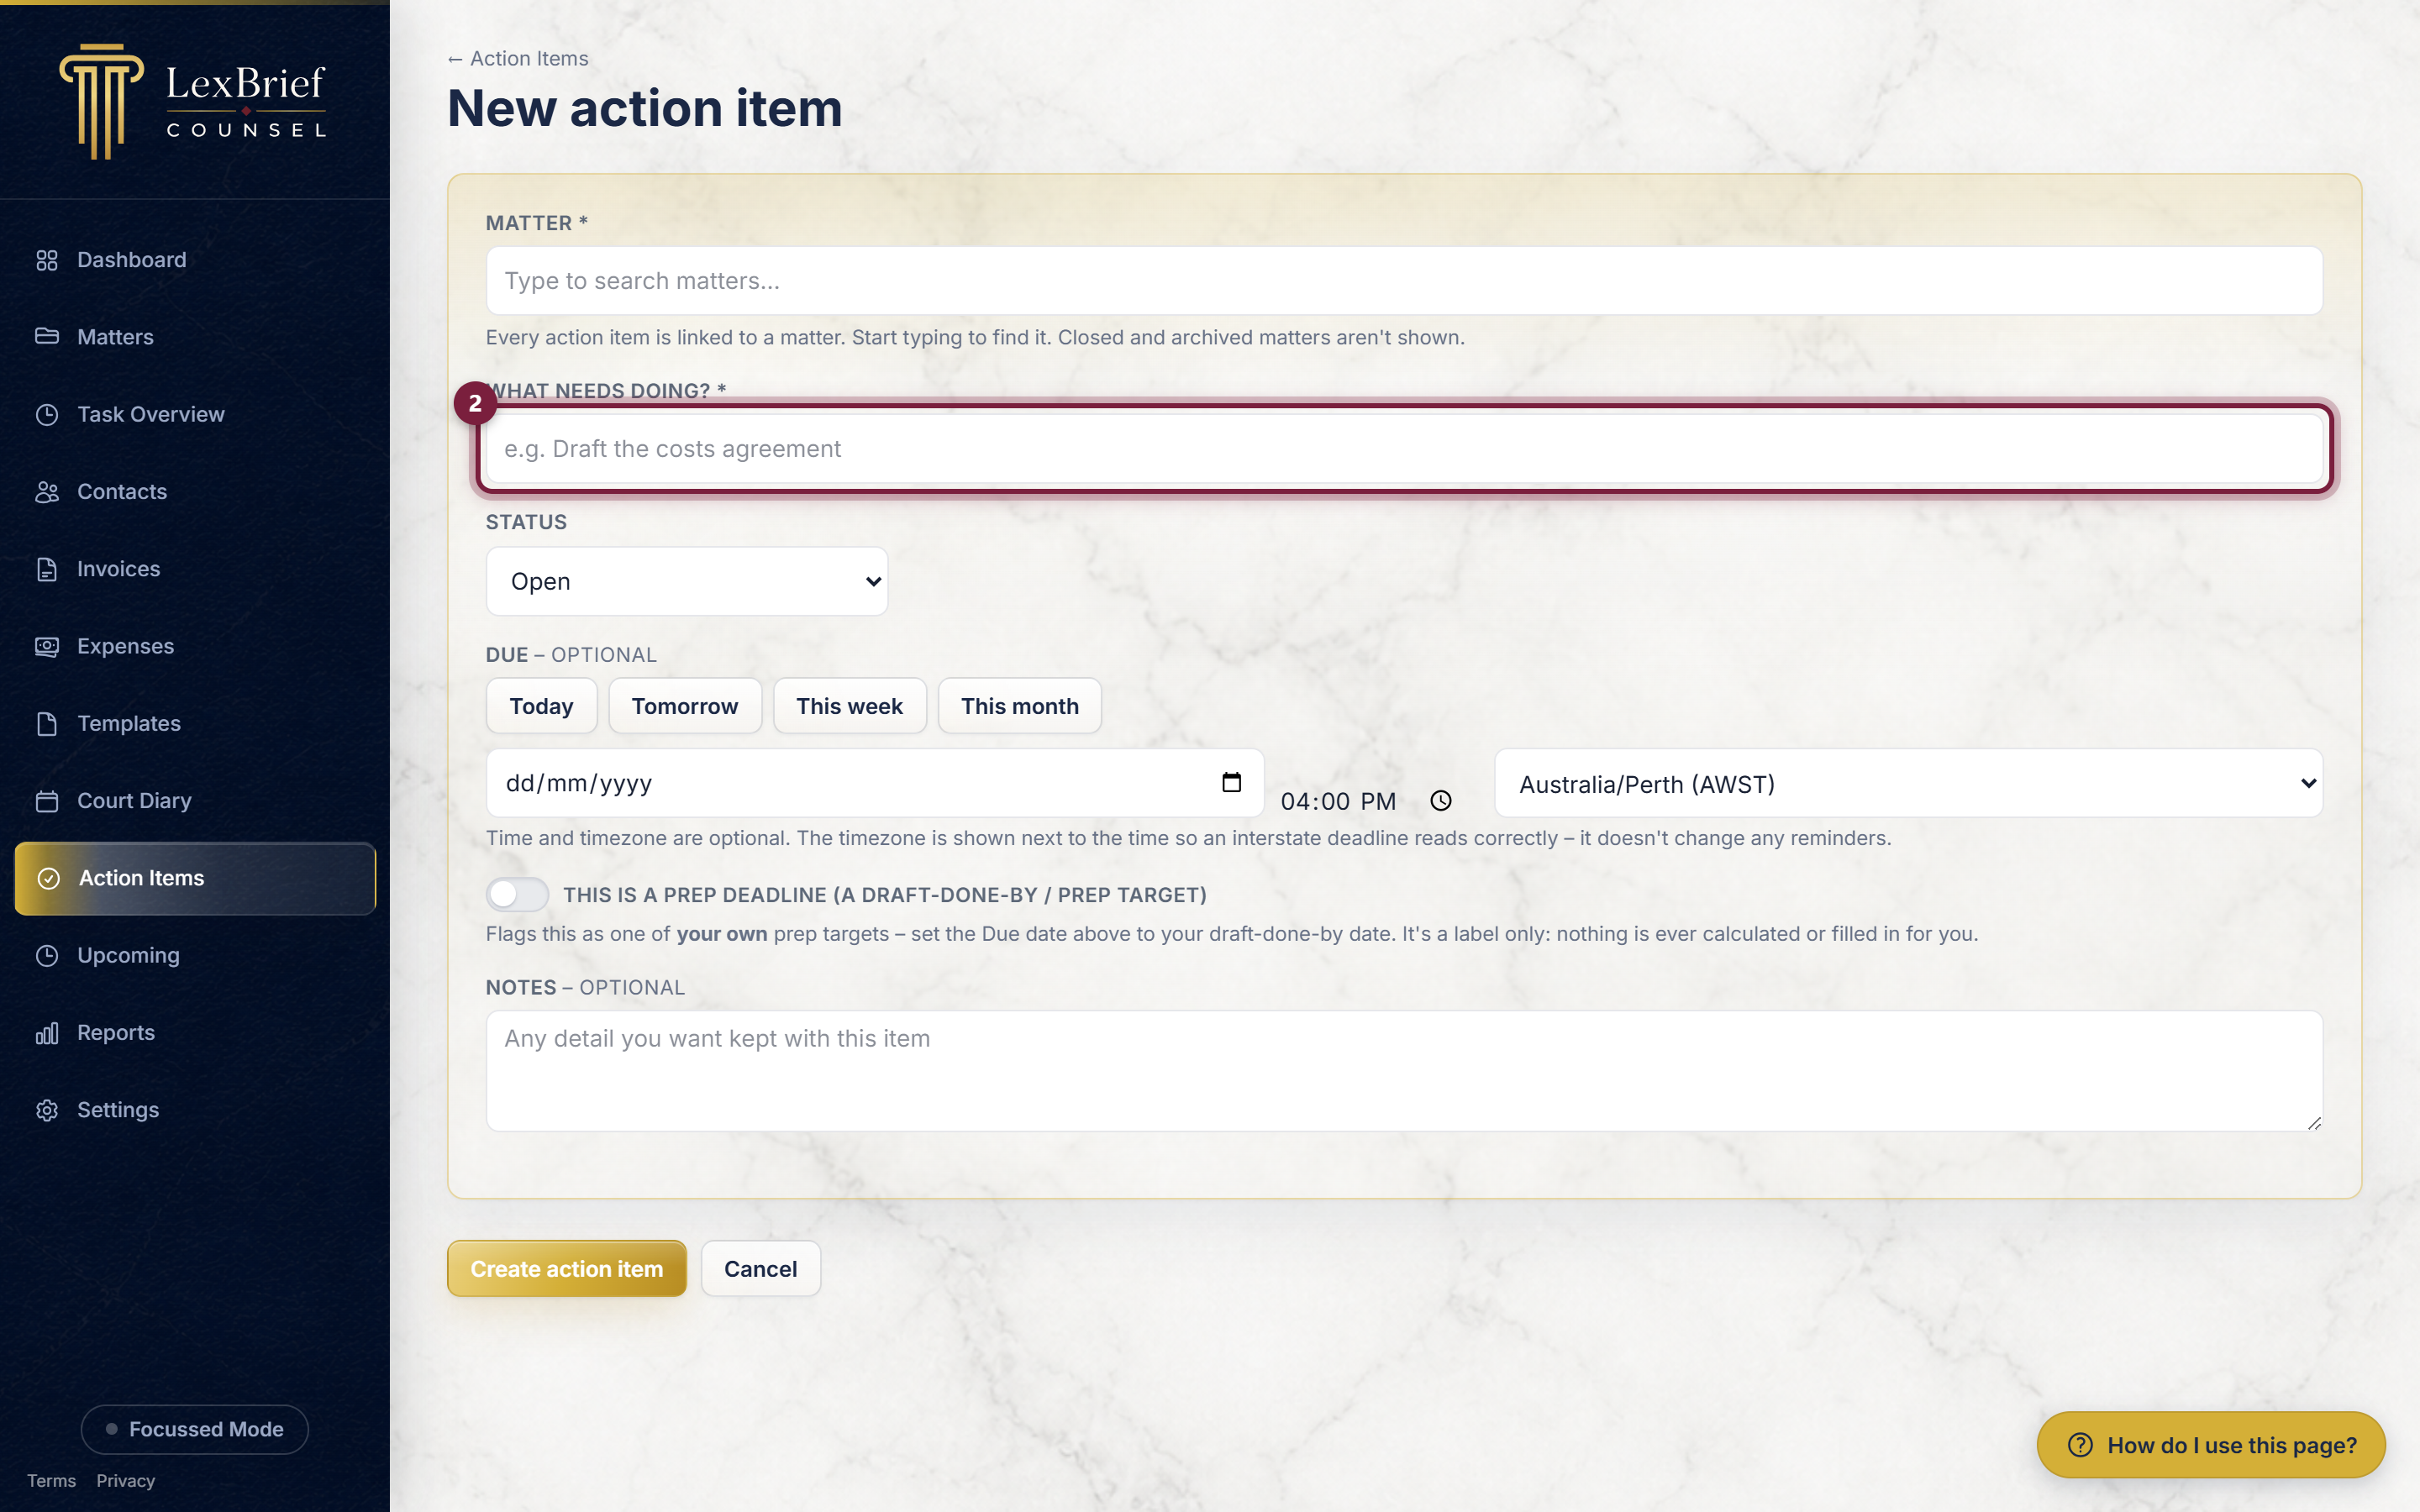
3. Say what needs doing
In the What needs doing? box, type the job in your own words – for example Draft the costs agreement. This is the only box you must fill in.
4. Set a due date (optional)
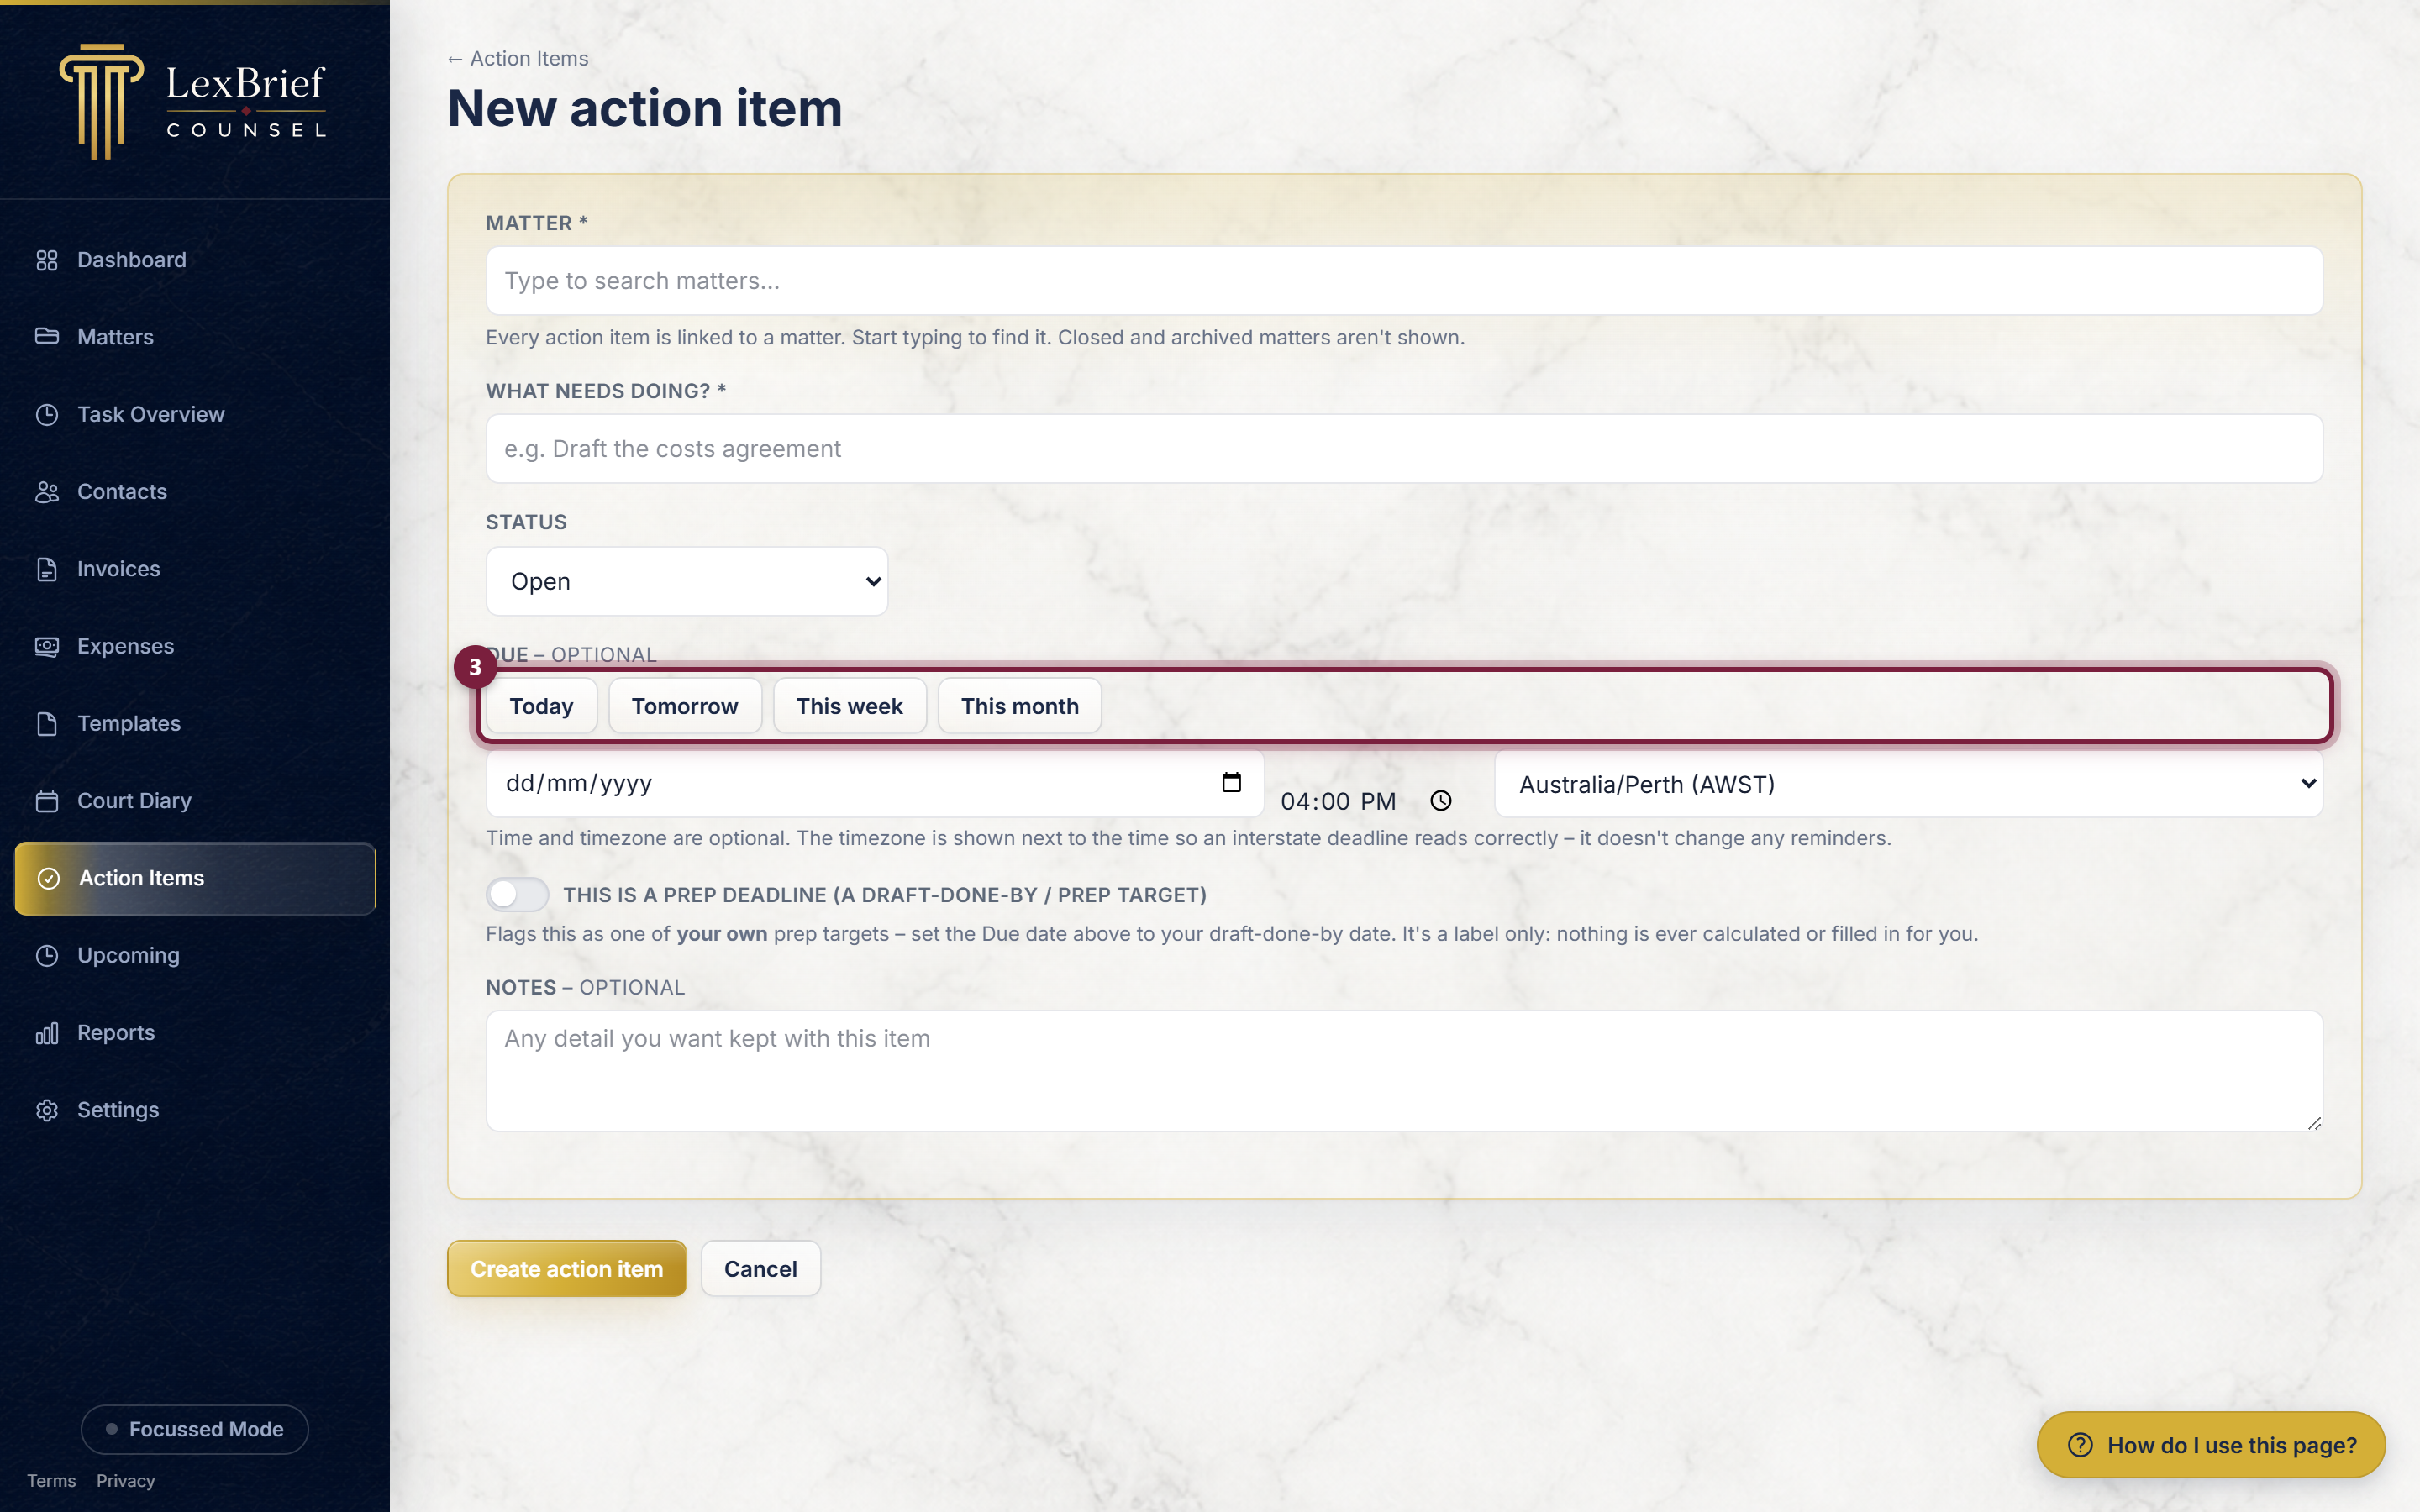
The Due date is optional, but it is what drives the colours and keeps you on top of things. The quickest way to set it is the row of buttons – Today, Tomorrow, This week and This month – which fill the date in for you. Or type a date in the box (or pick it from the little calendar).
5. Add a time and timezone (optional)
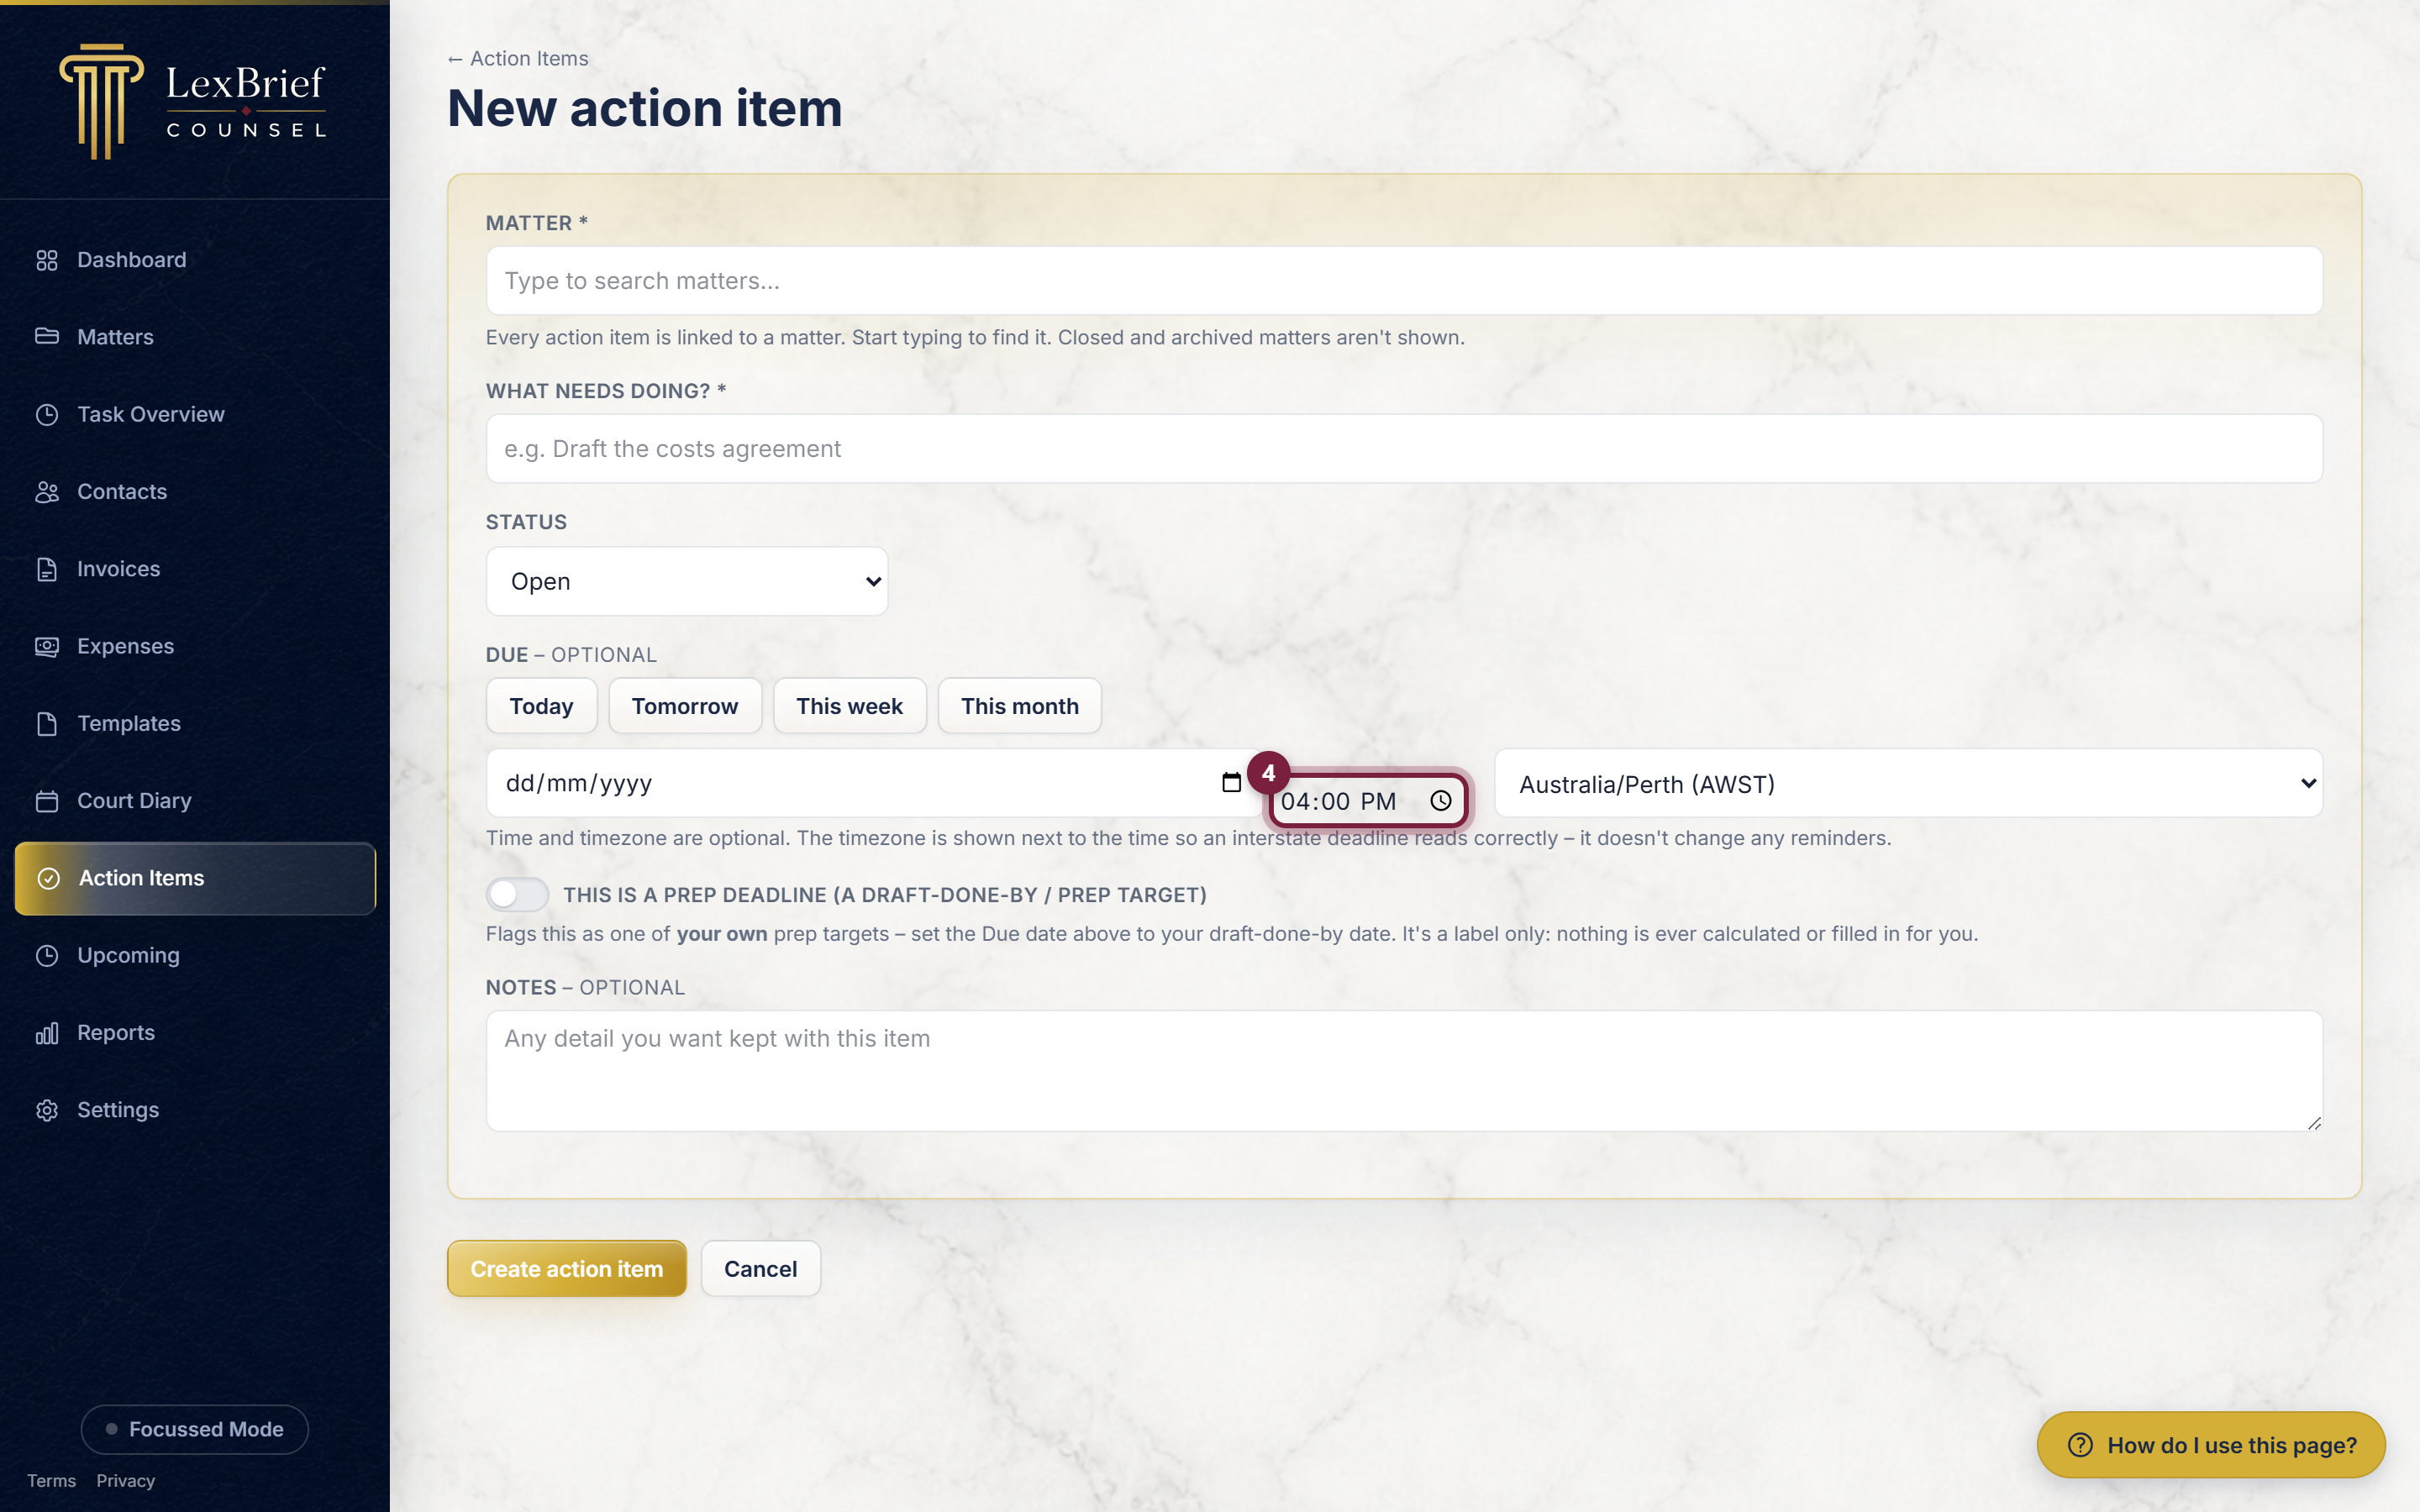
If the job has a set time, type it in the time box next to the date. The timezone box next to it is just a label – it is shown alongside the time so an interstate deadline reads correctly. It does not change any reminders, and you can leave both blank.
6. Create it
Click the gold Create action item button at the bottom.
What you should see. The new job appears in your Action Items list, tinted by its due date, and it also shows up on that matter's own Action Items tab.
A matter's Action Items tab
Every matter also has its own Action Items tab, which shows just that matter's to-do list. Open the matter (click it in your Matters list), then click the Action Items tab in the row of tabs across the middle of the page.
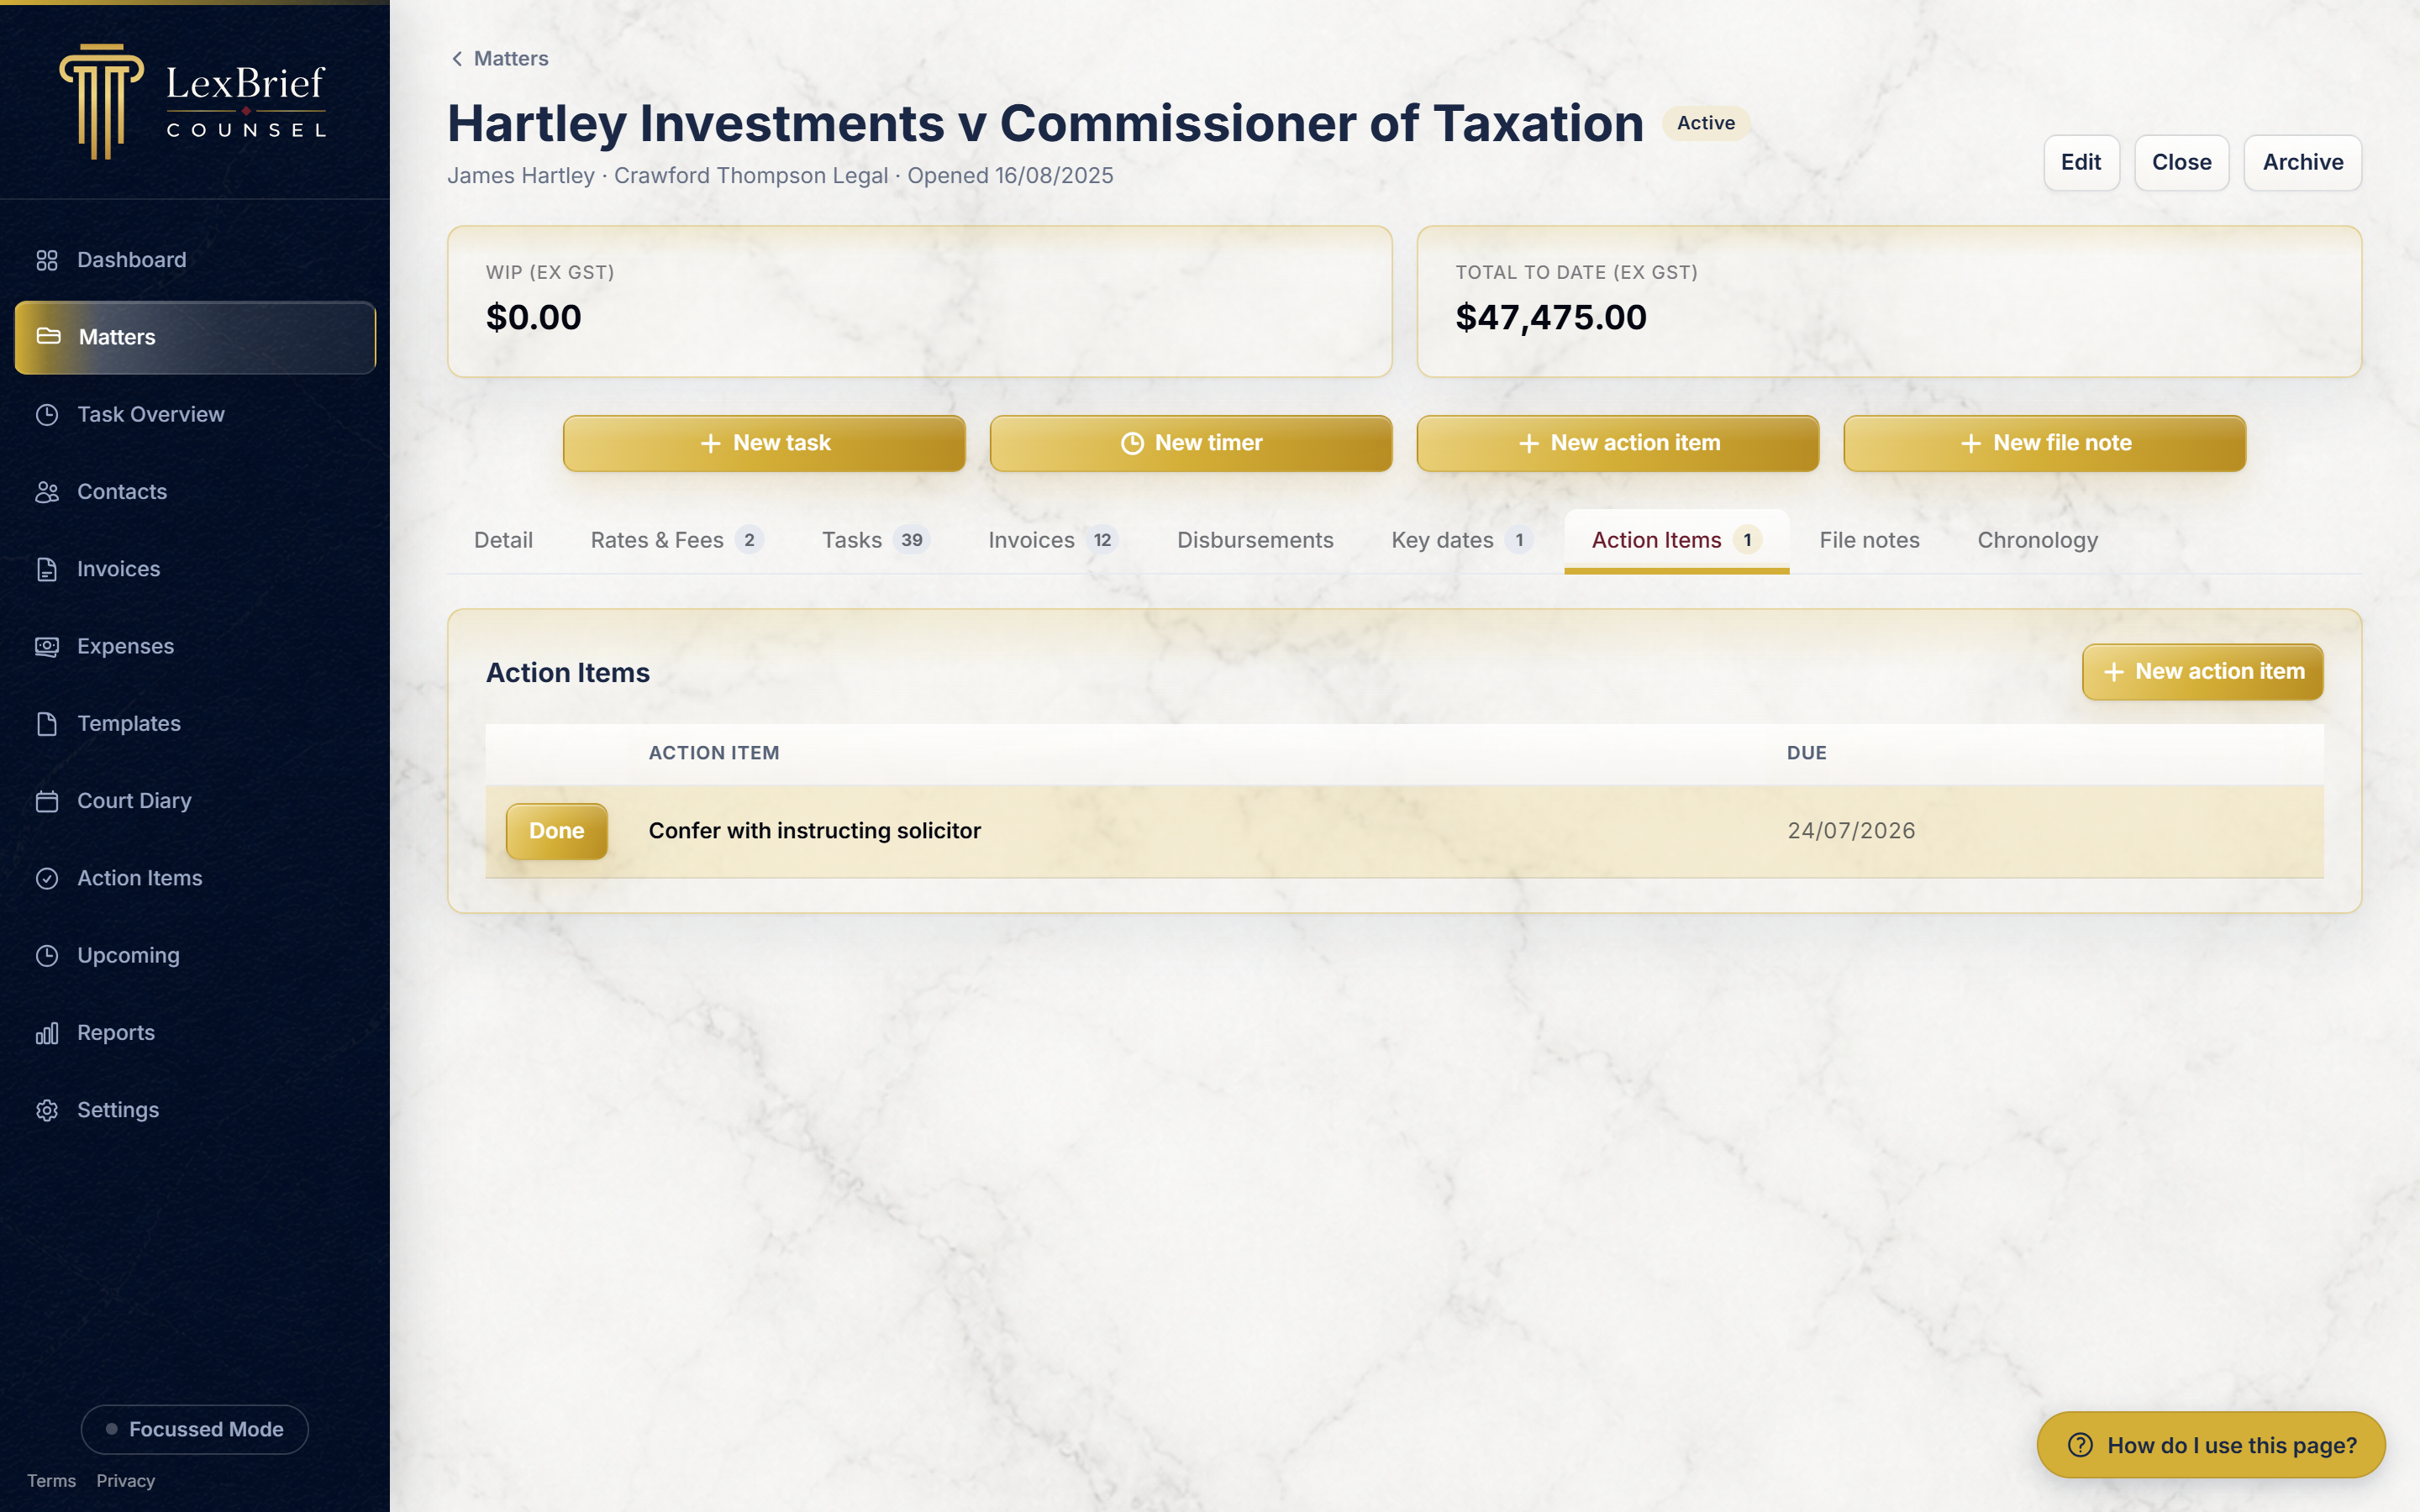
It works exactly like the main page, just for this one matter: the same colours, the same Done buttons, and a New action item button that adds an item straight onto this matter. Any follow-up steps (below) sit indented under the job they came from.
Follow-up actions
Sometimes one job leads to another. A follow-up lets you hang the next step off the current one, so a bigger task breaks into a tidy chain instead of a pile of loose items.
Open an action item (click its name in the list). Part-way down its page is a Follow-up actions section with a Create a follow-up box.
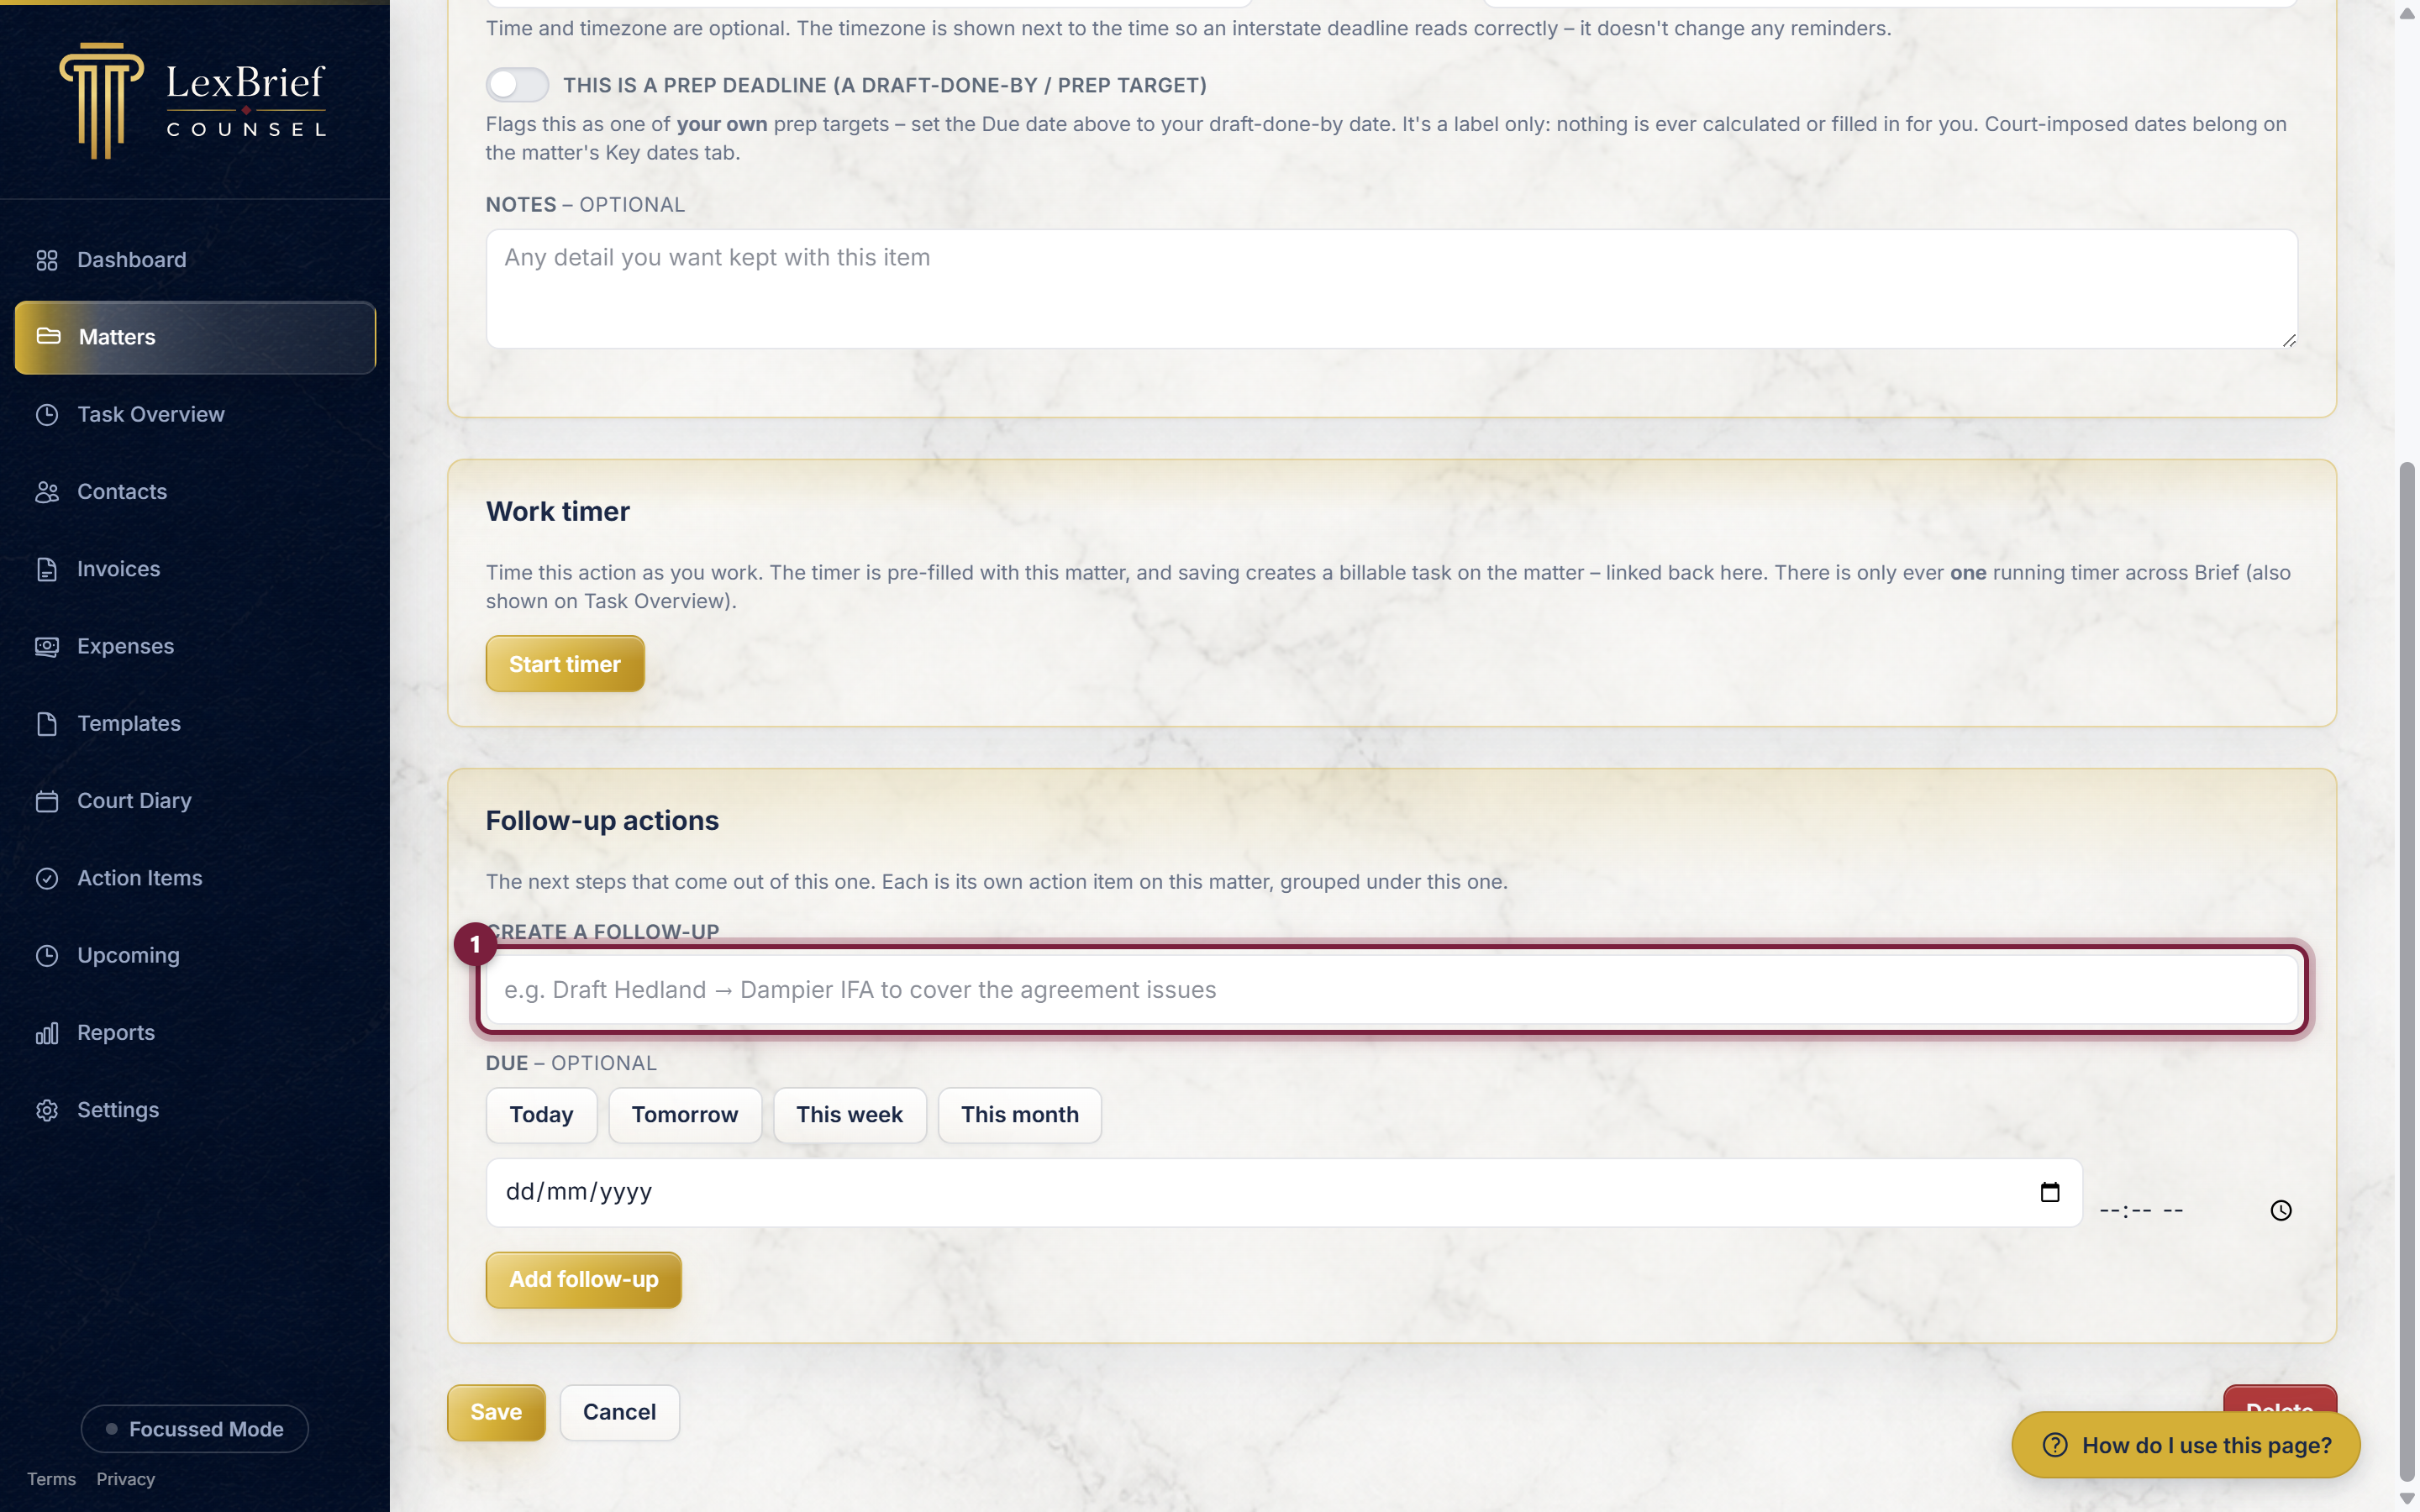
Type the next step, optionally give it a due date the same way as before, and click Add follow-up. It becomes its own action item on the same matter, shown indented under the one you were on.
Timing your work on an item
If you want to bill the time you spend on a job, you can time it right from the action item. On the item's page is a Work timer section with a Start timer button.
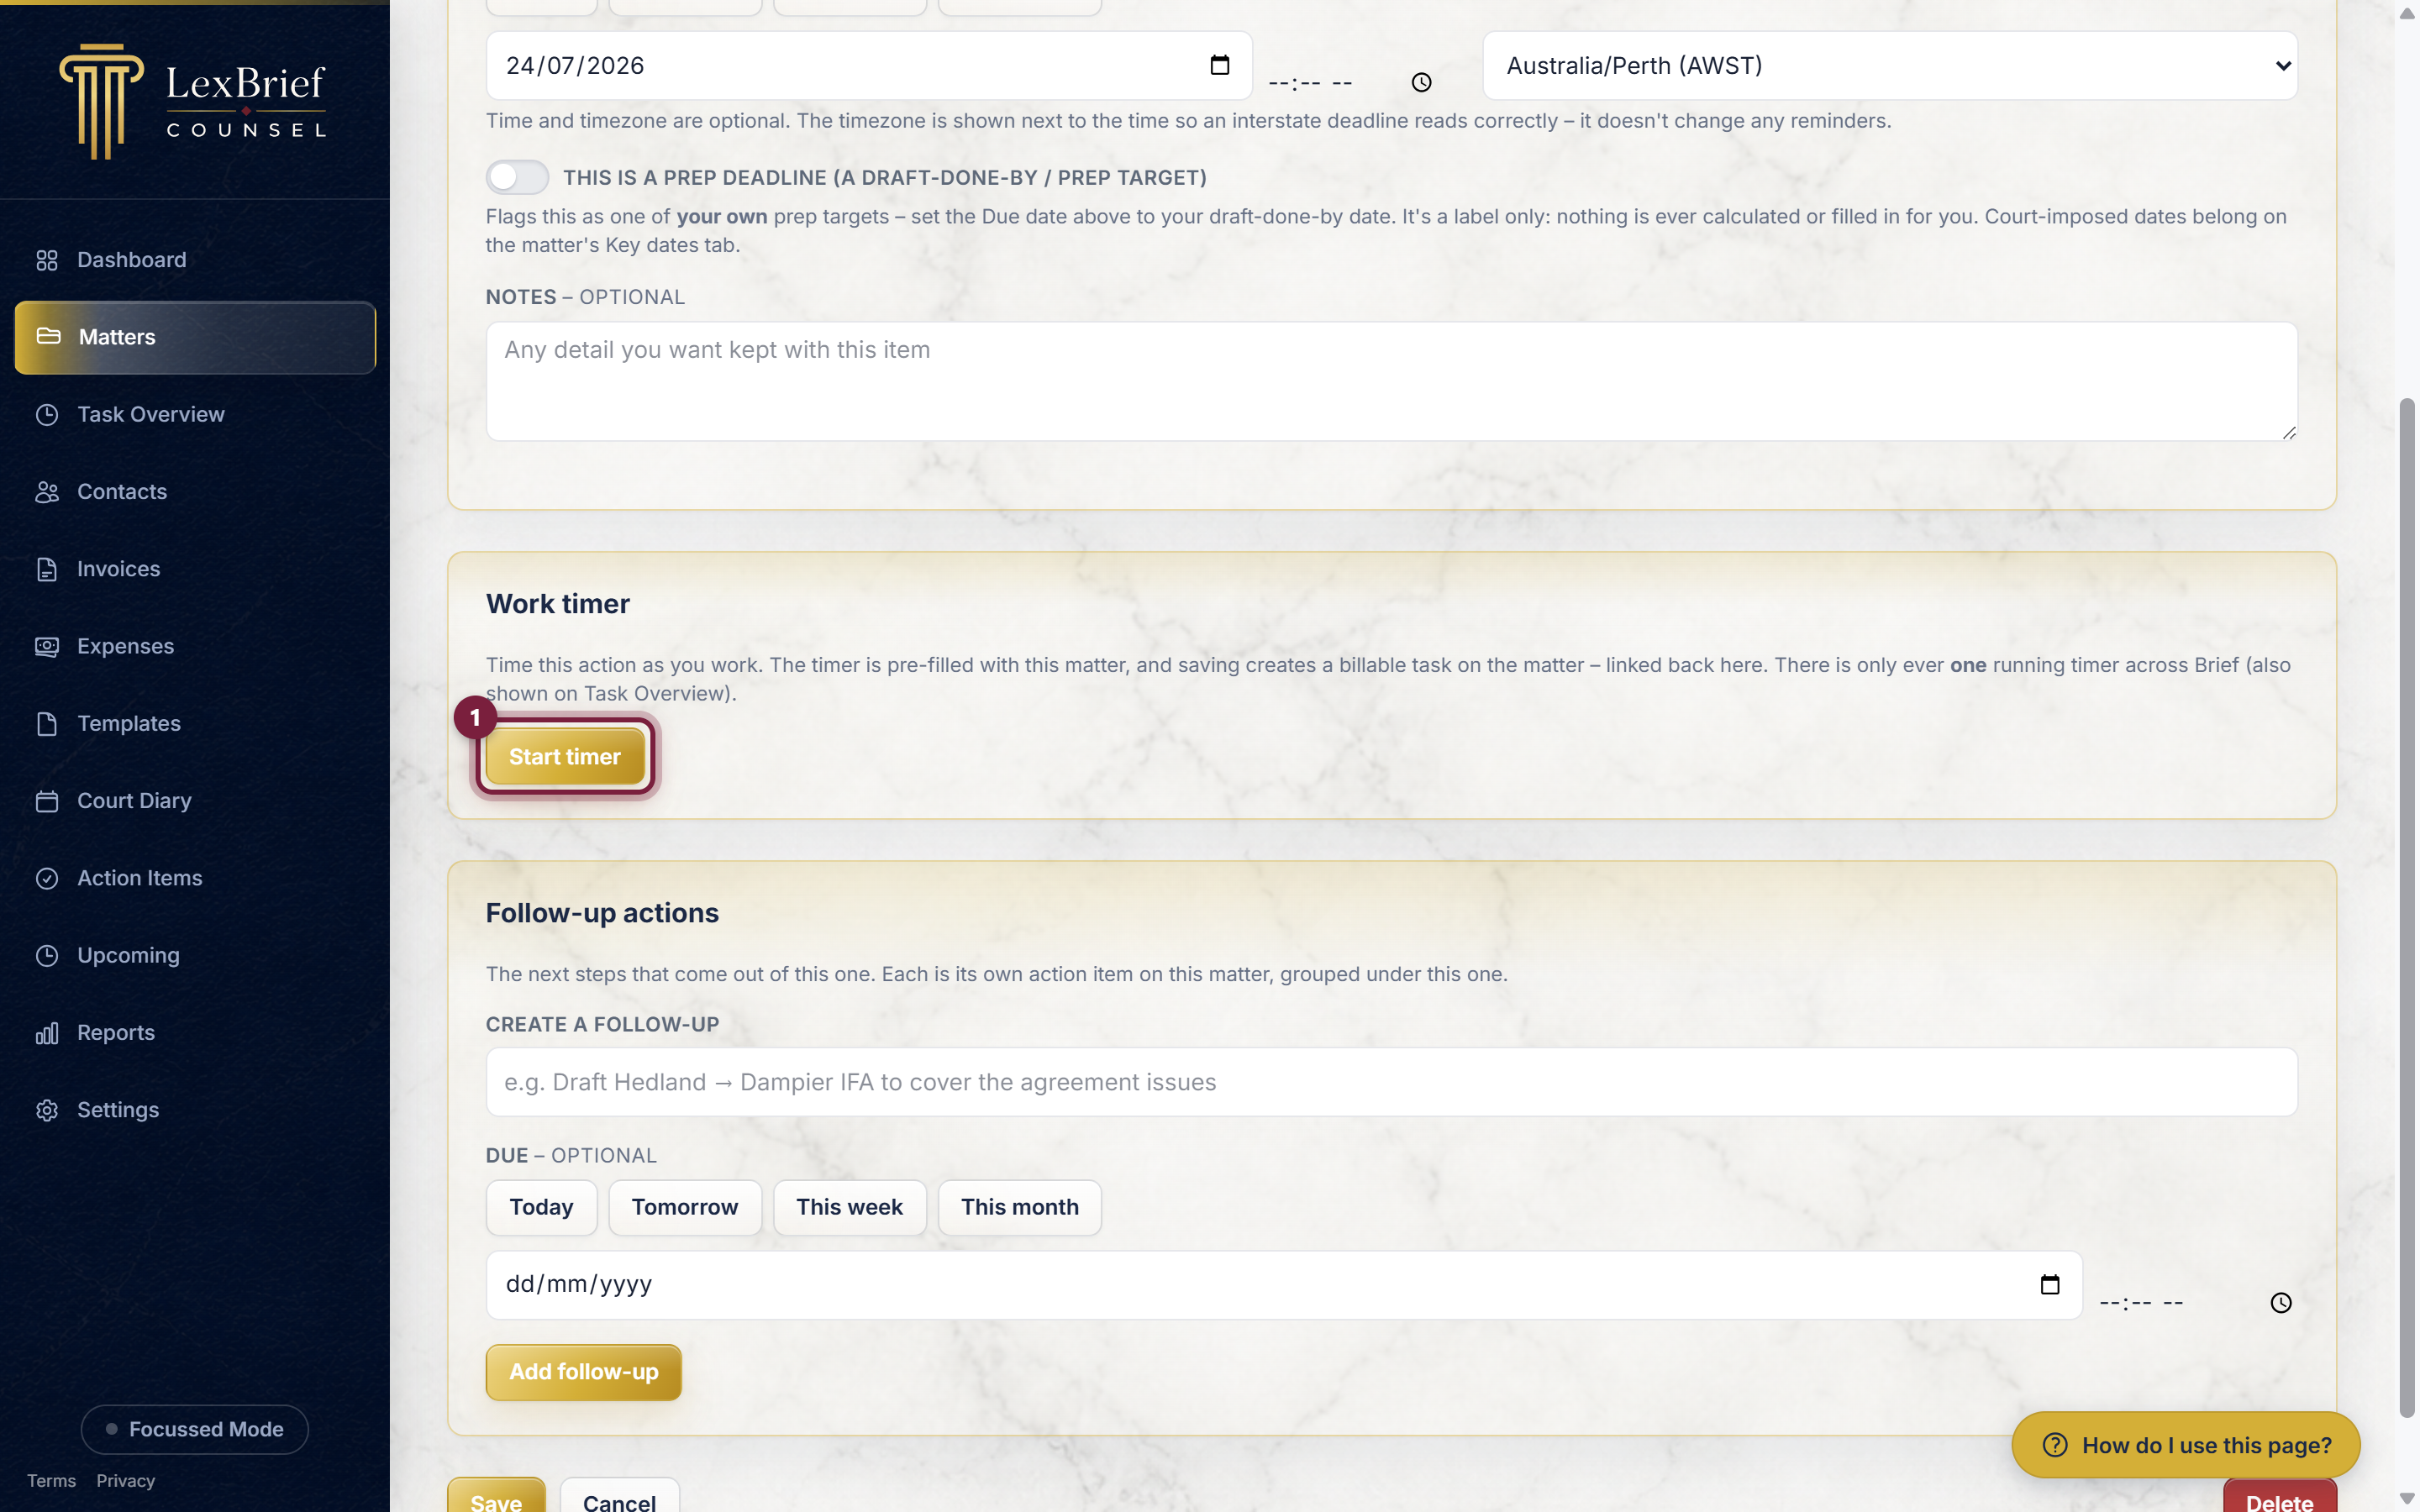
Click Start timer and it begins counting, already filled in with this matter and the job's name. You can Pause and Resume it, and when you are finished, Save as task records the time as a billable task on the matter, rounded up to the matter's usual billing block. There is a switch to mark the action item done at the same time.
What next
Now that you can keep a to-do list per matter, these guides cover the related day-to-day work:
- Recording time – timers and manual time entry, in full.
- Court Diary – recording court dates and deadlines.
- Browse all help guides
Stuck on anything at all? Email support@lexbrief.au – a real person reads it, usually the same working day.