

If at any point your screen does not look like the picture, stop and email support@lexbrief.au – we would rather help than have you guess.
Before you start
If this is your very first time in LexBrief, read Your first day in LexBrief Counsel first. This guide is about recording time on its own.
Time is always recorded against a matter, so you need a matter set up, with at least one rate on it, before you can save time. If you have not done that yet, see the Matters guide.
A note on wording: the dark strip of links down the left-hand side of the screen is the menu. When we say "click Task Overview in the left-hand menu", we mean click those words in that dark strip.
What the timer does
The timer is a live stopwatch. You start it, it counts up while you work, and you can pause and resume it as you get interrupted. When you are done you save it, and LexBrief creates a billable time entry (a "task") on the matter from the time that has passed.
- Only one timer runs at a time. If you start a new one while another is running, LexBrief pauses the old one for you (it asks first).
- Your time is rounded up to the matter's charging band. Most barristers charge in 6-minute units, so 6 minutes is 1 unit, and anything past that rounds up to the next unit – for example 6 minutes and 1 second becomes 2 units. LexBrief does this for you.
- Nothing is billed automatically. Saving a timer just records the time entry on the matter. You still choose when to put it on an invoice.
Open Task Overview
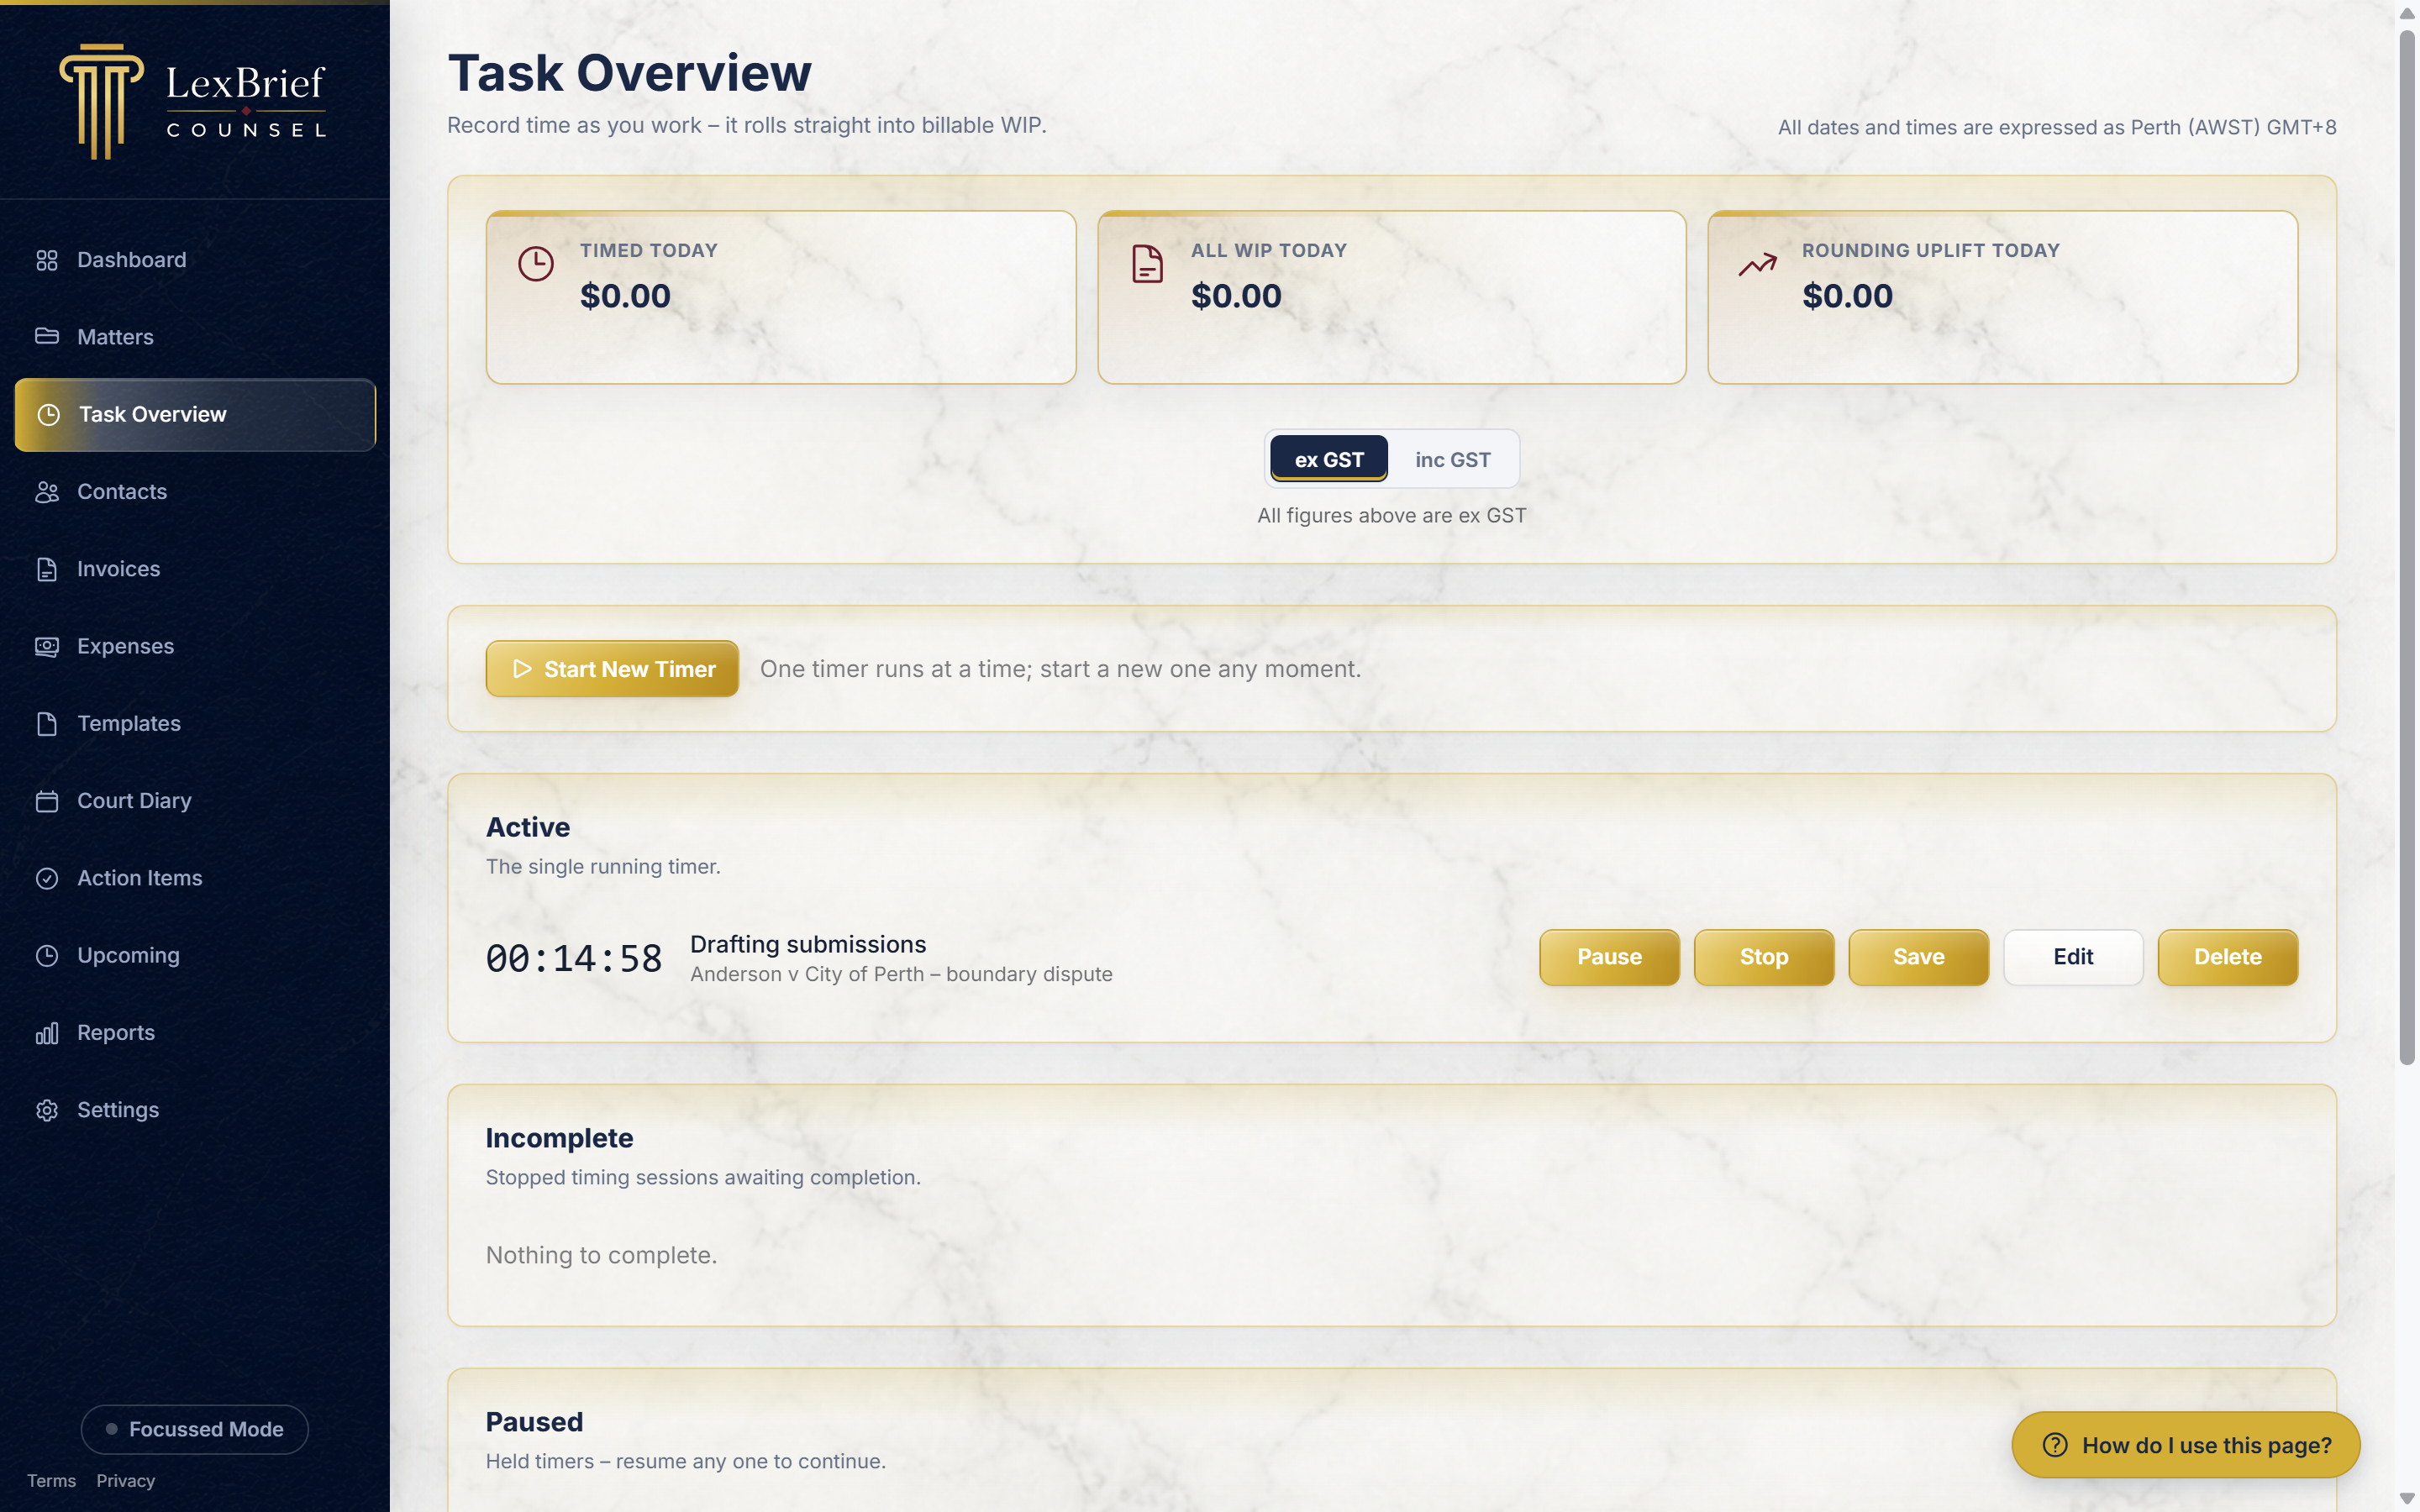
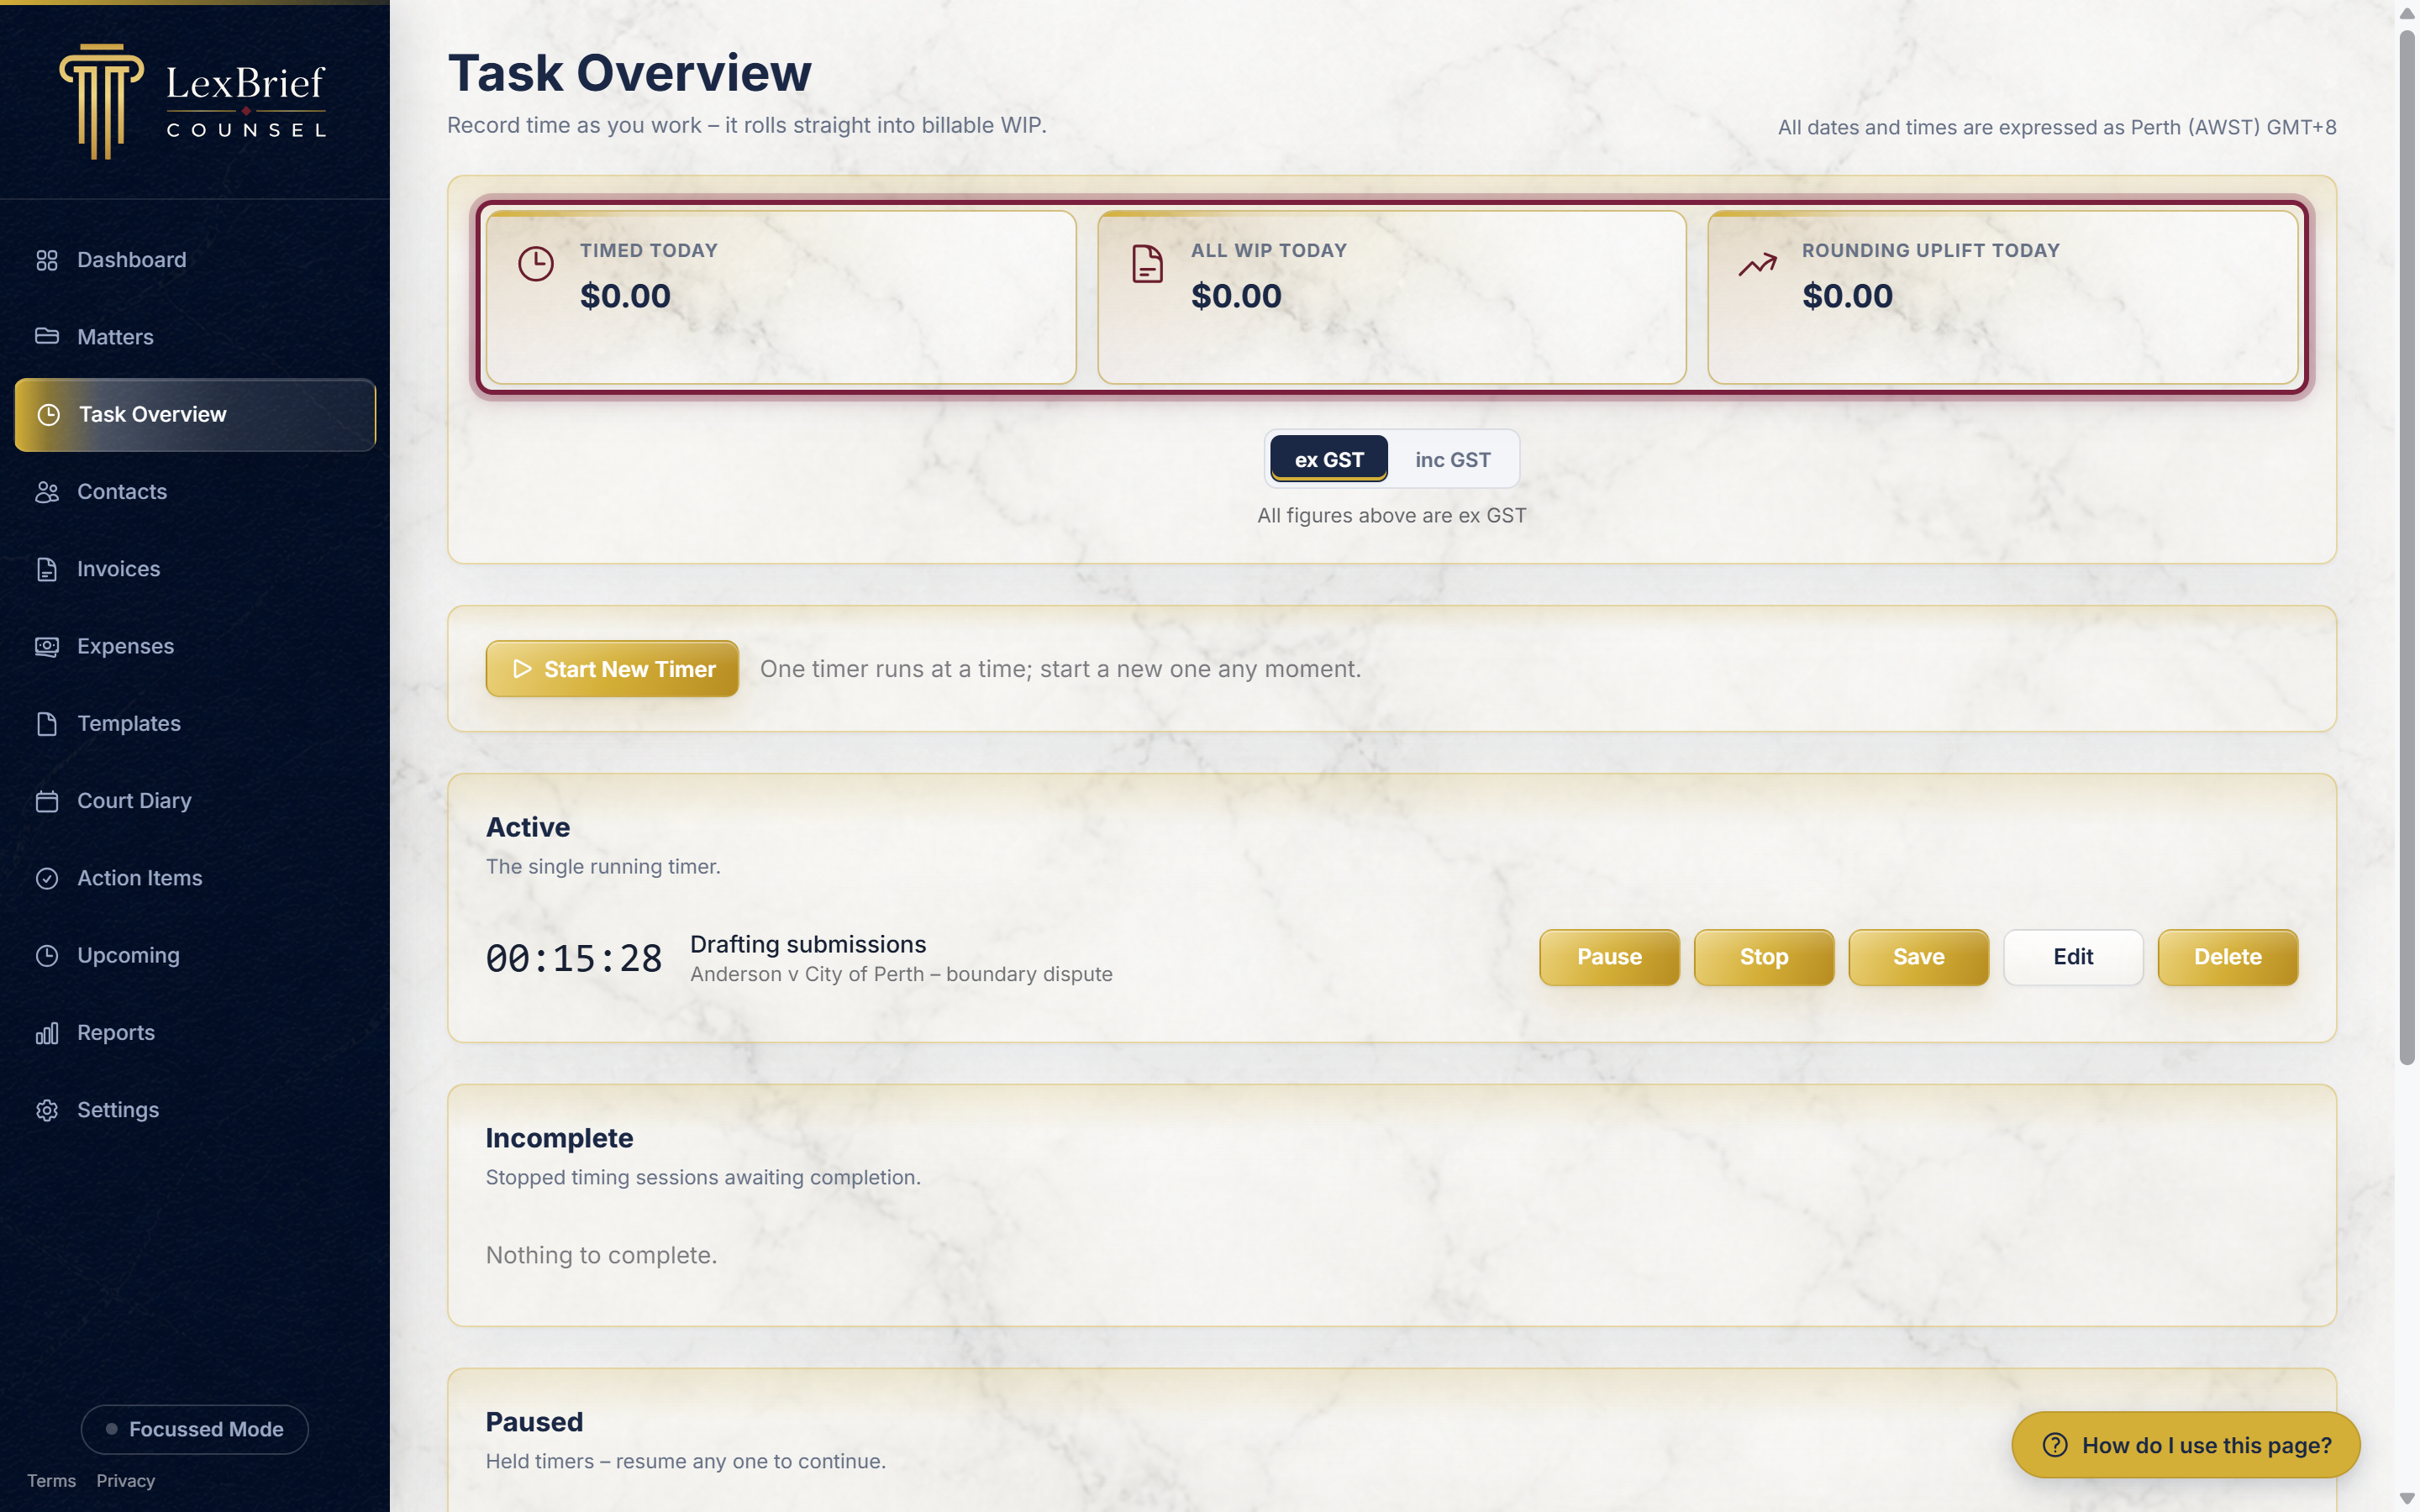
Click Task Overview in the left-hand menu. The page shows a few figures across the top, a Start New Timer button, and below it the sections for your timers: Active (the one running now), Incomplete, and Paused. At the bottom of the page is Task history, which lists the time you have already recorded.
Start a timer
1. Click "Start New Timer"
Click the gold Start New Timer button. A timer starts straight away and appears in the Active section, counting up.
2. Say what you are working on
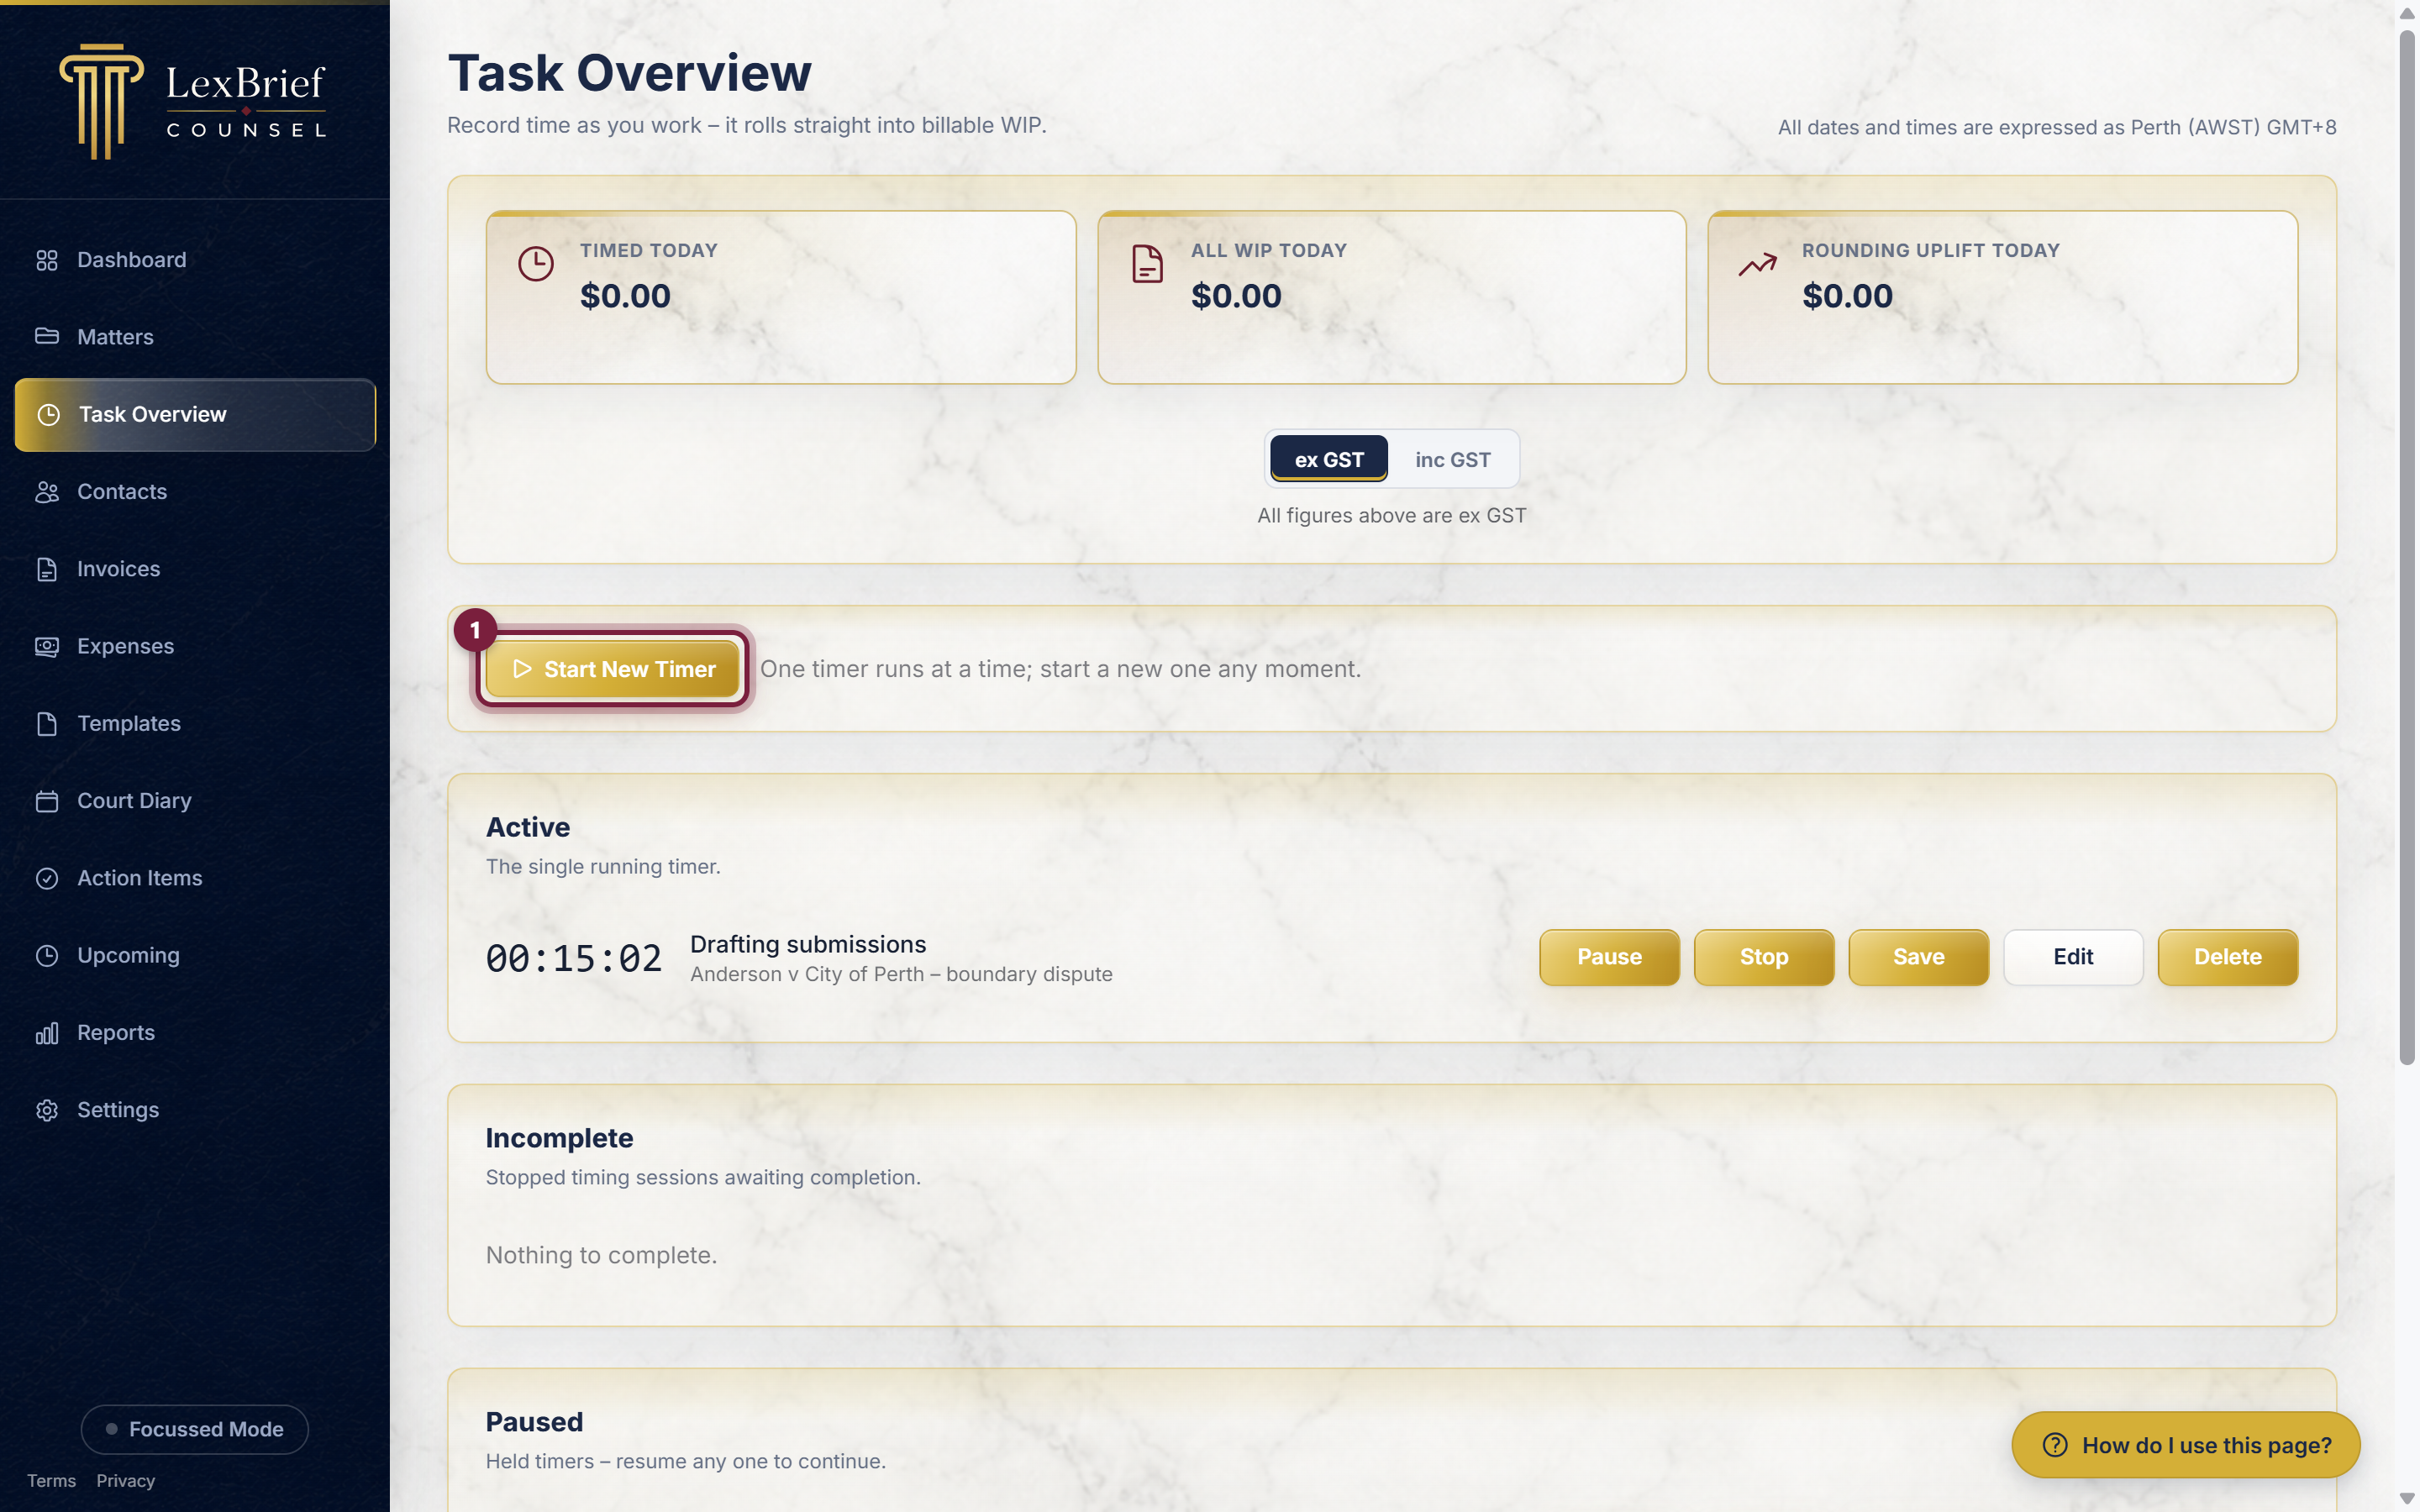
Your new timer starts blank, so tell LexBrief which matter it is for. On the running timer, click Edit to open a small pop-up box.
In that box, pick the Matter from the list, choose the Rate to charge at, and type a short Description of the work (for example Drafting submissions). As you fill it in, LexBrief shows the units and dollar value it will record.
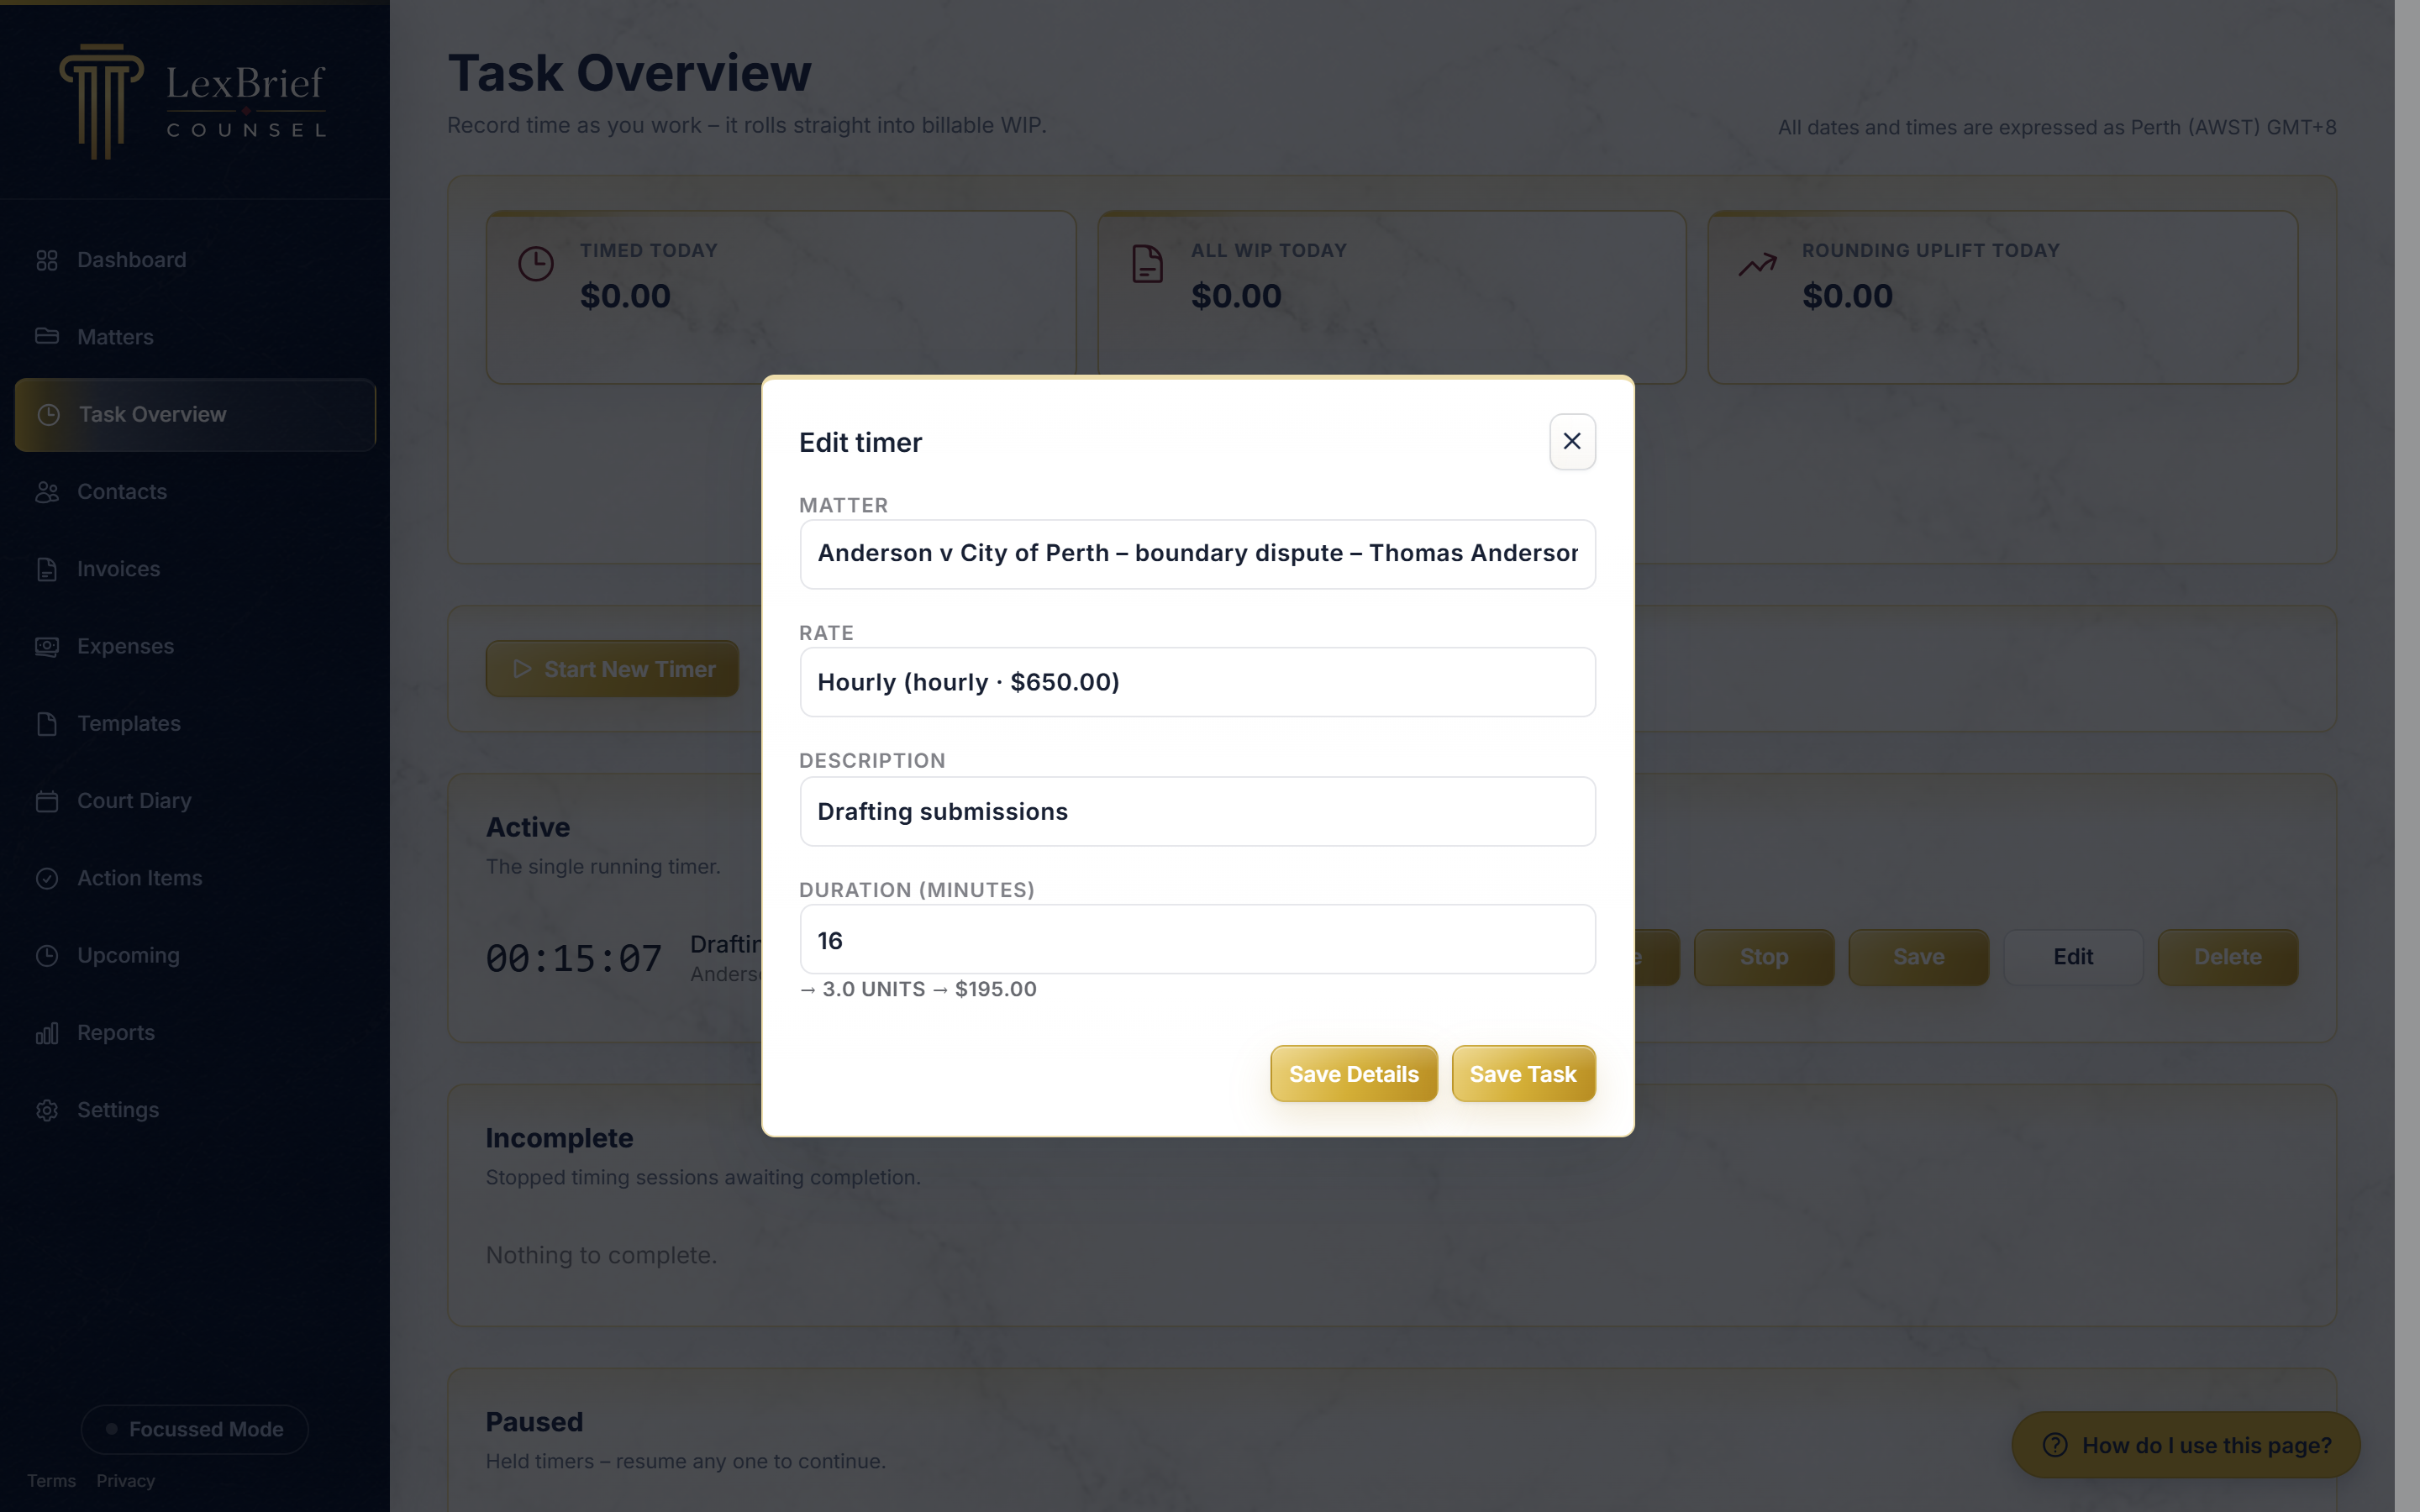
Click Save Details to keep these settings without stopping the clock – the timer keeps running. (You can also come back and change them any time before you save the task.)
While it runs
A running timer sits in the Active section with its clock ticking up and a row of buttons beside it.
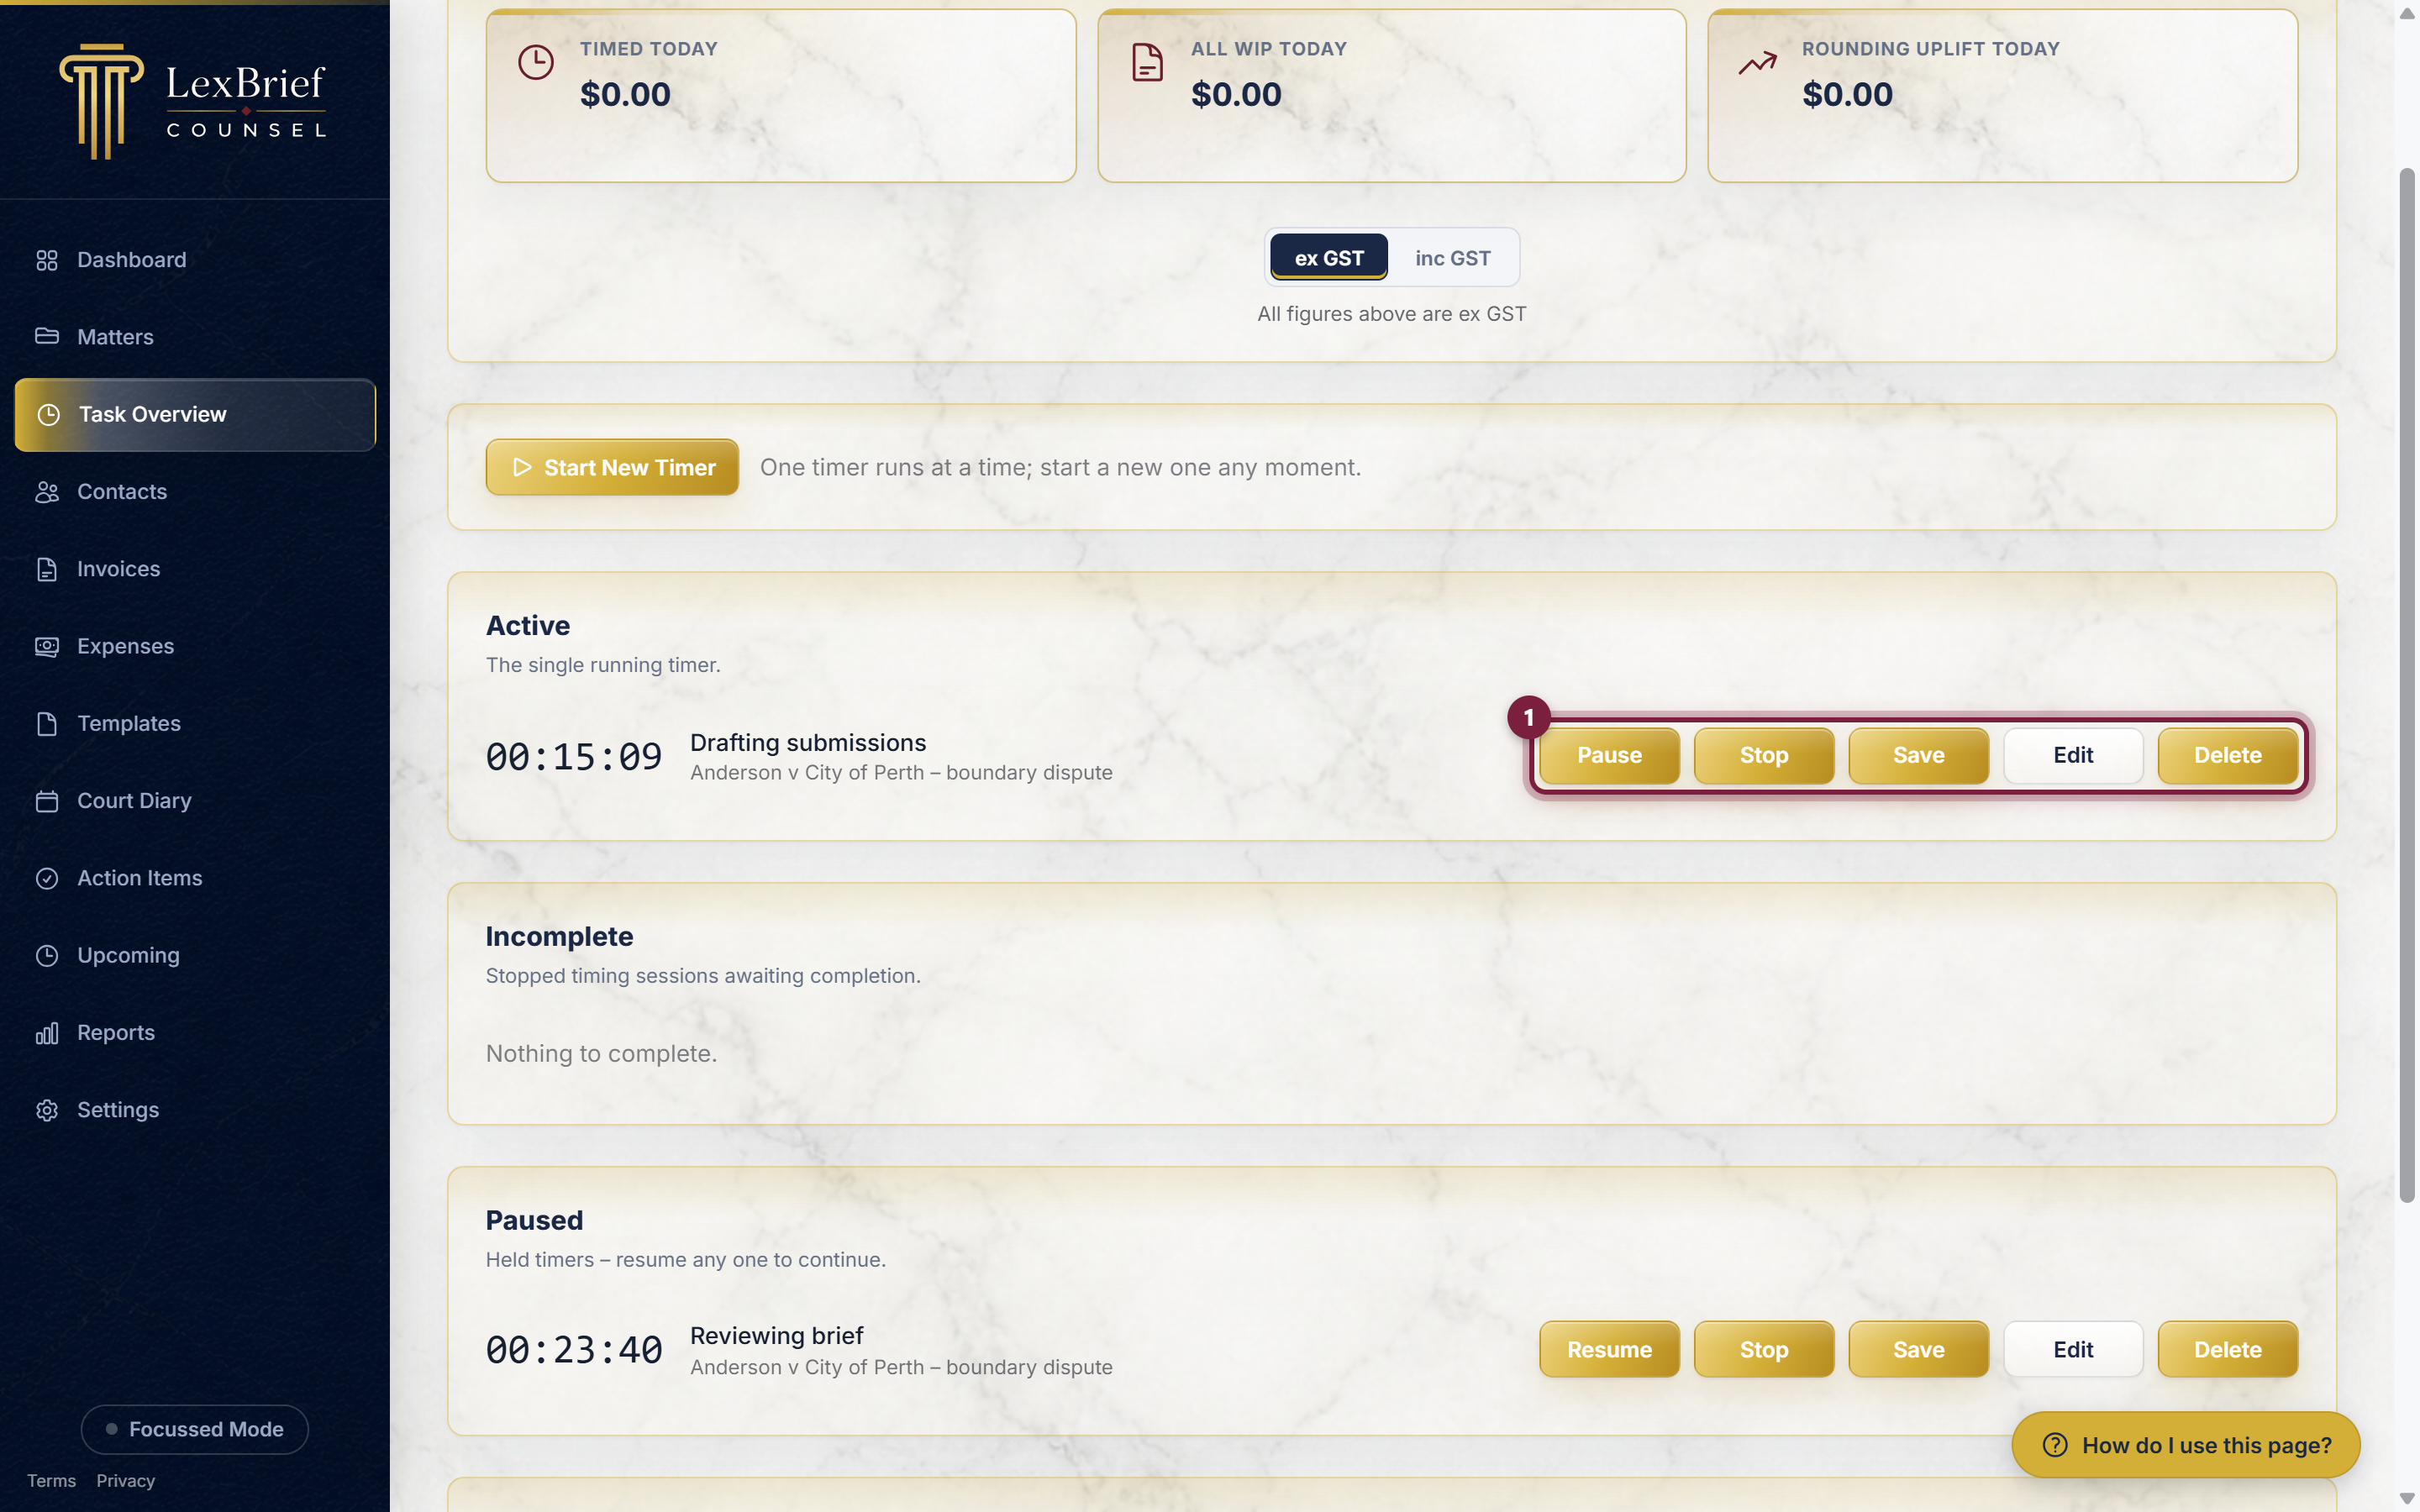
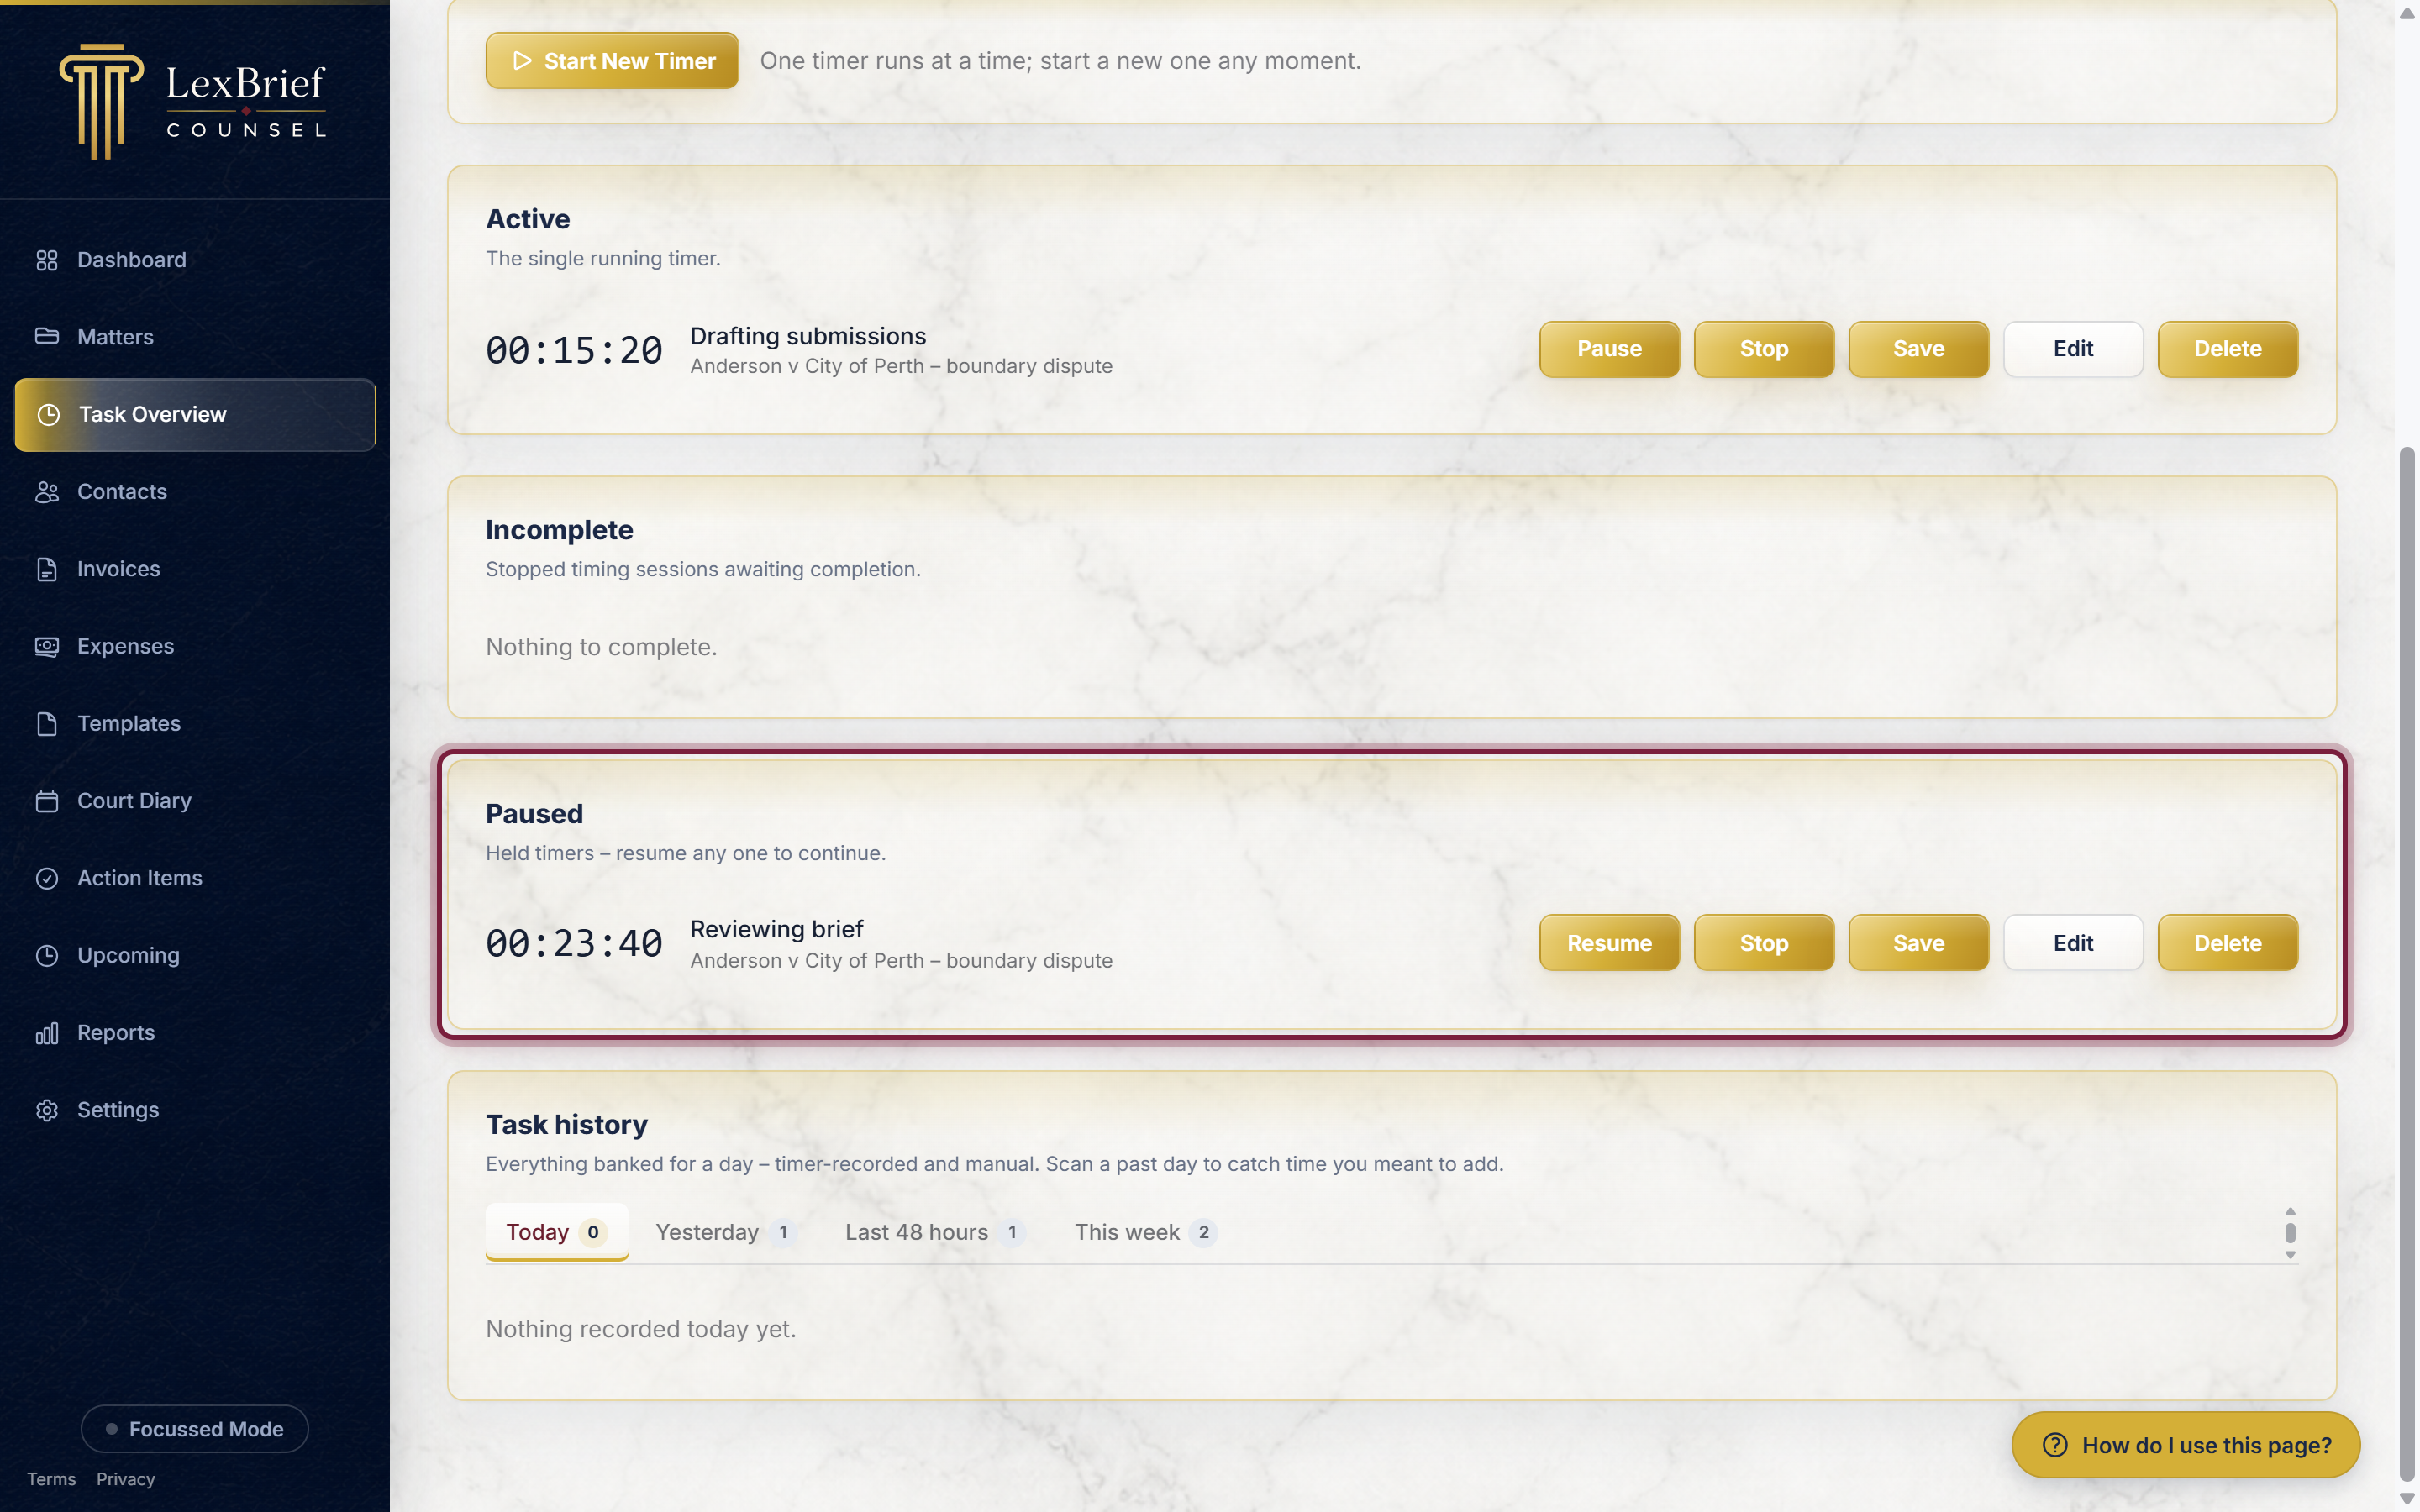
- Pause – hold the timer without ending it. It moves to the Paused section and the clock stops. Use this when you are interrupted.
- Edit – open the pop-up box again to change the matter, rate or description.
- Delete – throw the timer away if you started it by mistake. Nothing is recorded.
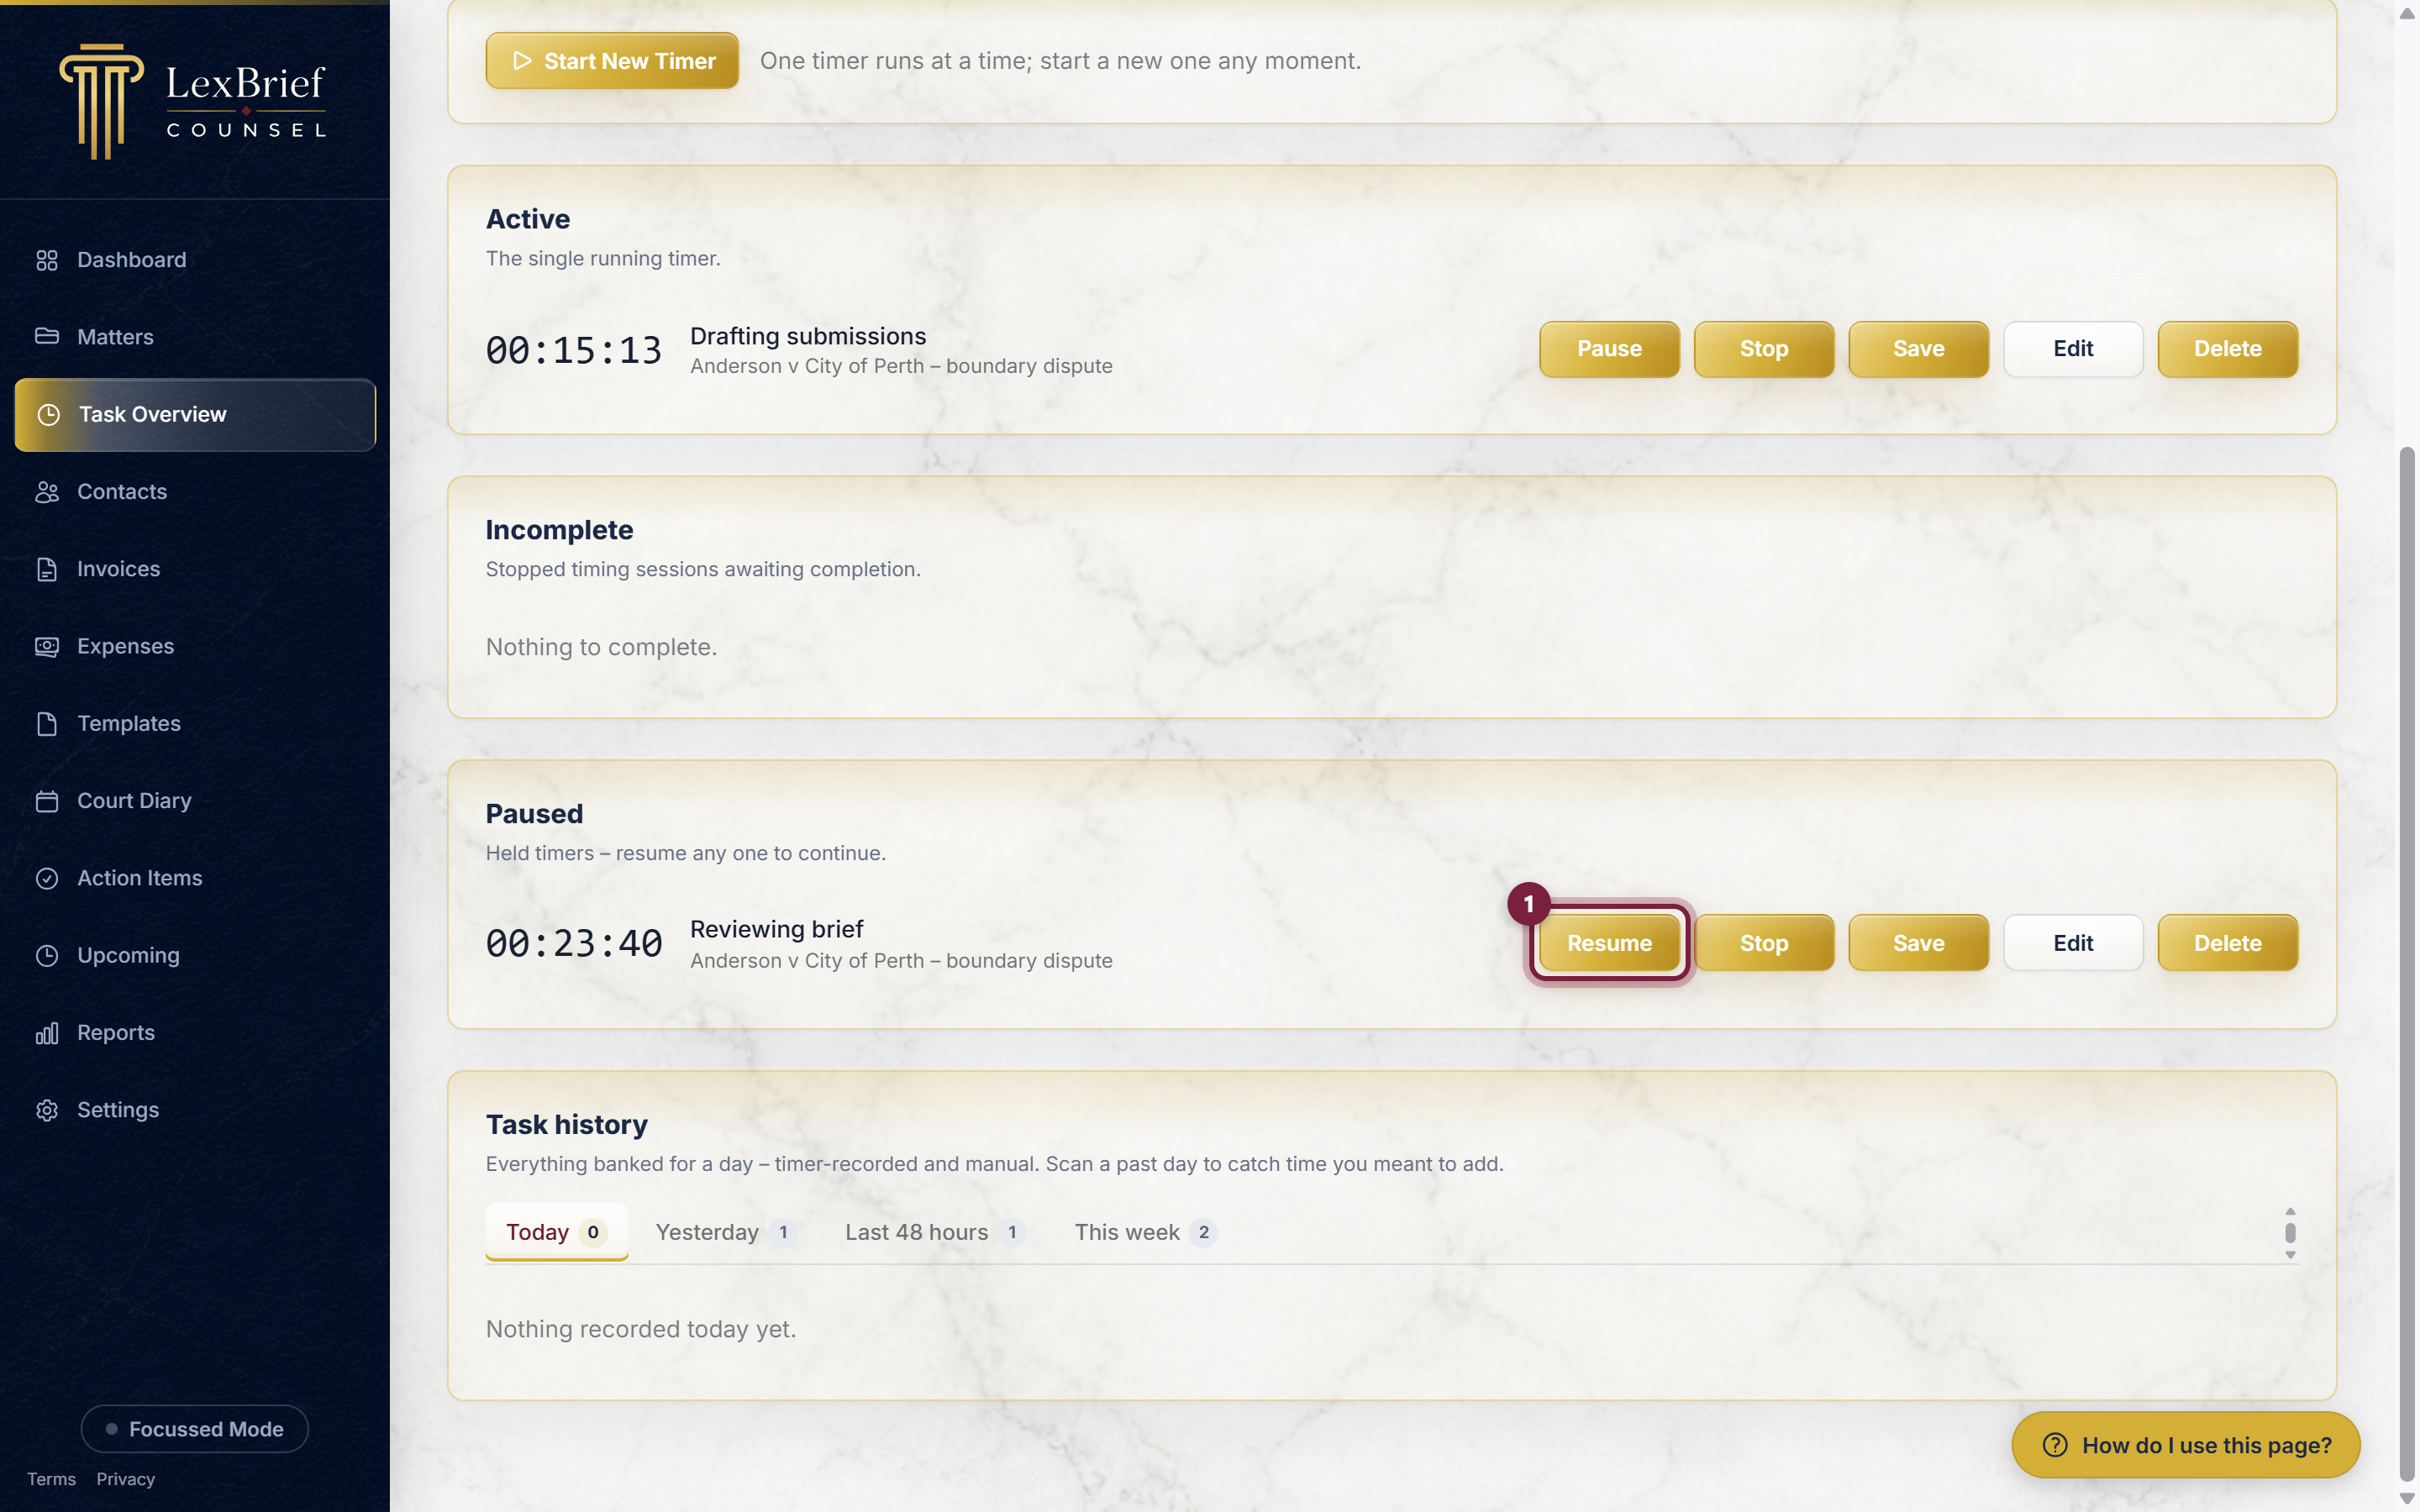
To pick a paused timer back up, find it in the Paused section and click Resume. It starts counting again from where it left off.
Stop and save as a task
When the work is finished, save the timer. This is the step that records your time as a billable entry on the matter.
On the timer (whether it is running or paused), click Save. LexBrief takes the time that has passed, rounds it up to the matter's band, and creates the time entry using the matter, rate and description you set.
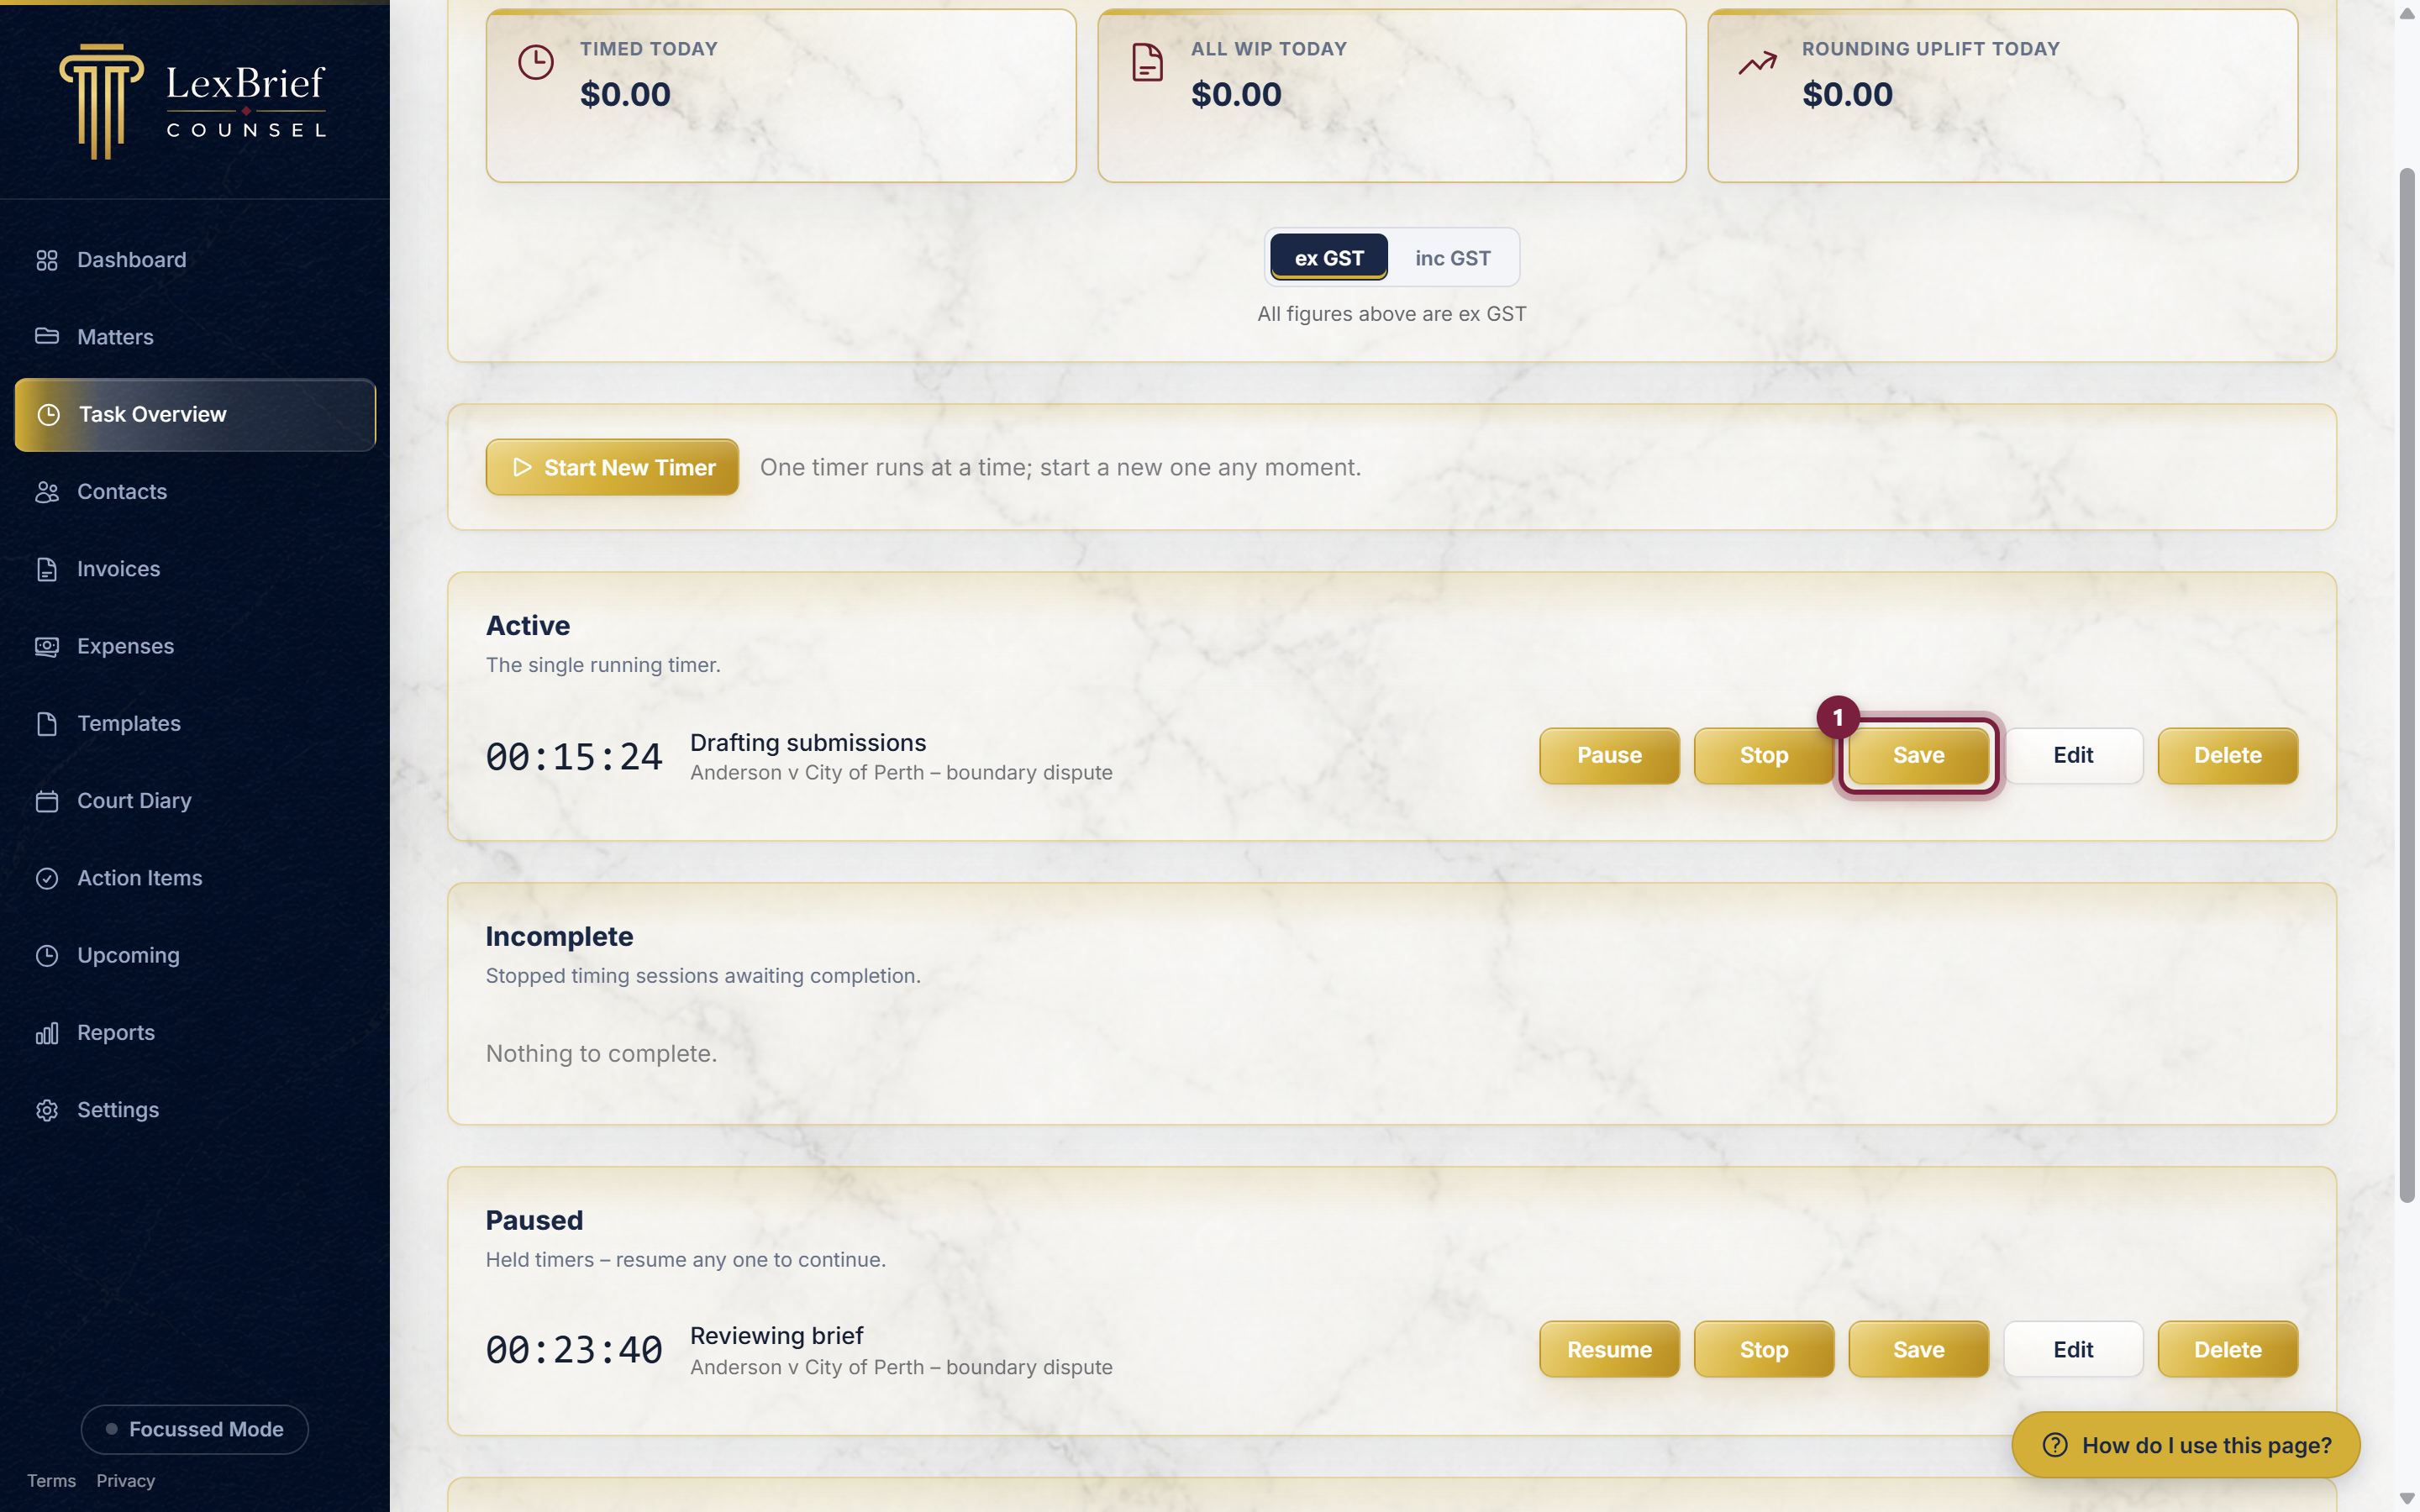
Once saved, the entry appears in Task history at the bottom of the page, and it also shows on the matter's Tasks tab, ready to be invoiced.
Check back over a past day
Most time that never gets billed is time that was never entered. You finish a phone call, think "I will put that in when I am done", and the day carries you off. The Task history card at the bottom of the Task Overview page exists so you can look back over a past day, see what you recorded, and spot what is missing while you can still remember it.
It lists everything you have recorded for a day – both time recorded by a timer and time you typed in by hand on a matter. Time typed in by hand is marked manual so you can tell the two apart.
Pick the days you want to see
Across the top of the card is a row of tabs. Click one to choose how far back to look. Each tab shows a number beside it, which is how many time entries fall in that period.
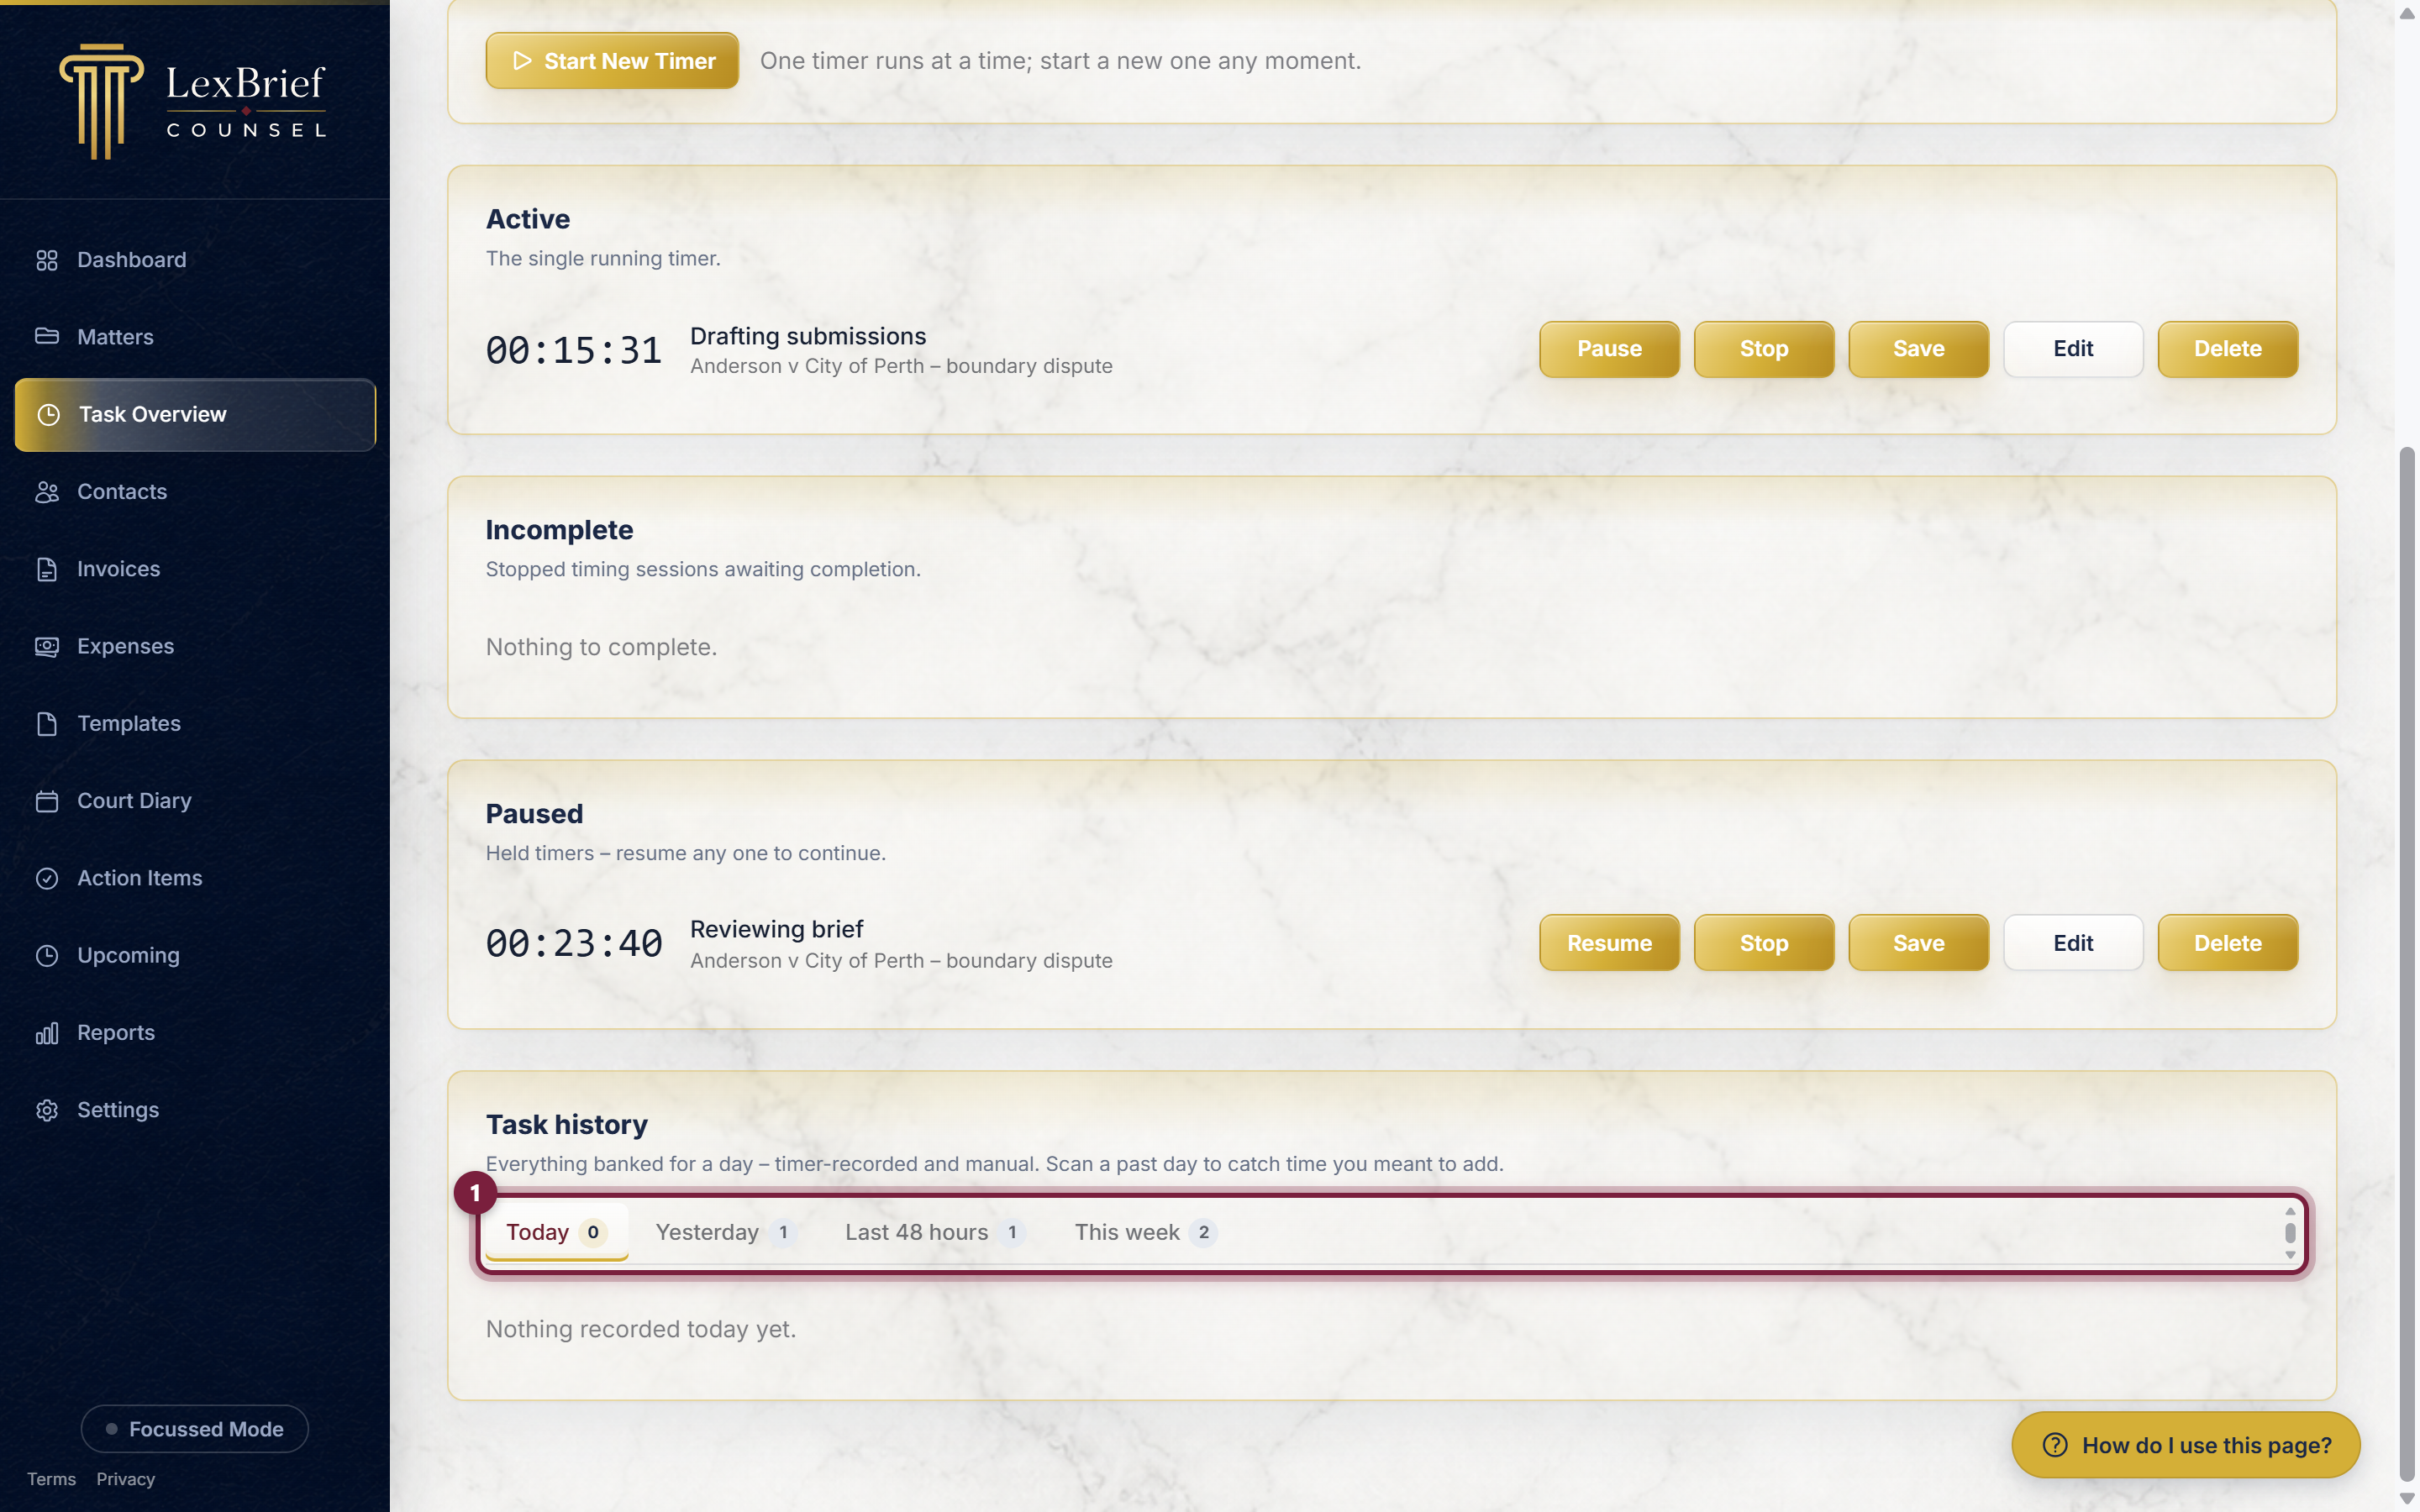
- Today – work dated today.
- Yesterday – work dated yesterday only.
- Last 48 hours – today and yesterday together. This means the two whole days, midnight to midnight. It is not the last 48 hours counted back from this moment, so at 9am it still shows all of yesterday, not just yesterday from 9am.
- This week – the current calendar week, Monday through to Sunday. On a Monday morning it shows only that Monday.
What you should see: the tab you clicked turns darker, and the list below changes to show only the days that fall in that period.
Read a day
Entries are grouped by the day the work was done, with the most recent day at the top. Each day has a heading showing the weekday, the date, how many time entries there are, and the day's total value.
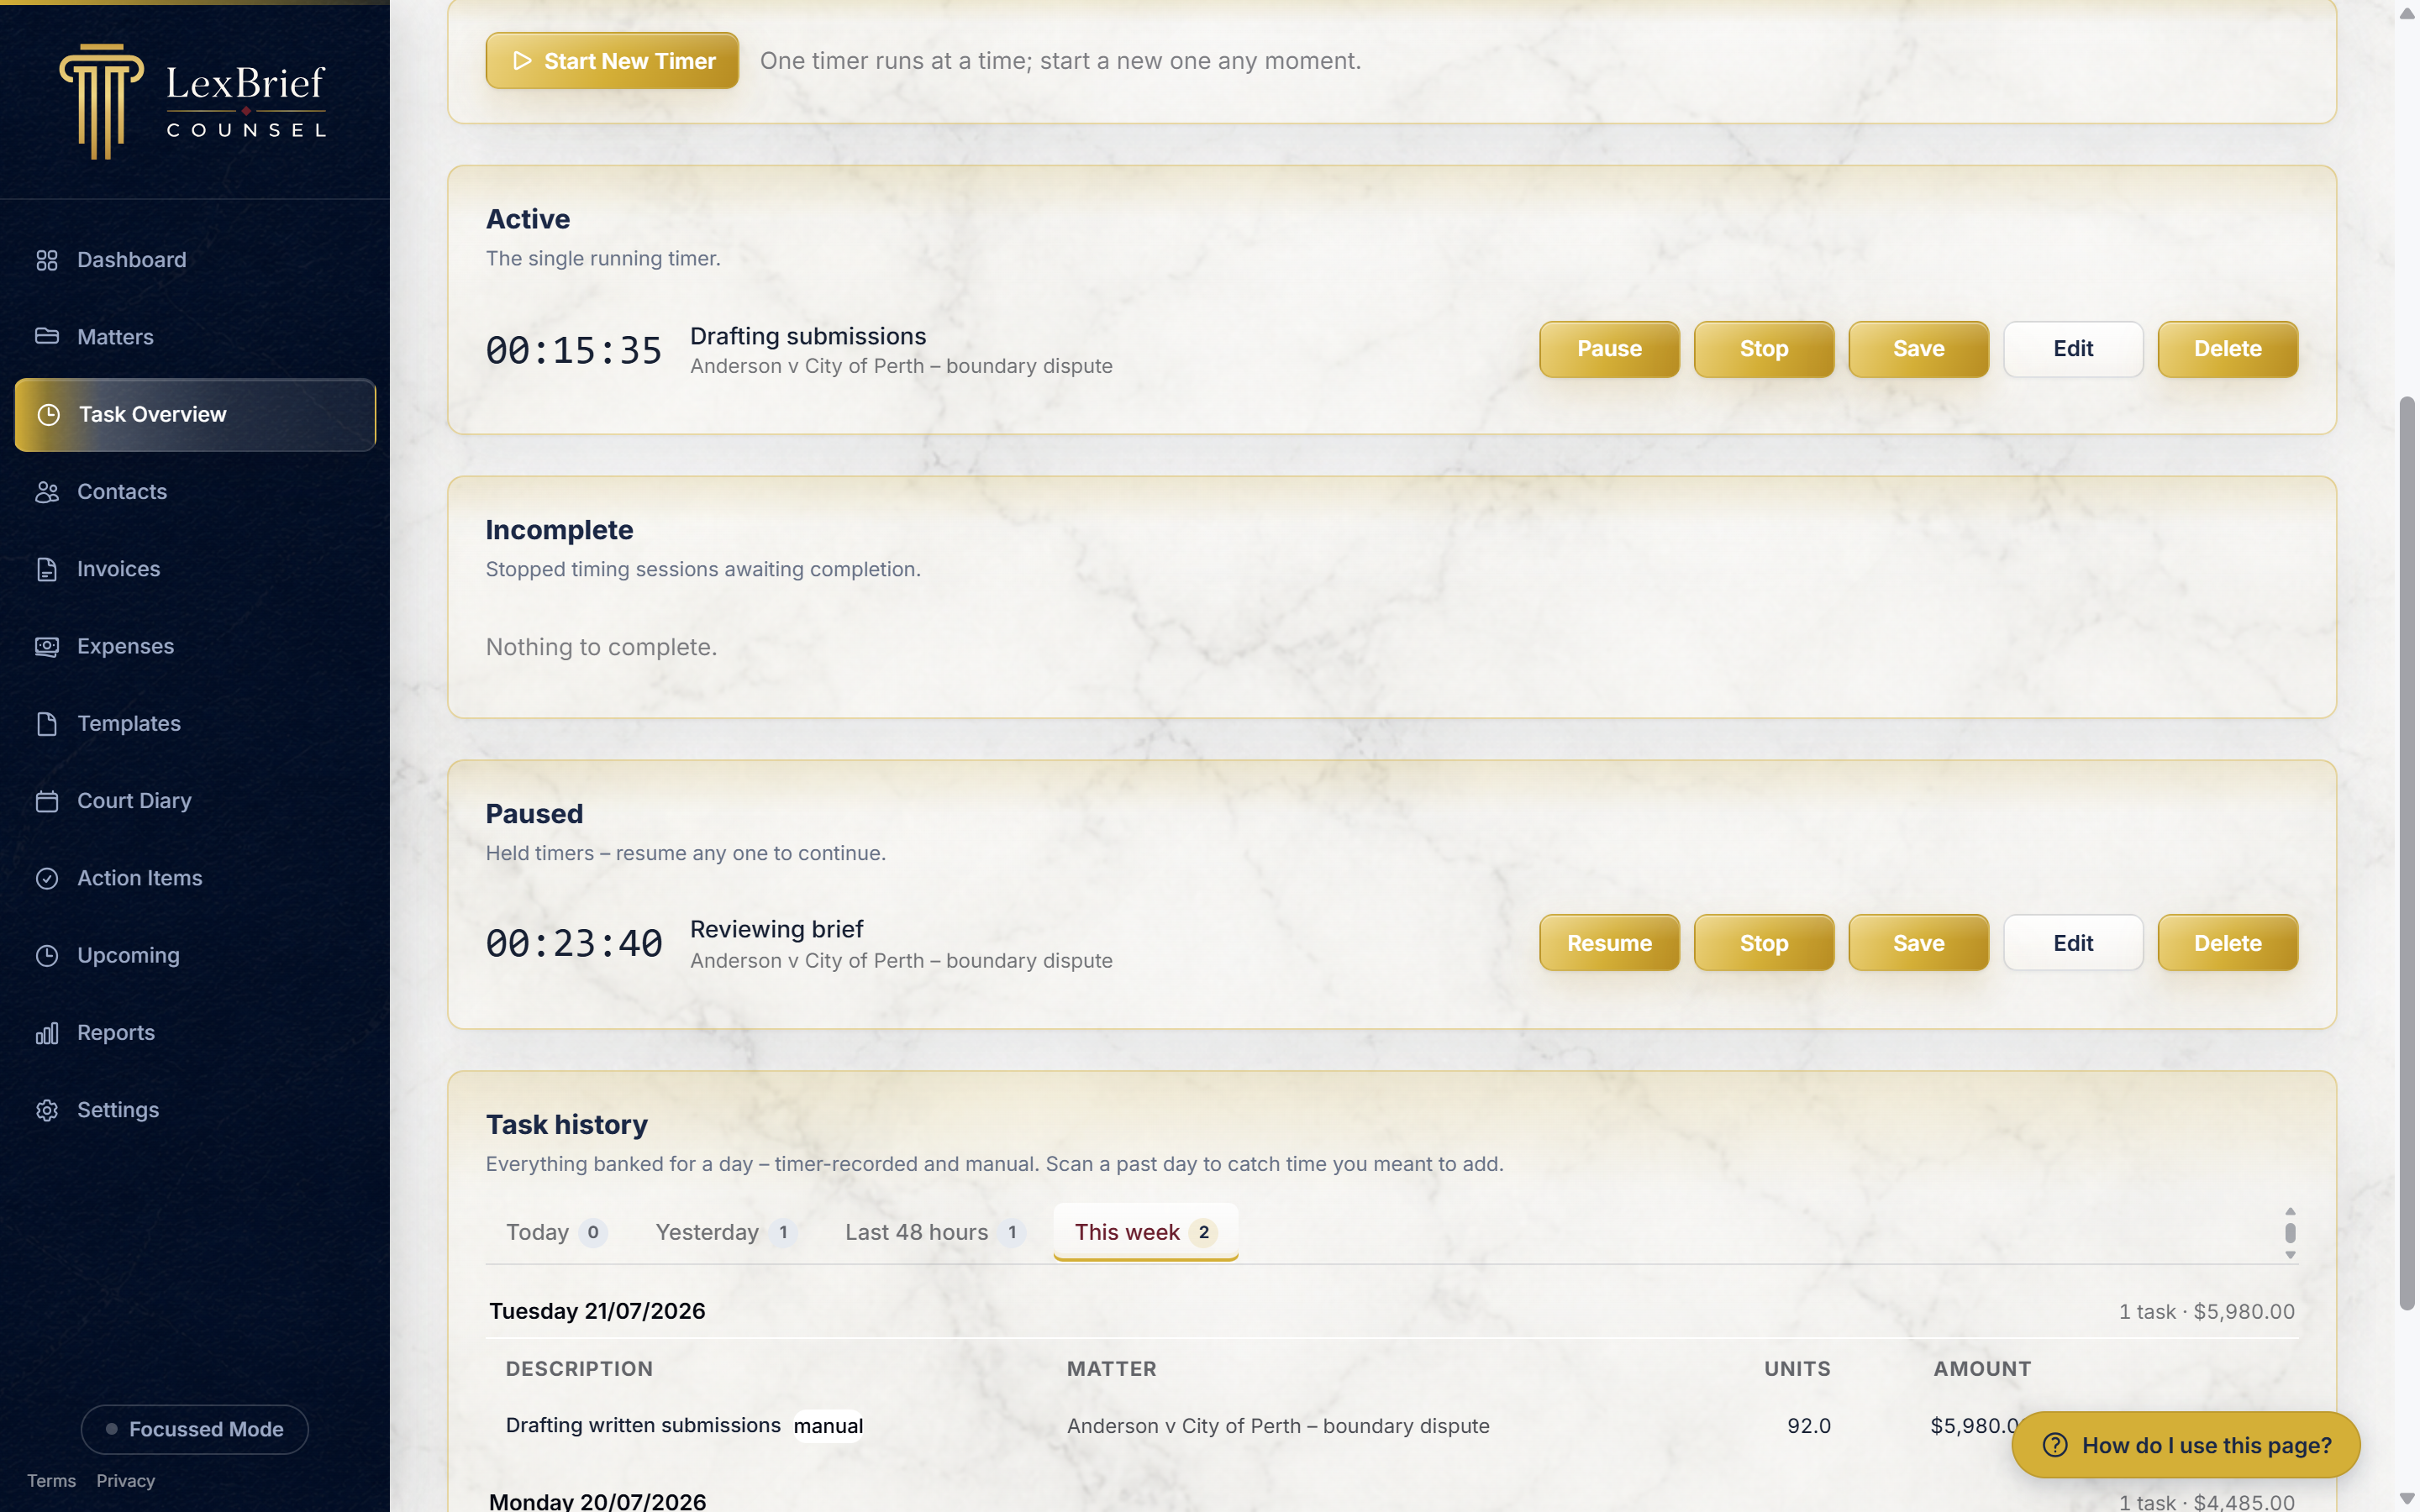
Under the heading is a small table: the description of the work, the matter it belongs to, the units, and the amount. At the end of each line is View task →, which takes you to that entry on the matter if you want to check or change it.
Whether the amounts are shown with or without GST follows the ex GST / inc GST switch near the top of the page.
Task history works the same way on your phone as it does on the computer, so you can check a day over on the way home.
The figures at the top
The three figures across the top of the page keep a running tally for the day:
- Timed today – the value of the work you have recorded using timers today.
- All WIP today – the value of all time recorded today, whether by timer or typed in by hand. ("WIP" means work in progress – unbilled work.)
- Rounding uplift today – the extra value gained today from rounding up to your charging band.
The small ex GST / inc GST switch below the figures changes whether they include GST.
Recording time without a timer
You do not have to use a timer. If you already know how long something took, you can type the time straight in as a task on the matter instead – open the matter, go to its Tasks tab, and add a new task with the units or minutes you spent. This is handy for work you did away from the computer.
The task form is also where you can discount a single task – click + Add discount to take an amount off it (by units or minutes, by percentage, or by a flat dollar figure). It is off by default, so a task carries no discount unless you add one. See Discount a task in the Matters guide for how each option works.
For the detail on adding and editing tasks on a matter, see the Matters guide.
What next
Recorded time flows into the rest of your practice:
- Matters – where your time entries live, and where you set the rates a timer charges at.
- Invoices – turn the recorded time into a bill for the client.
- Browse all help guides
Stuck on anything at all? Email support@lexbrief.au – a real person reads it, usually the same working day.